Introduction
Thank you for purchasing code. It really means a lot and It's our pleasure to serve top-notch service to you. Thank you so much for choosing WRTeam . If you have trouble with the code and documentation please contact to our Support Team Here
Elite Quiz Admin Panel
How to Install Elite Online on Your shared hosting?
- Create your domain or subdomain in your shared hosting
- Create an empty database in your shared hosting and remember this credentials:
i. database name
ii. database username
iii. database password - Upload the source code you have downloaded from CodeCanyon and unzip it.
Note :- .htaccess file is necessary , check that it exists , if not on the hidden file option - Now navigate to the url where your project is located.
ex. mydomain.com or subdomain.mydomain.com - The installation screen should appear and guide you in the process.
Thats it! Now you are ready to run your first Elite Online : https://elitequiz.wrteam.in
Default Login DetailsUser: admin
Pass: admin123
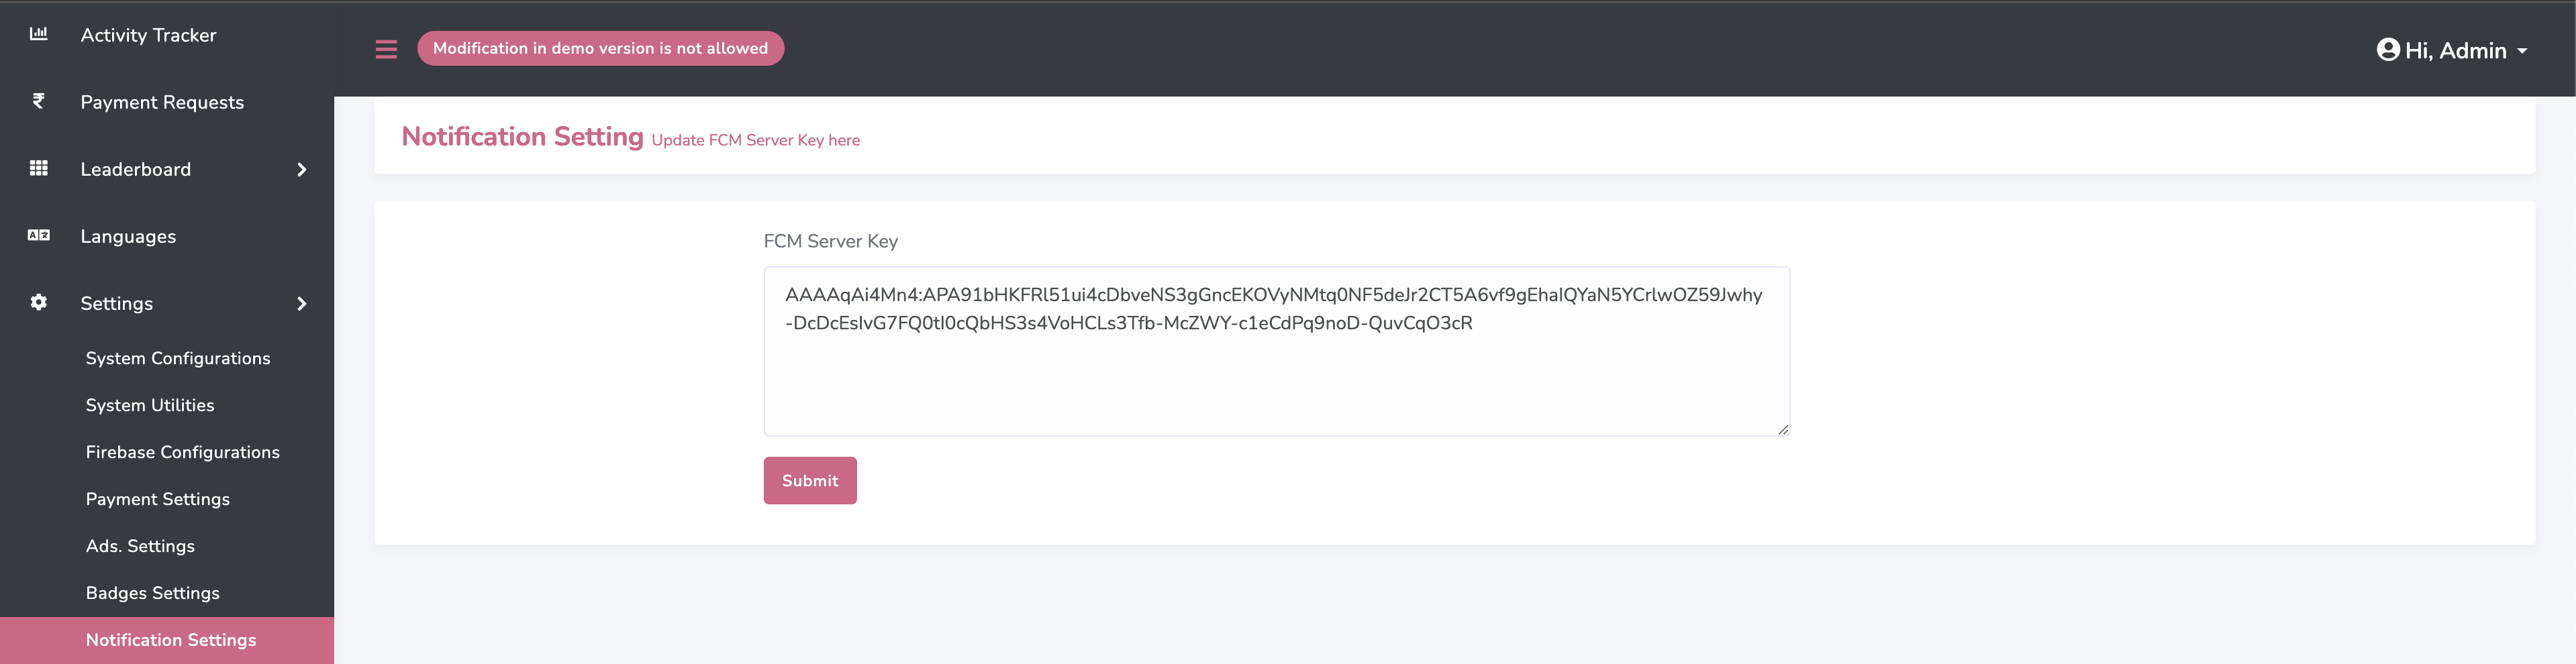
Notification Management
First Of all,we need to set the FCM server key from Firebase console
Set System Configurations
Set Configurations for you app. All the changes are maded here will directly reflect in the App
Change Quiz name , JWT KET and logo form Profie menu

From here you can set System & App Timezone, App Play store or market place Link, Enable / Disable Answer Display, Language Mode, Option E Mode, Force Update App, Daily Quiz Mode, Contest Mode, Battle Random Category Mode, Battle Group Category Mode & In App Purchase. Manage App Version and Update Shareapp Text. Set fix Question in level

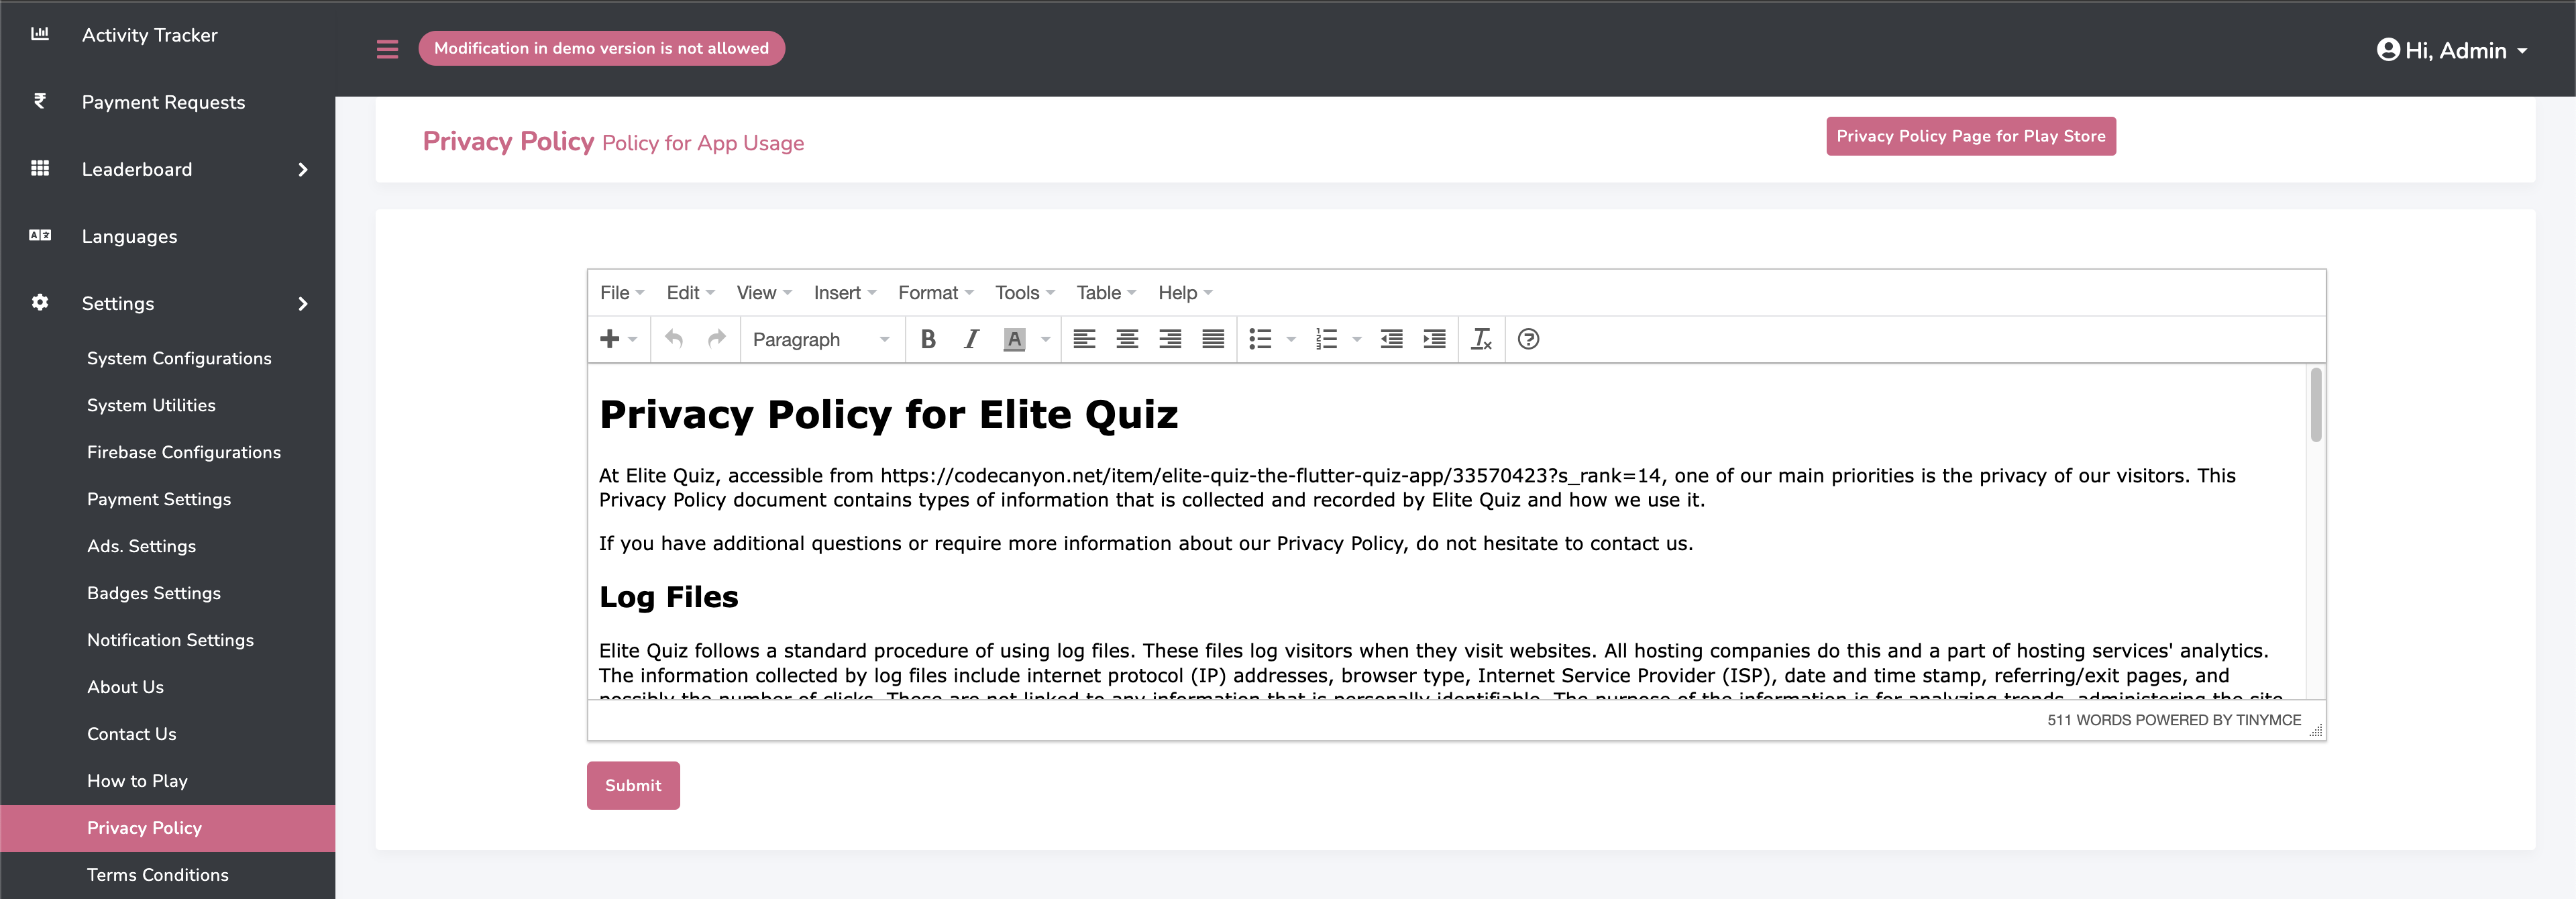
Set Privacy Policy
Set Privacy Policy for your website and app.
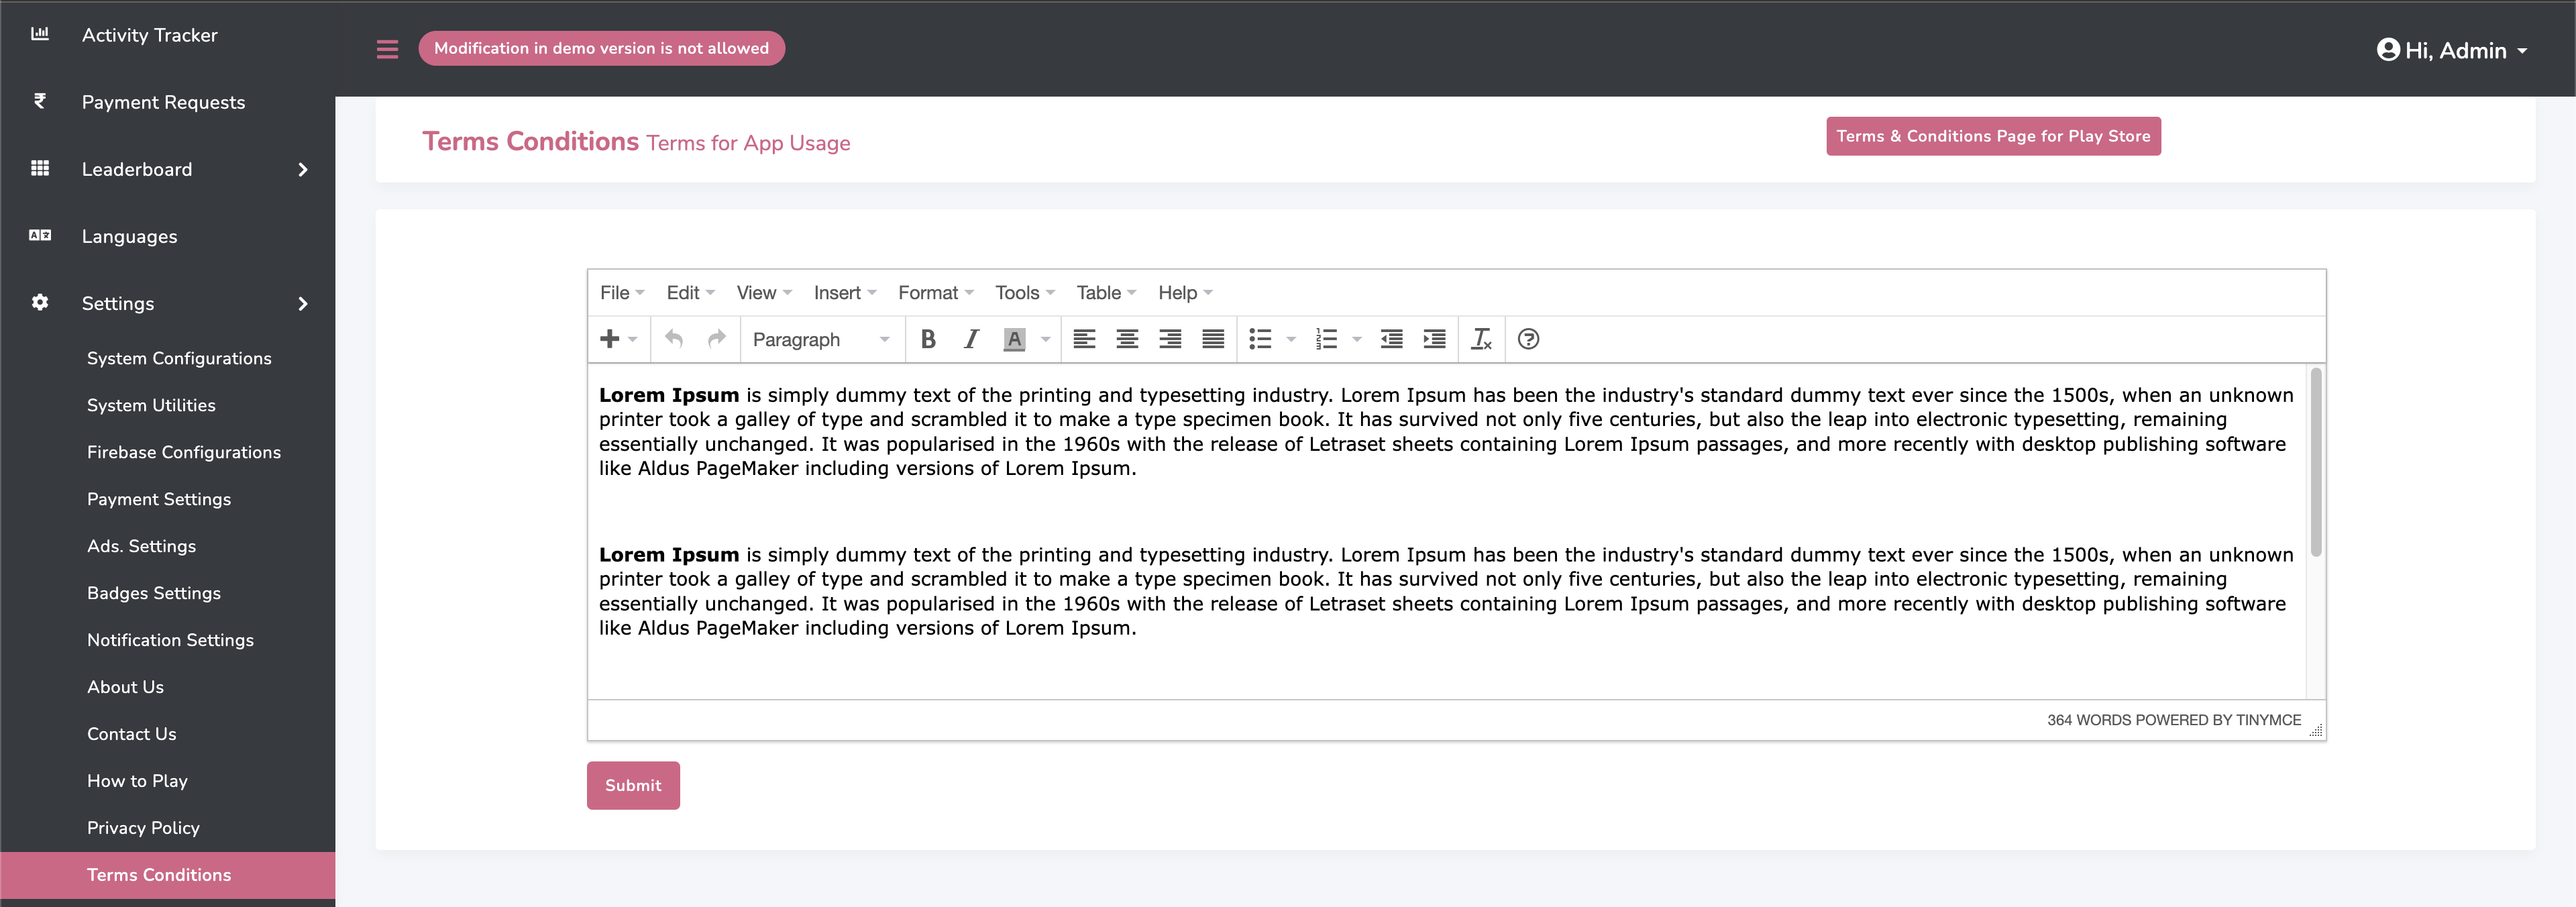
Set Terms Conditions
Set Terms Conditions for your website and app.
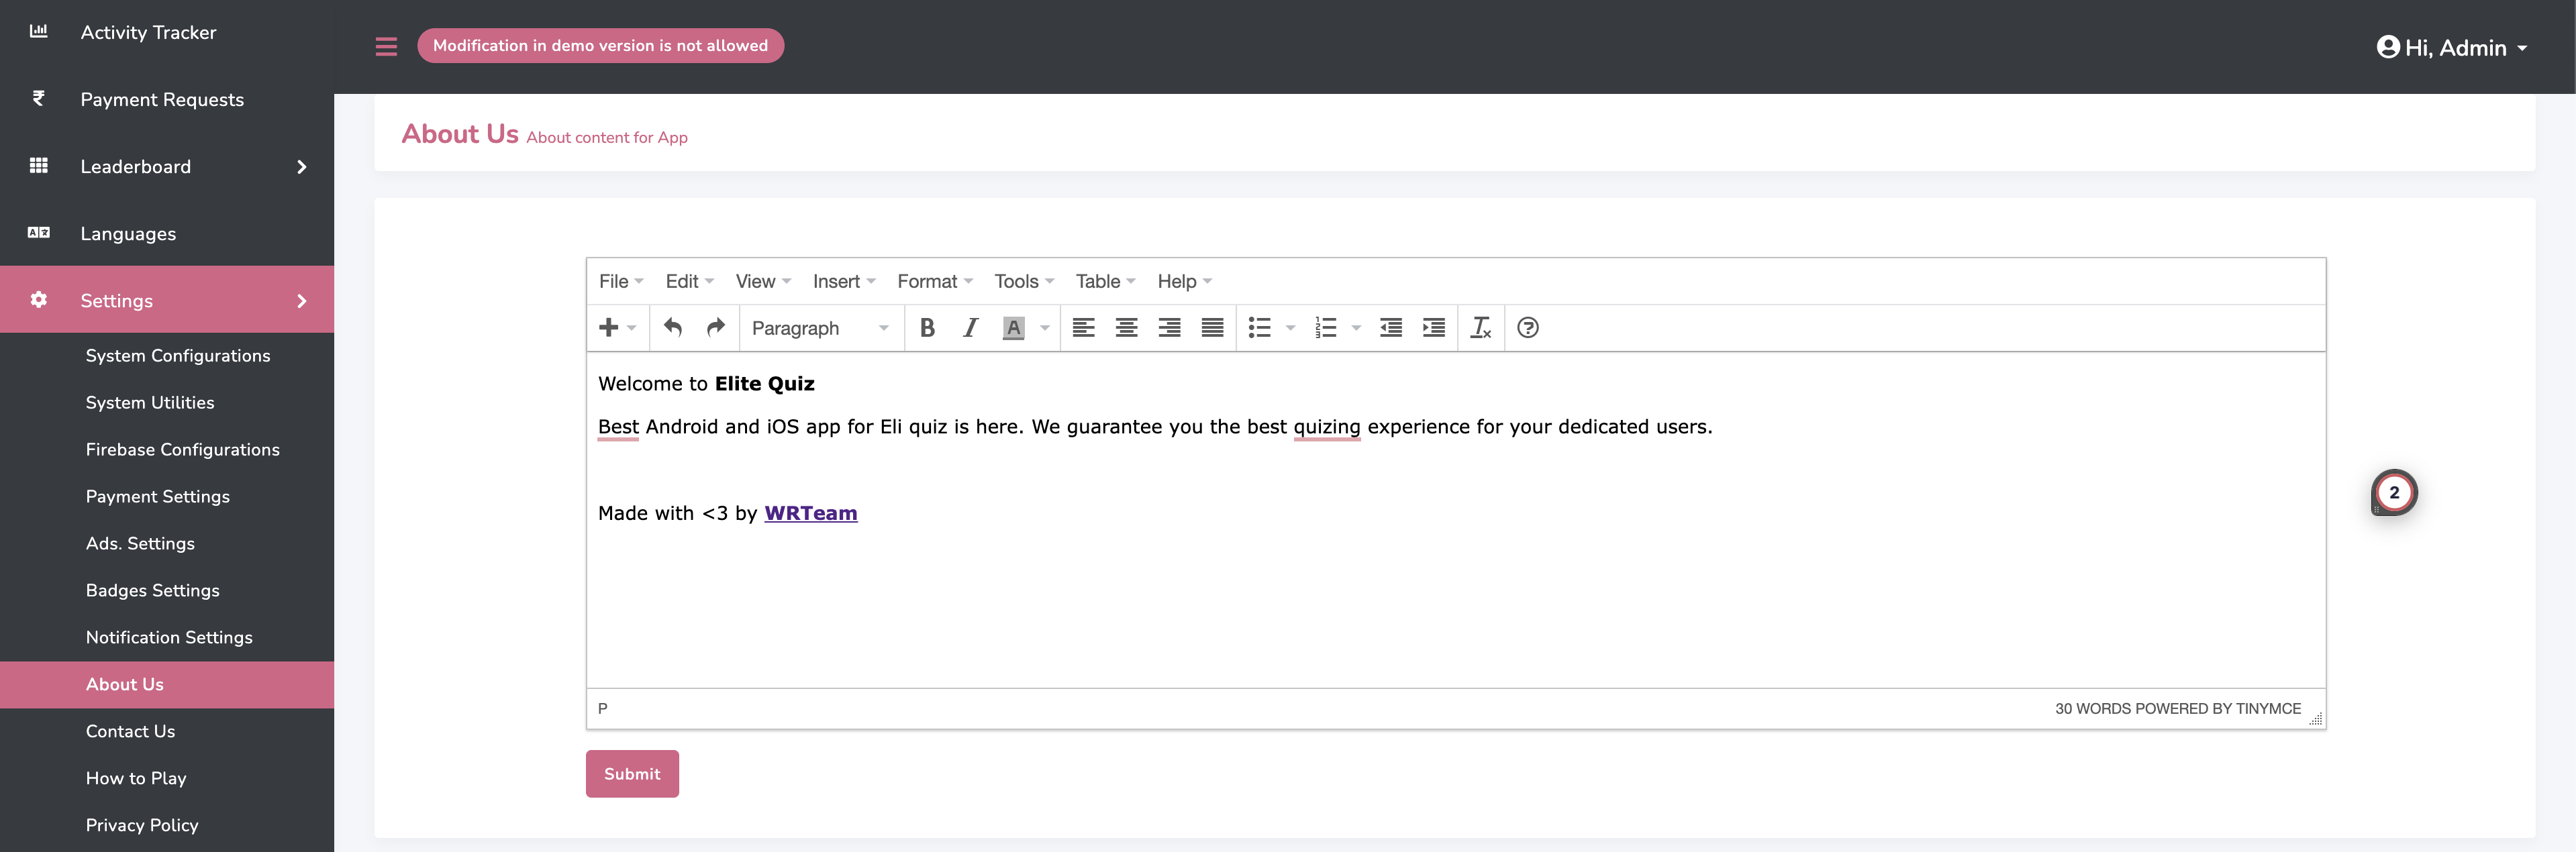
About Us Content
Set and manage your about us content for app.
How to Play Content
Set and manage your how to play content for app.

Elite Quiz App
How to setup Flutter
-
Visit flutter official website : https://docs.flutter.dev/get-started/install
for full install guide.
If you prefer video tutorials, we recommend this playlist for the full installation process
https://www.youtube.com/playlist?list=PLSzsOkUDsvdtl3Pw48-R8lcK2oYkk40cm
How to run this project
-
Unzip the downloaded code. After unzipping you will have Elite Quiz - Flutter Code
zip folder.
Unzip Elite Quiz - Flutter Code folder and open it in Android Studio or Visual Studio Code. - Open ide teminal and execute flutter pub get command.
-
If you are running this app for ios then run these following commands in terminal.
cd ios
pod install
cd .. - open terminal and execute flutter run
How to change package name
-
Change package name for android app
Execute this command in your terminal
flutter pub run change_app_package_name:main your_new_package_name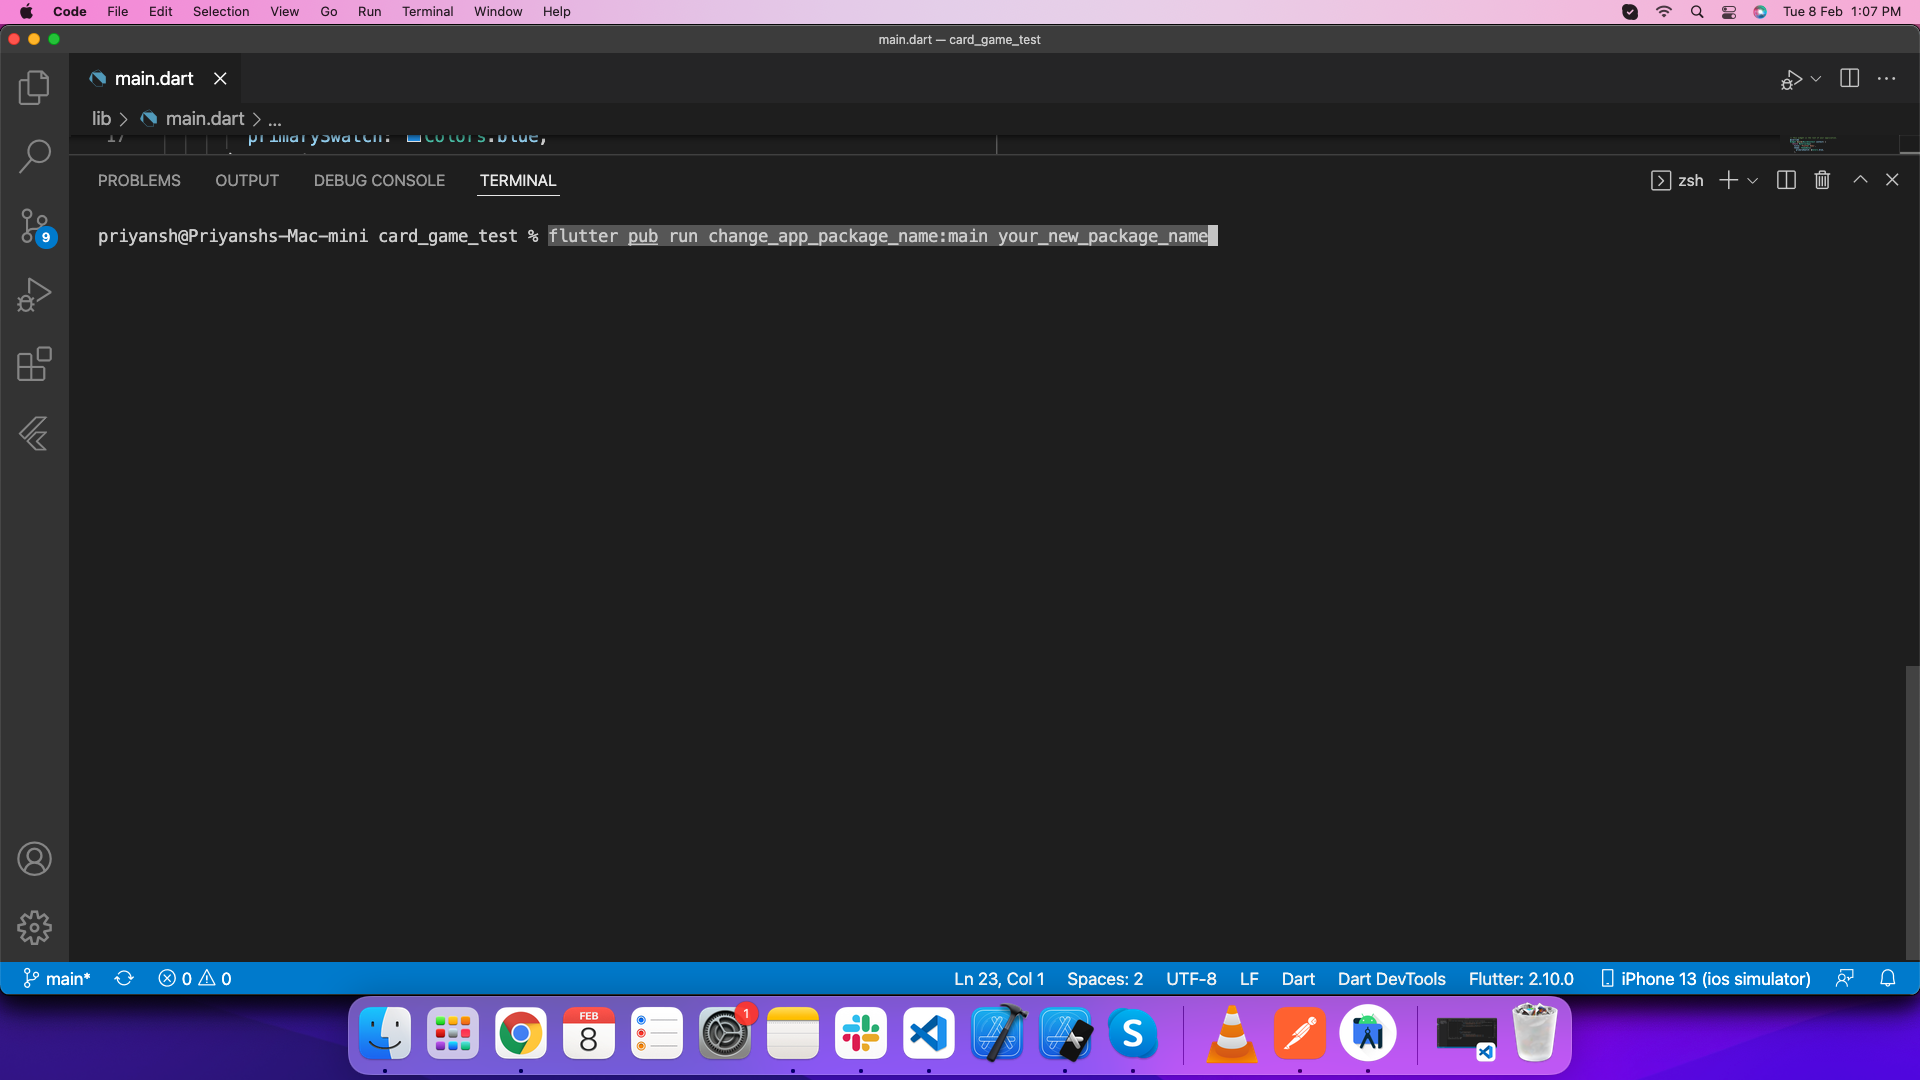
-
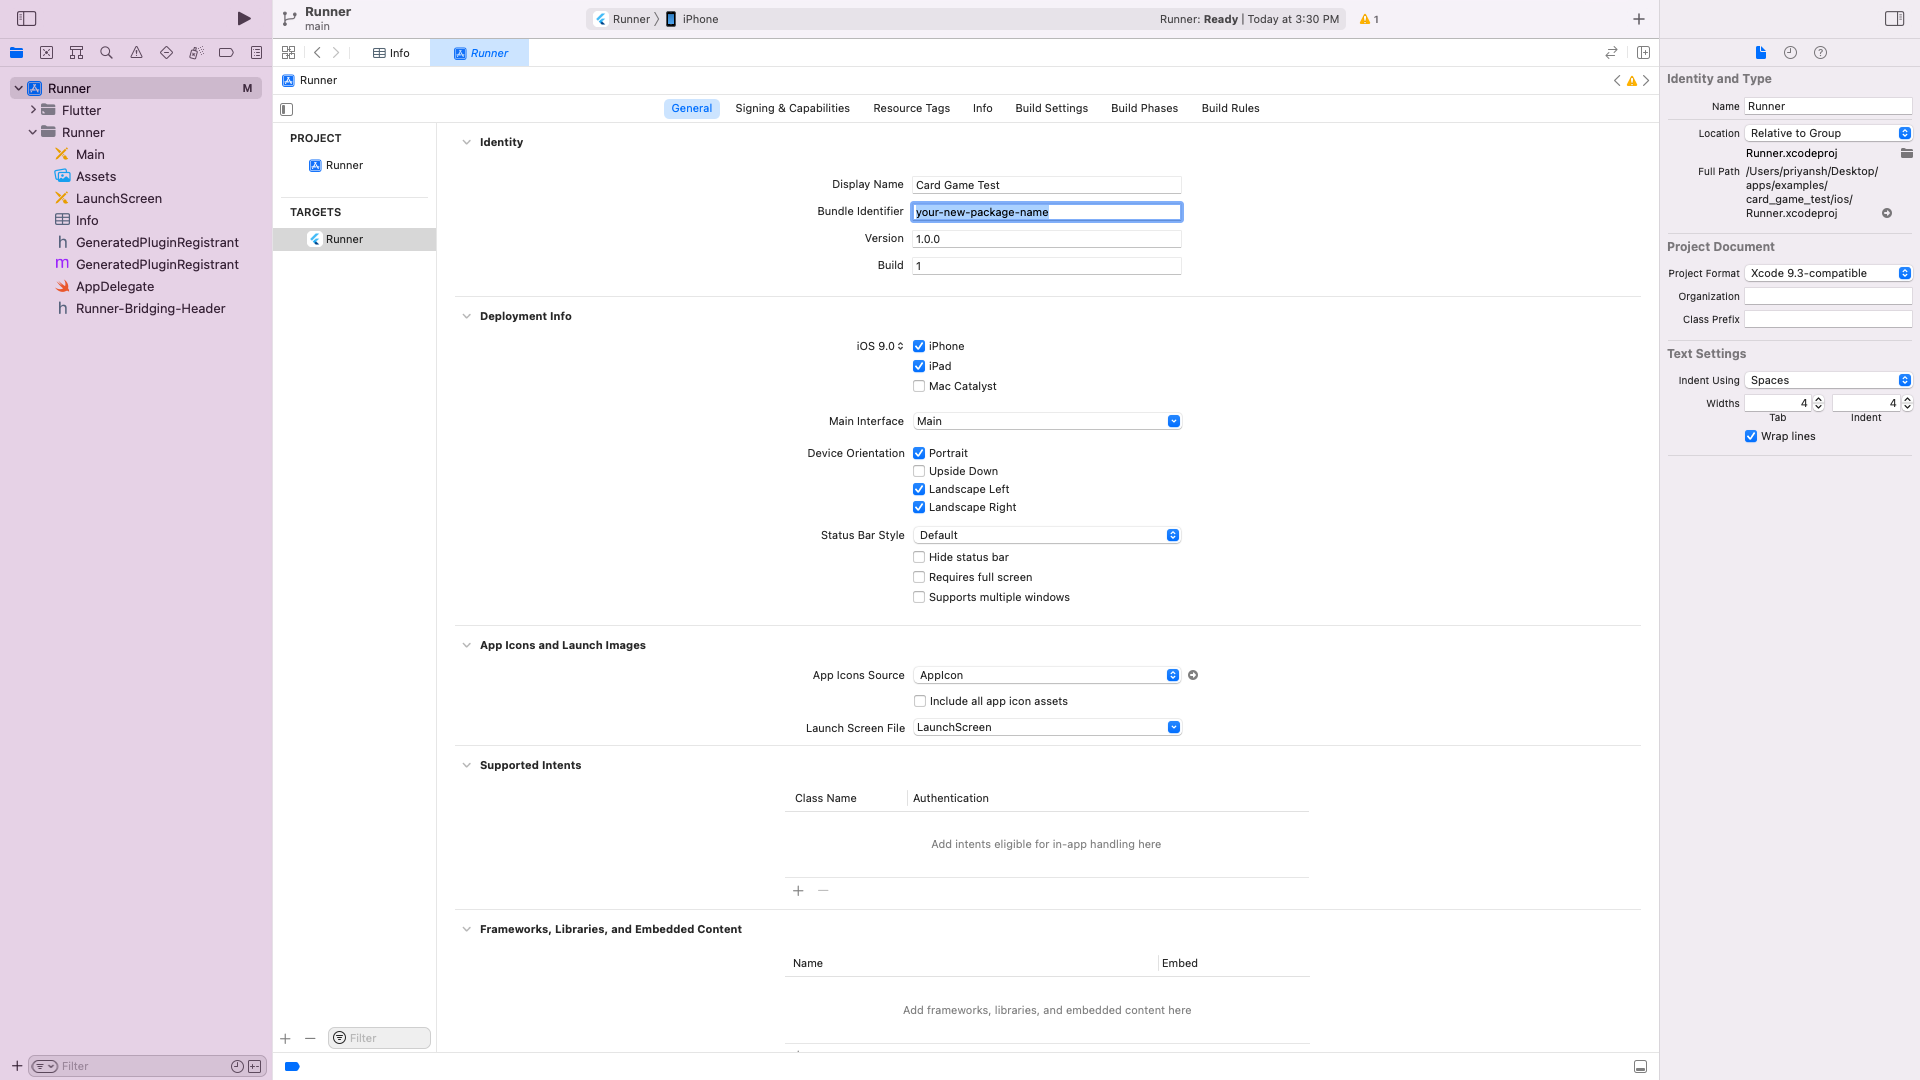
Change package name for ios app
Open ios folder of this project in xcode. Go Select Runner->Targets->General->Identity and enter new package name in Build Identifier.
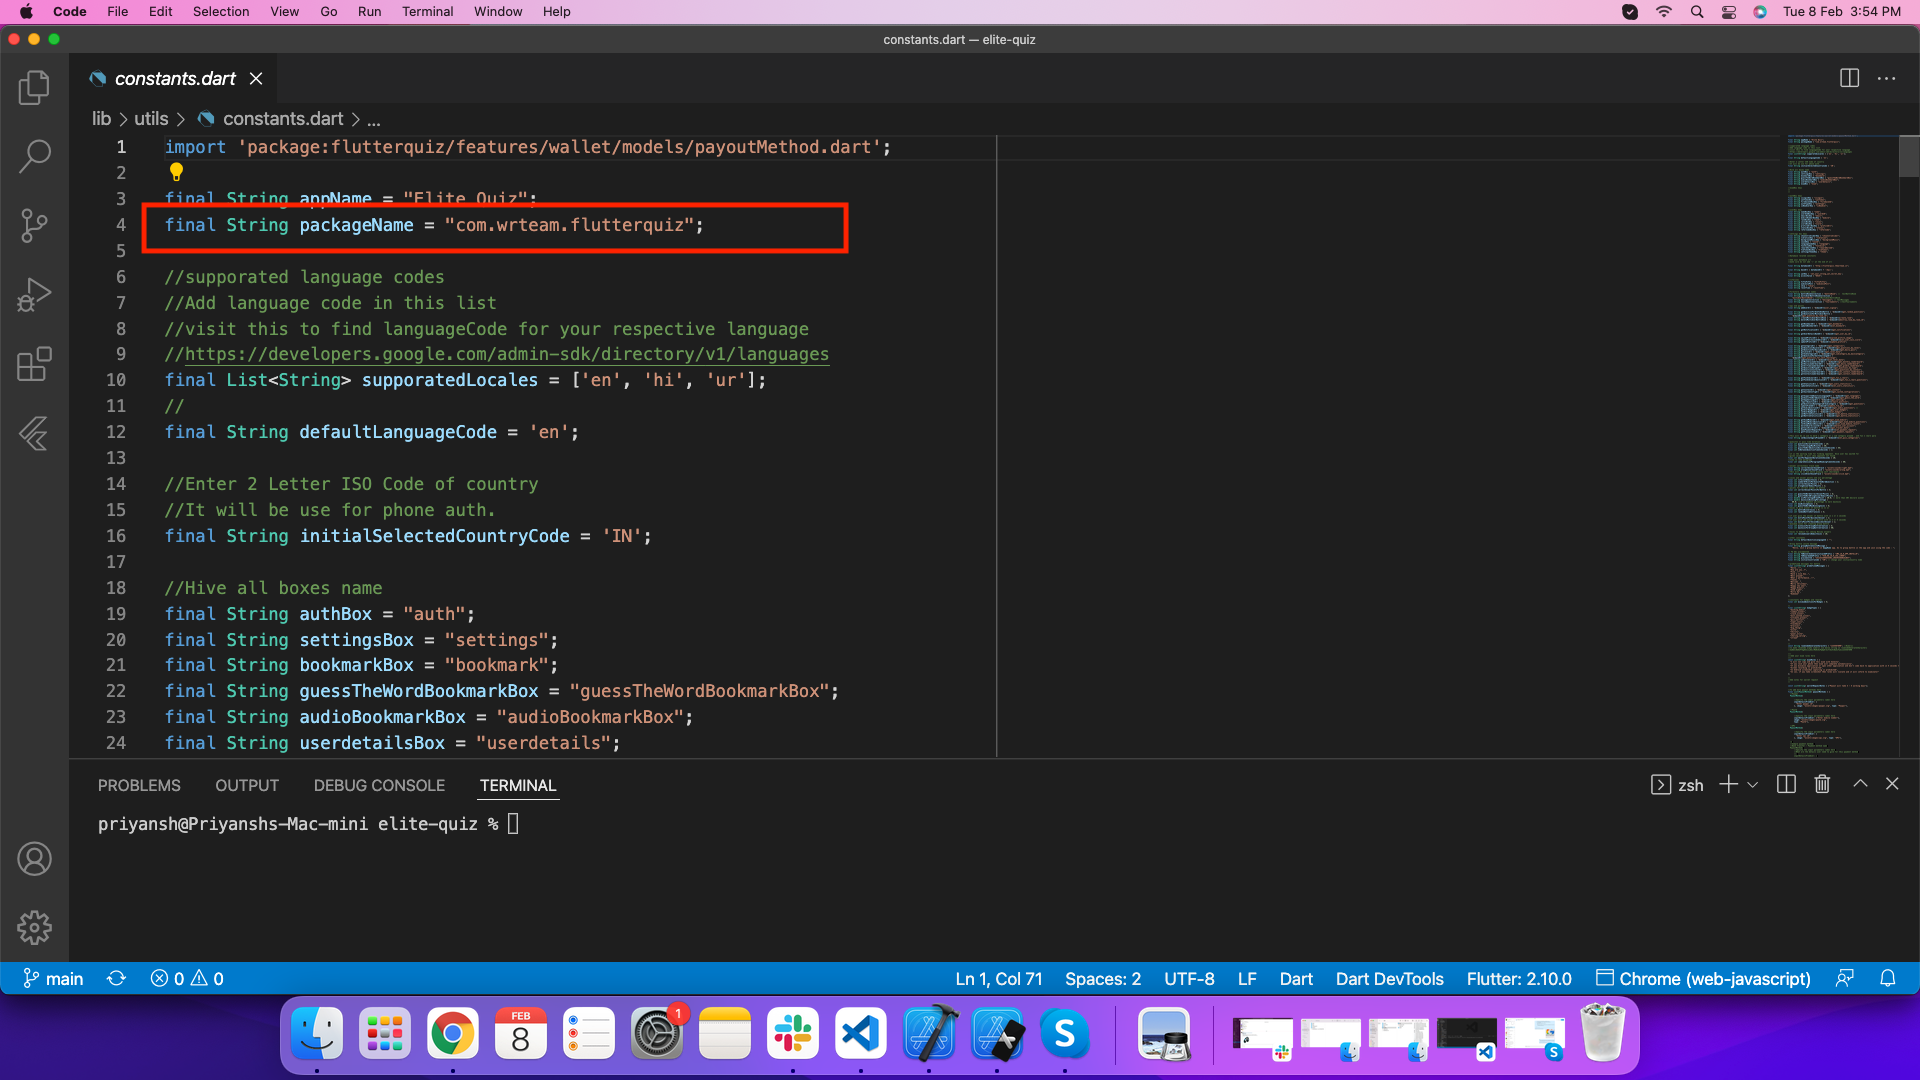
-
Go to lib/utils/constants.dart and update package.
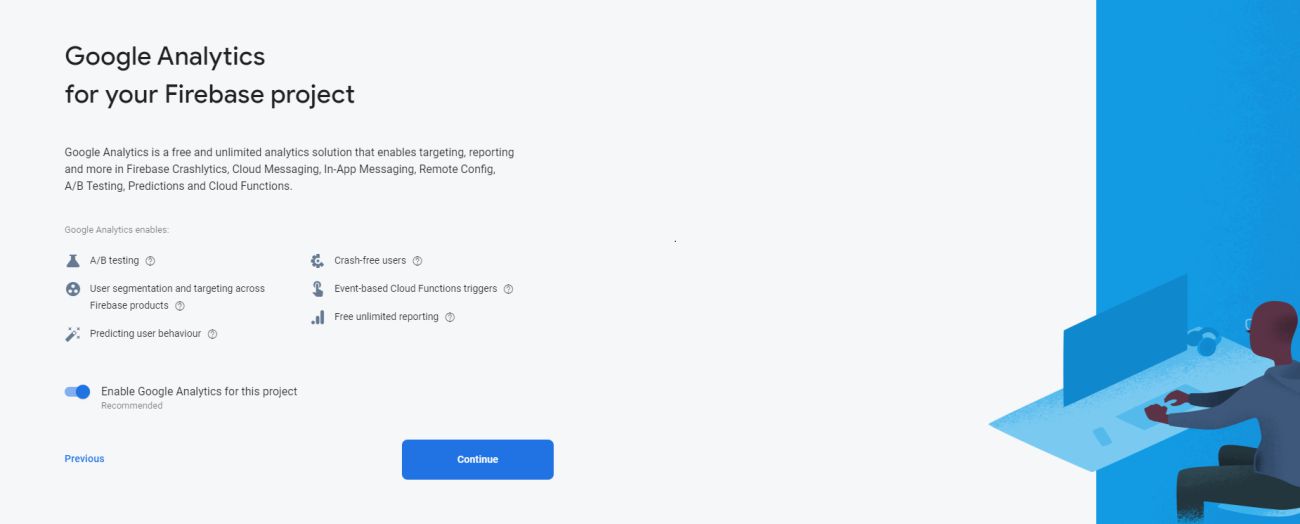
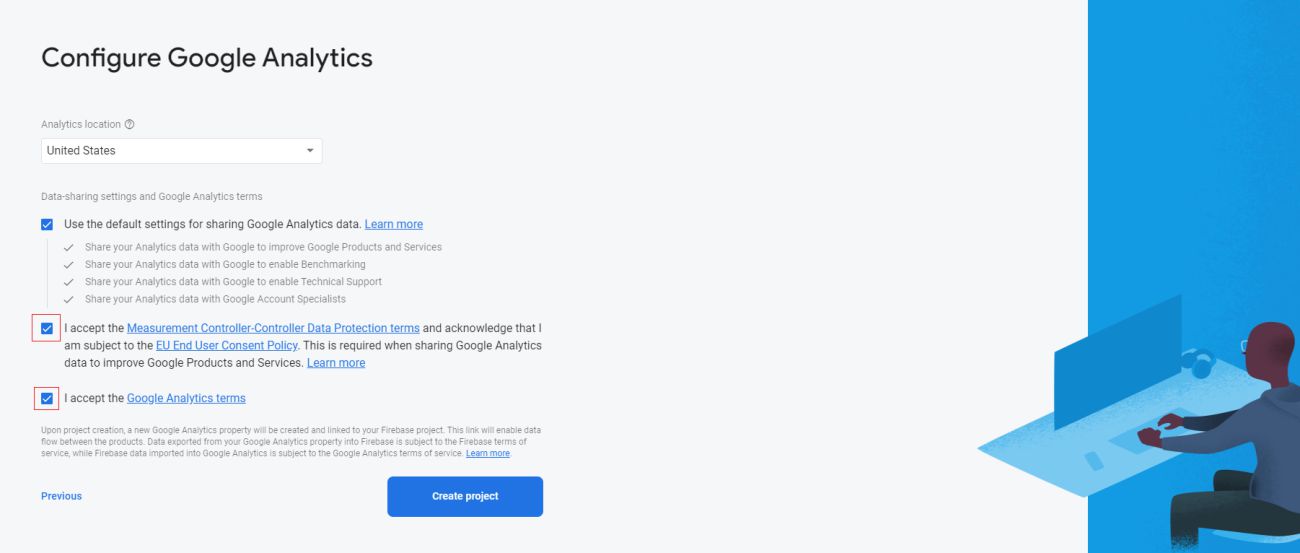
How to integrate firebase
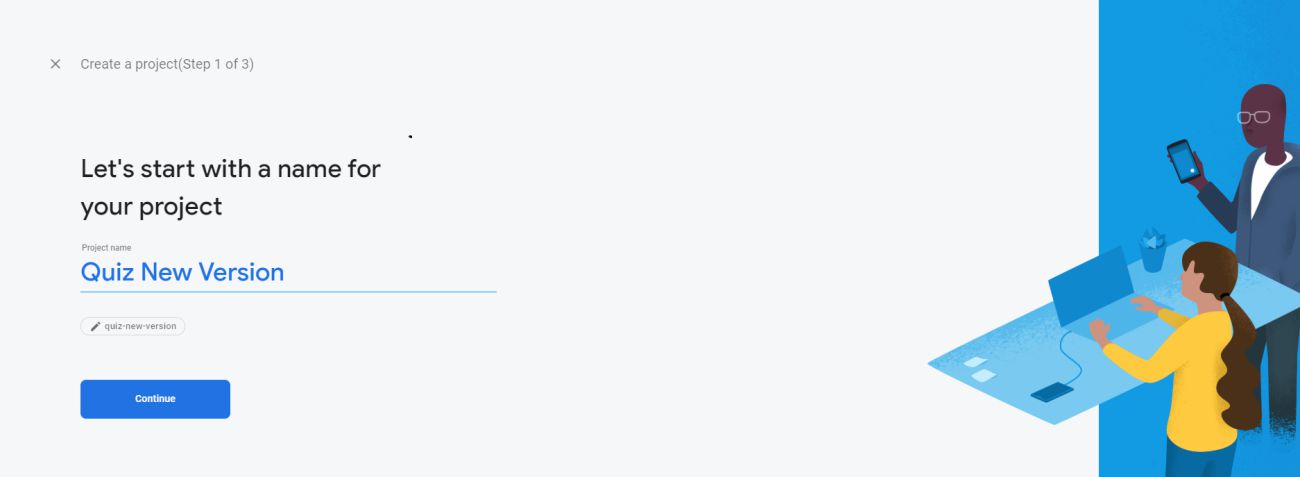
- Create firebase project in your account
- Add andorid application to your firebase project
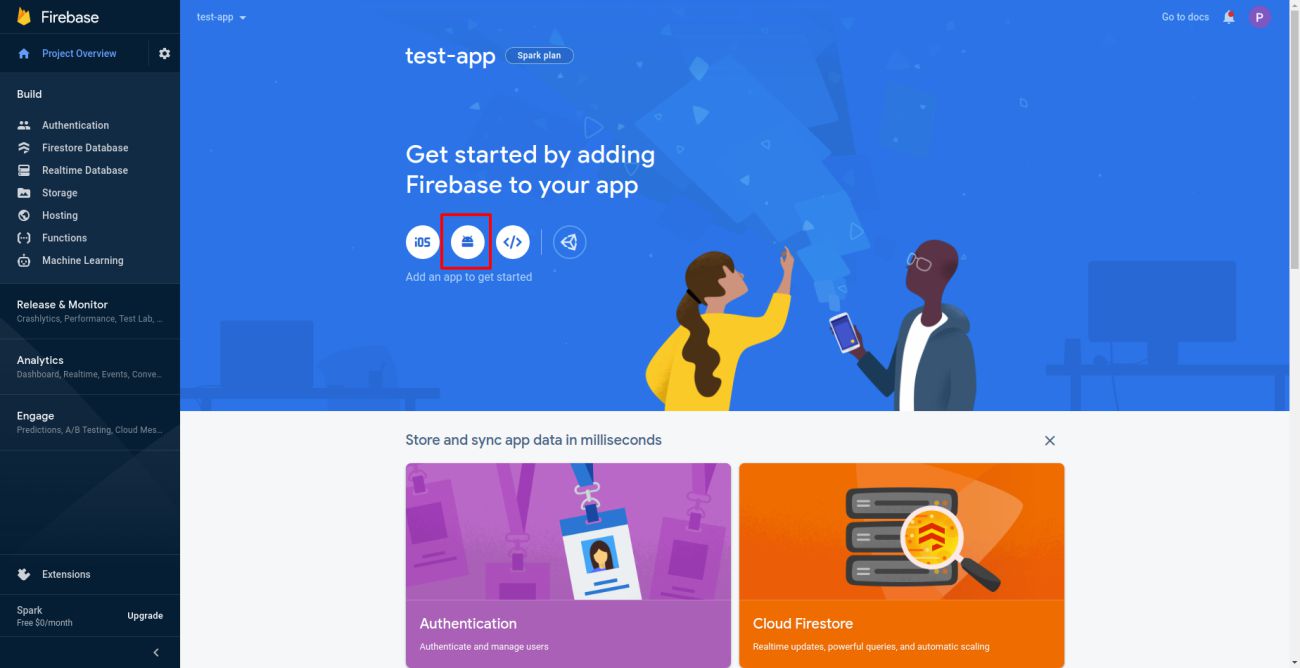
- Visit https://developers.google.com/android/guides/client-auth to know how to get
sha-1 and sha-256 key
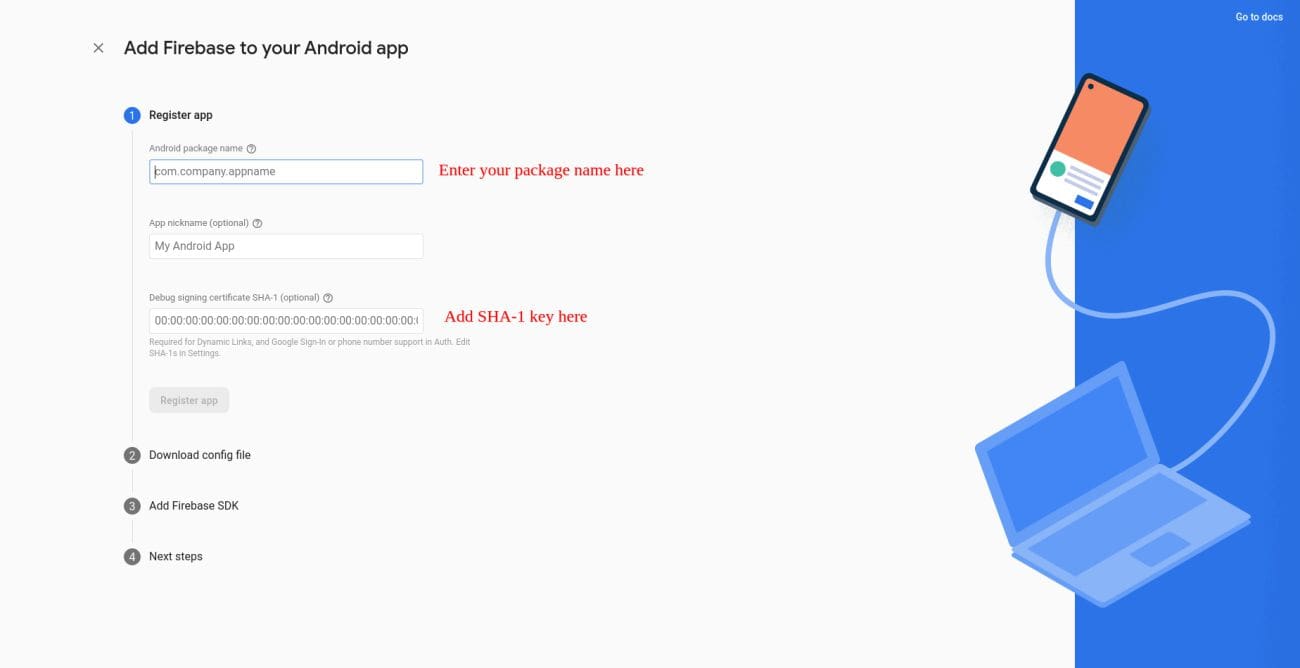
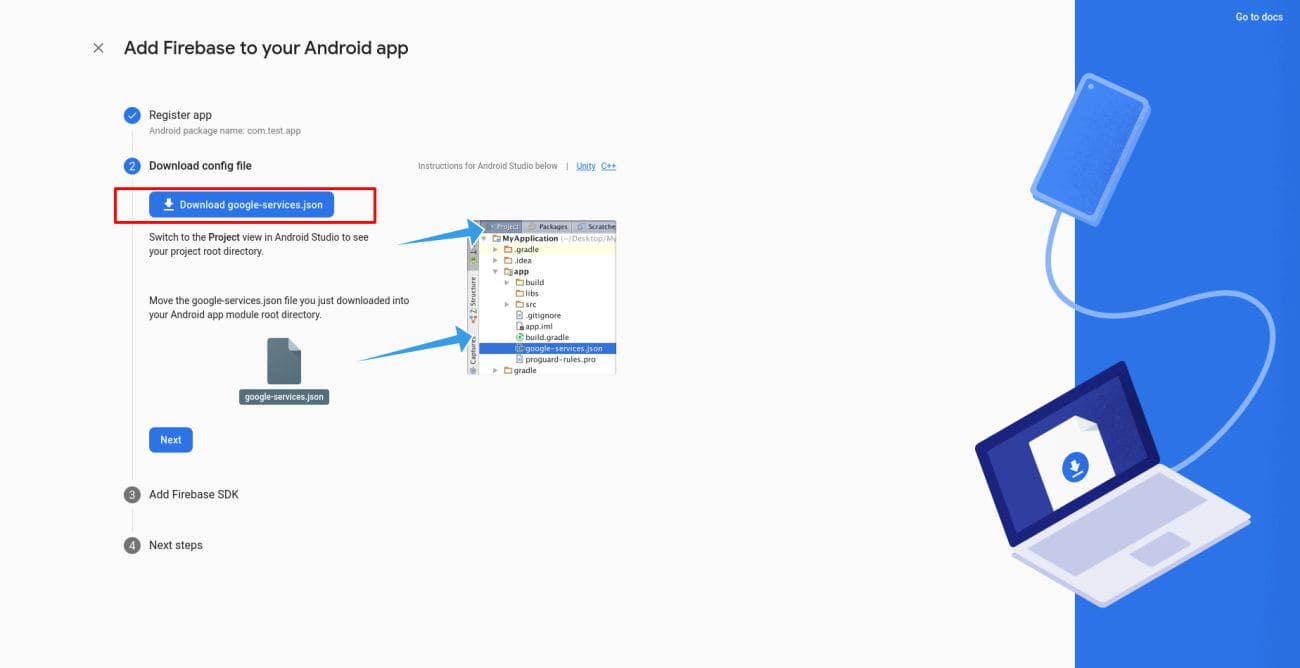
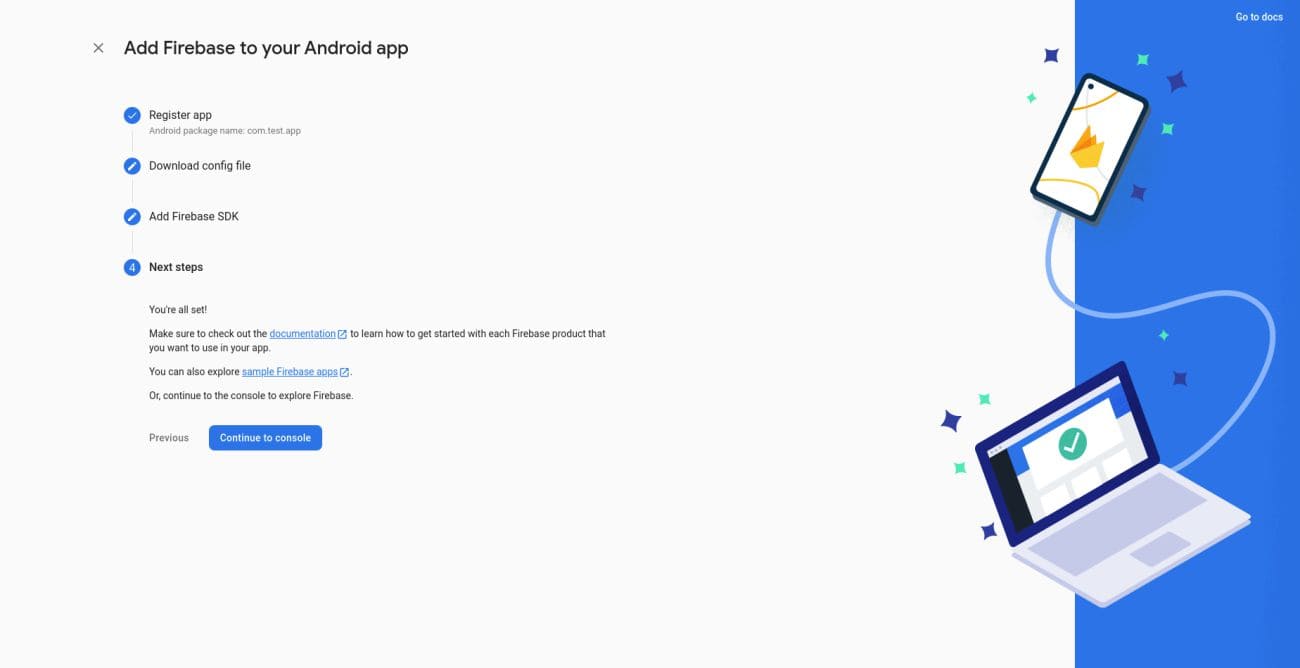
- You have connected andorid application to your firebase project successfully
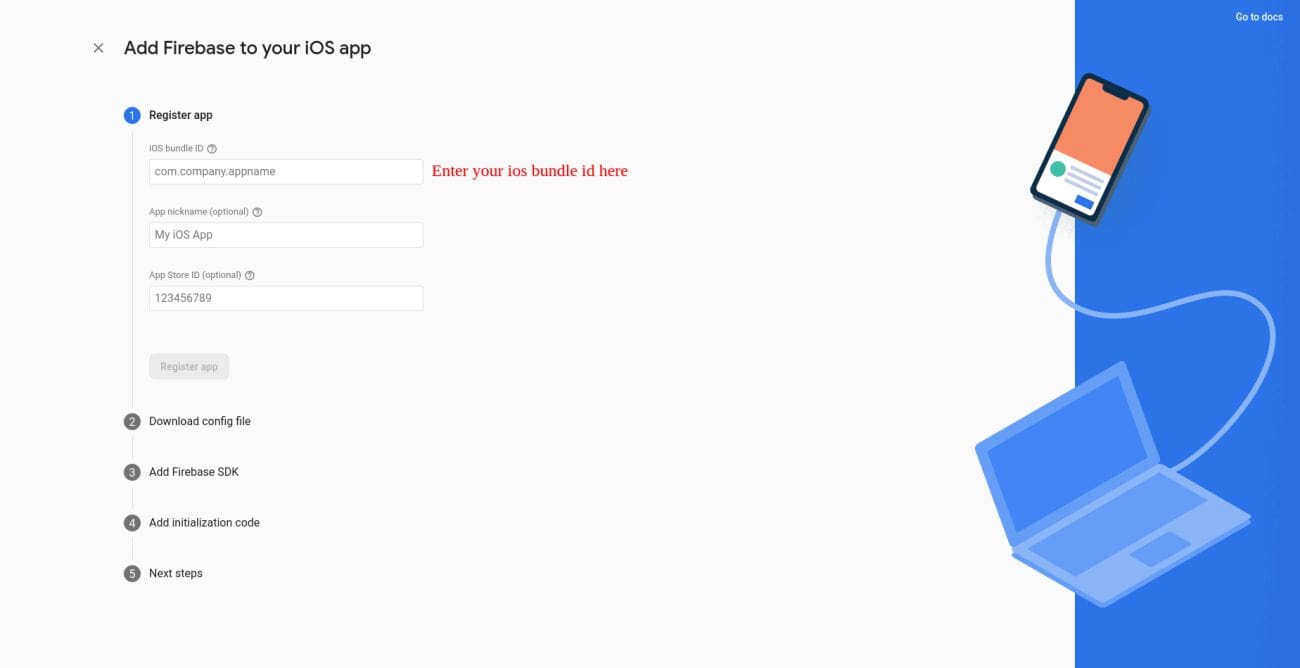
- Add ios application to your firebase project
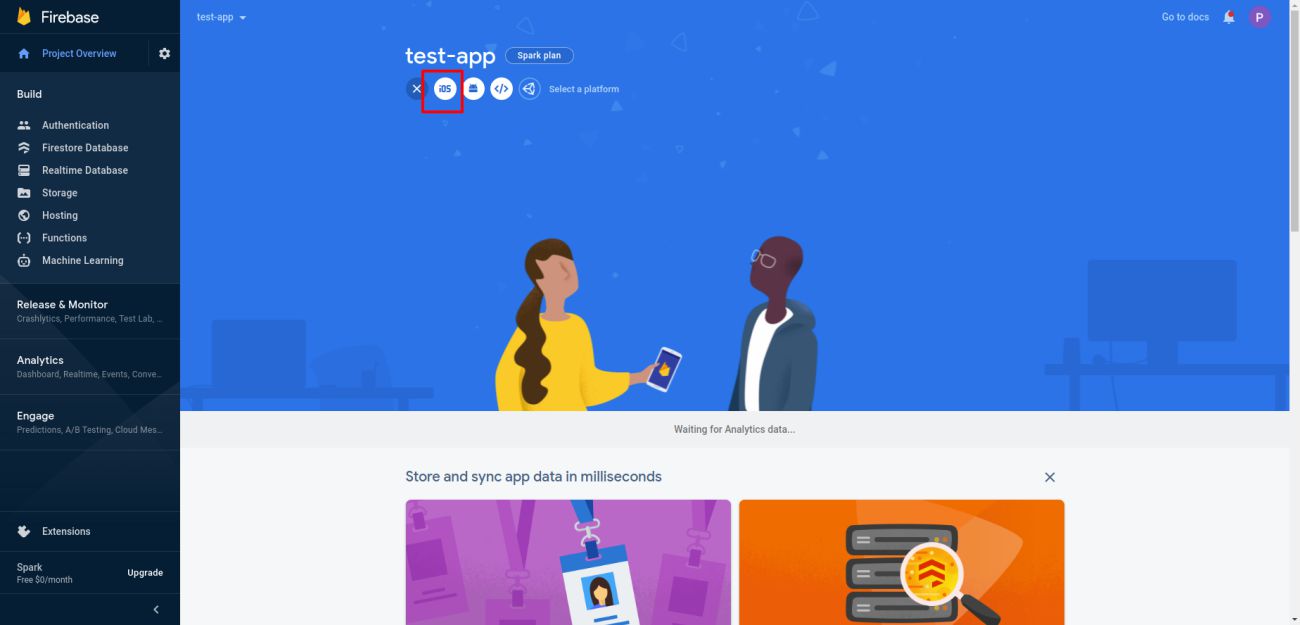
- Get your bundle id here
[your-flutter-project-dir]\ios\Runner.xcodeproj\project.pbxproj or search for
PRODUCT_BUNDLE_IDENTIFIER and you will get following result
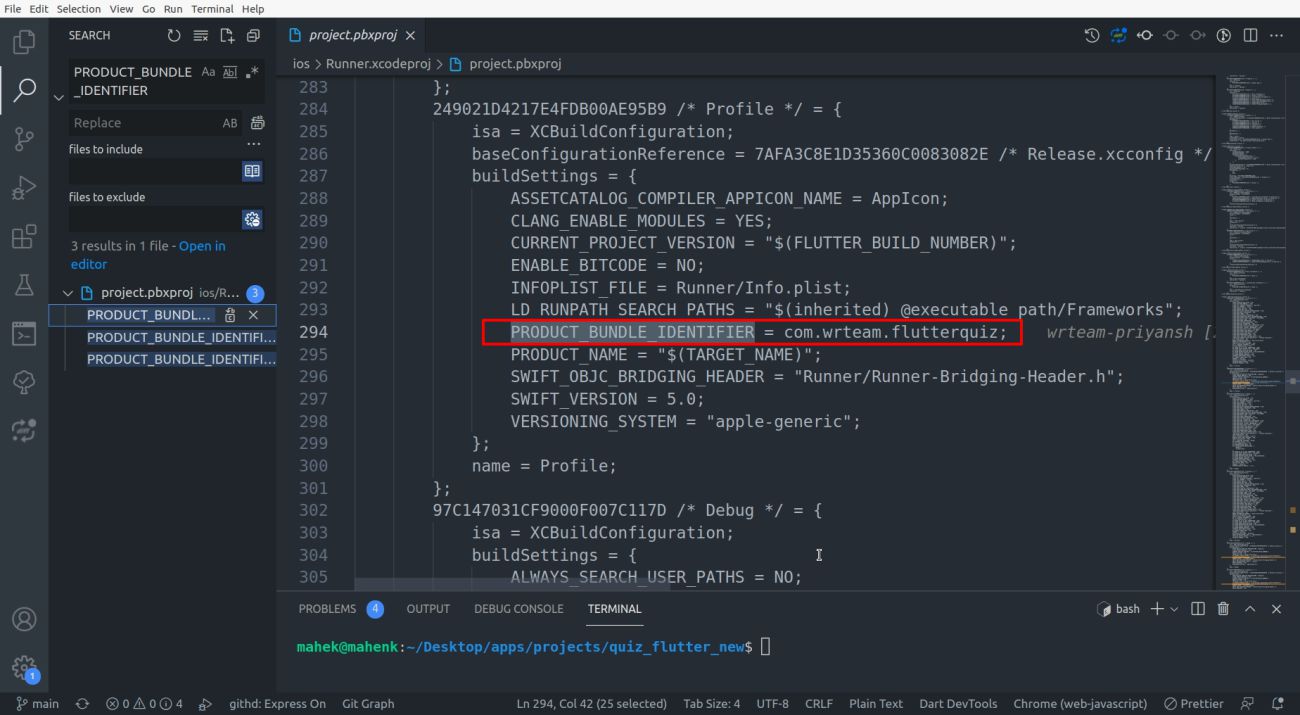
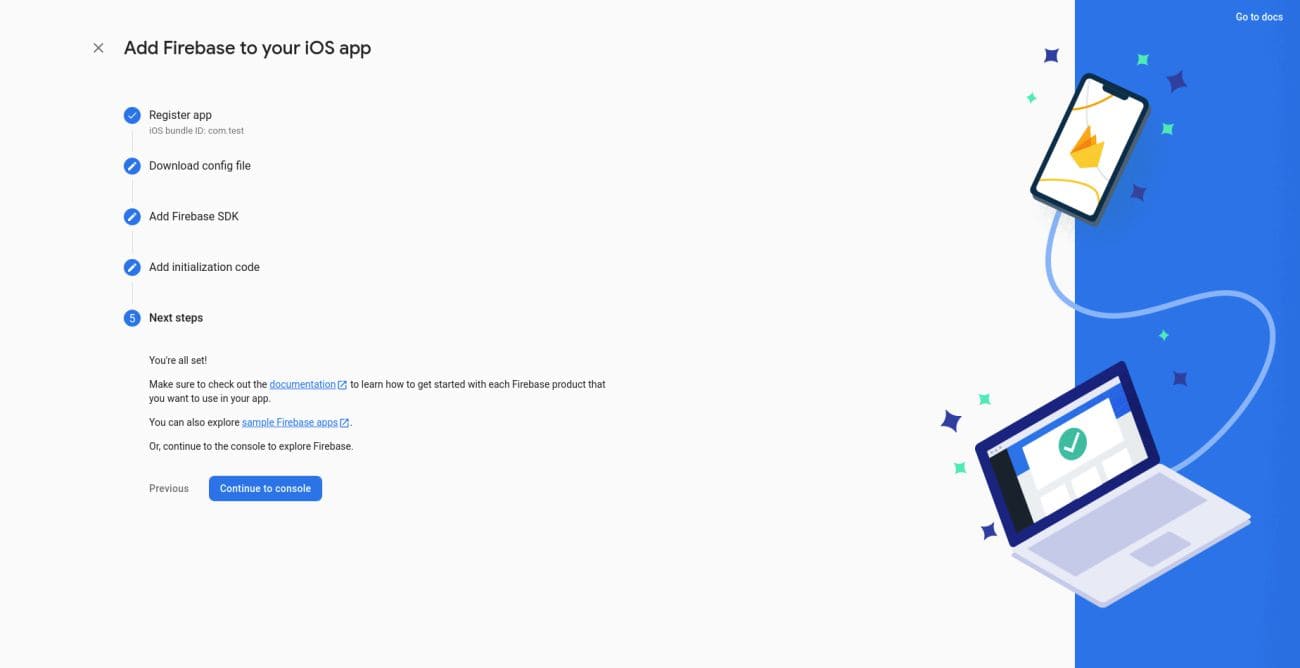
- You have connected ios application to your firebase project successfully
How to enable firebase auth
- Go to firebase project.Click on authentication menu and goto sign-in method. Enable
all the authentication method mention in below image
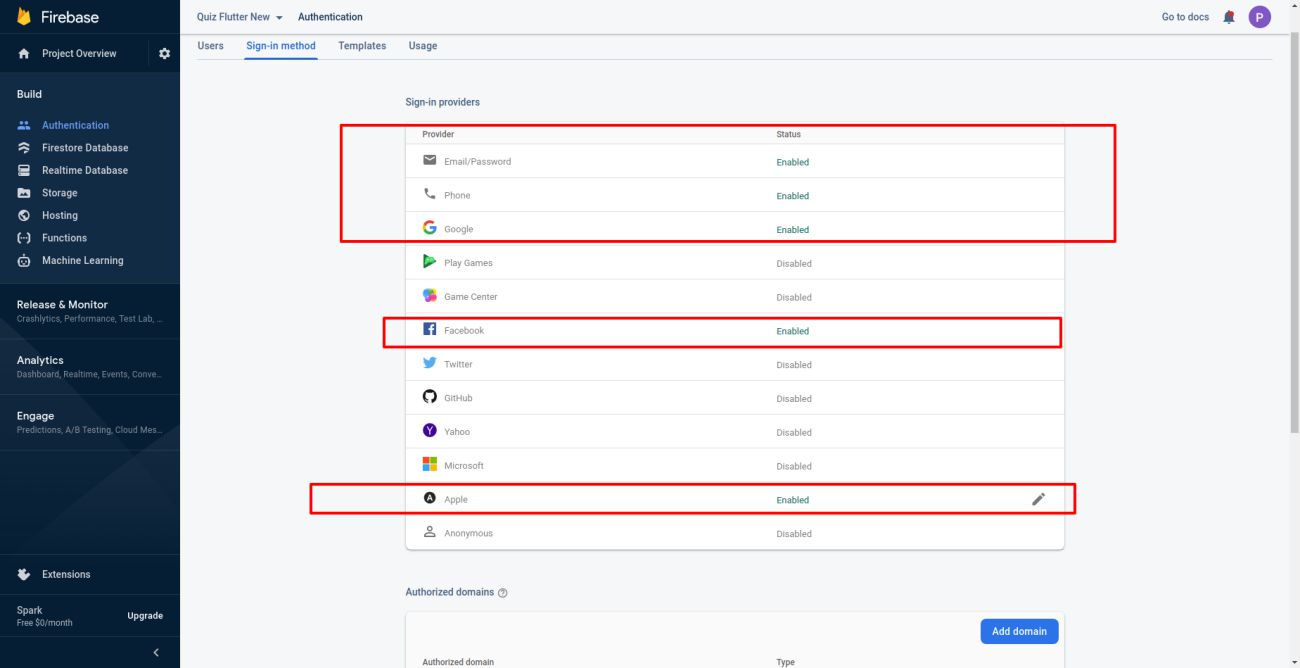
- If your are using google sign-in you need to enable OAuth APIs that you want to use using https://console.developers.google.com/ .Enable people api and make sure you've filled out all required fields in the console for OAuth consent screen. Otherwise, you may encounter APIException errors.
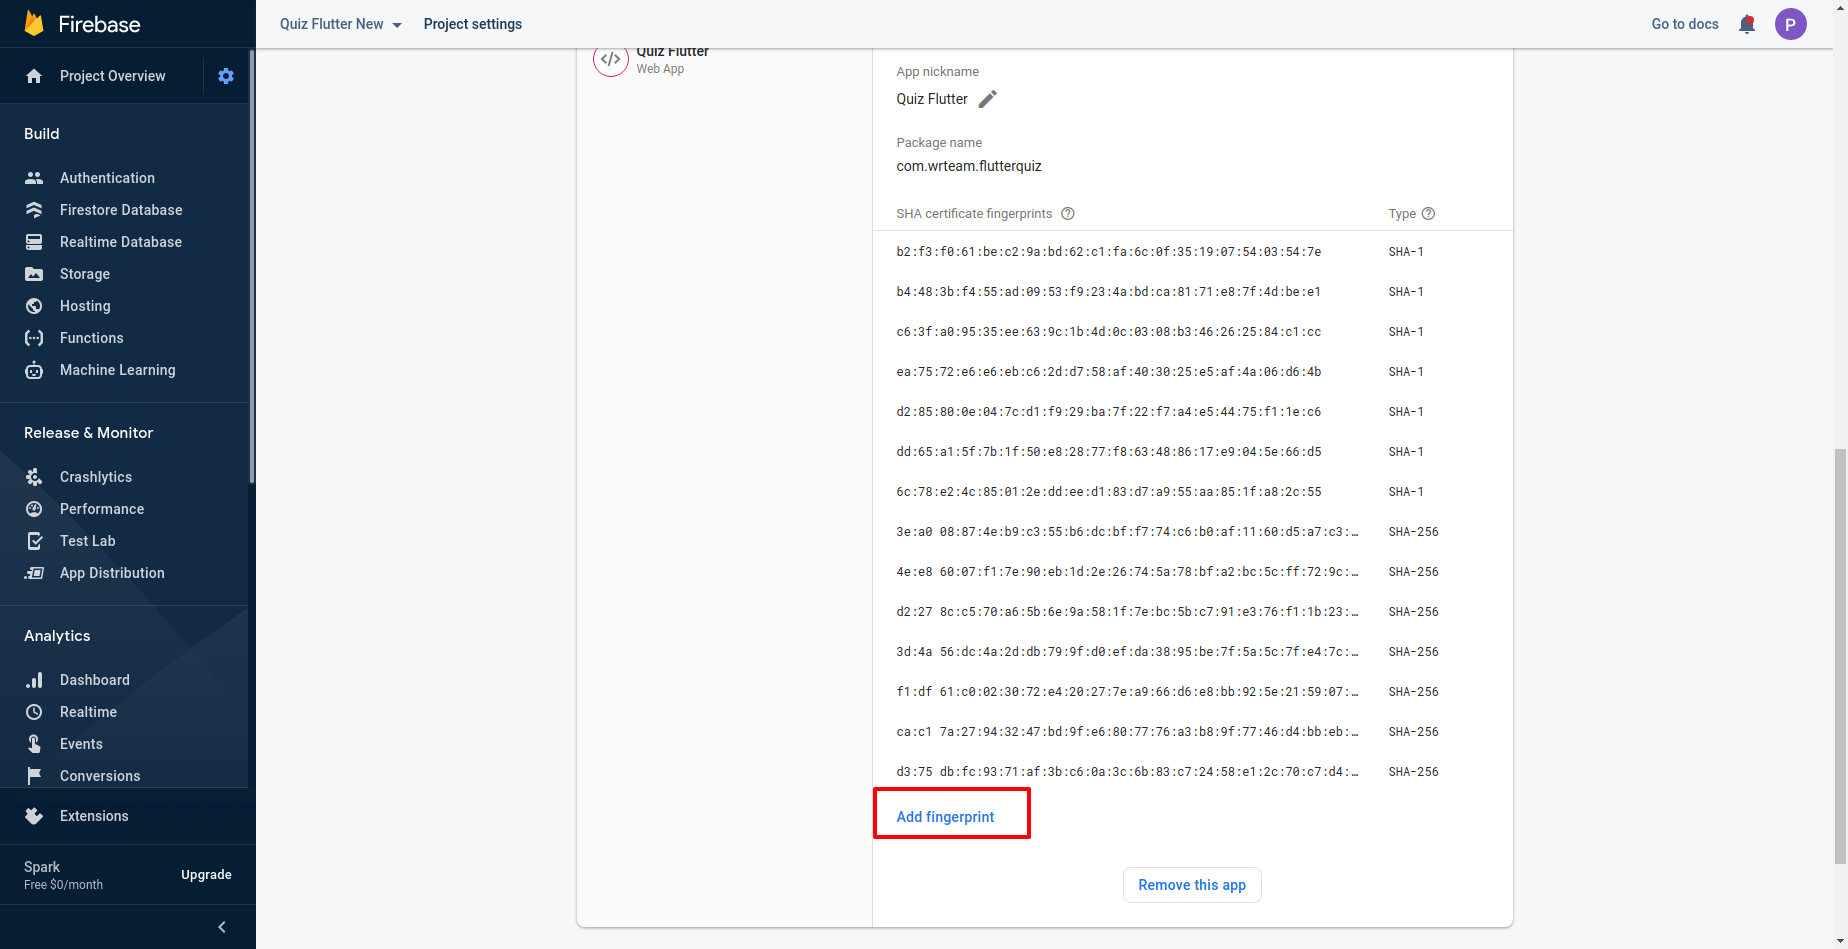
- Please add sha-256 key as shown in below image. Go to project settings -> your apps
-> android apps
- Please add support email as shown in below image. Go to project settings -> general
-> public settings
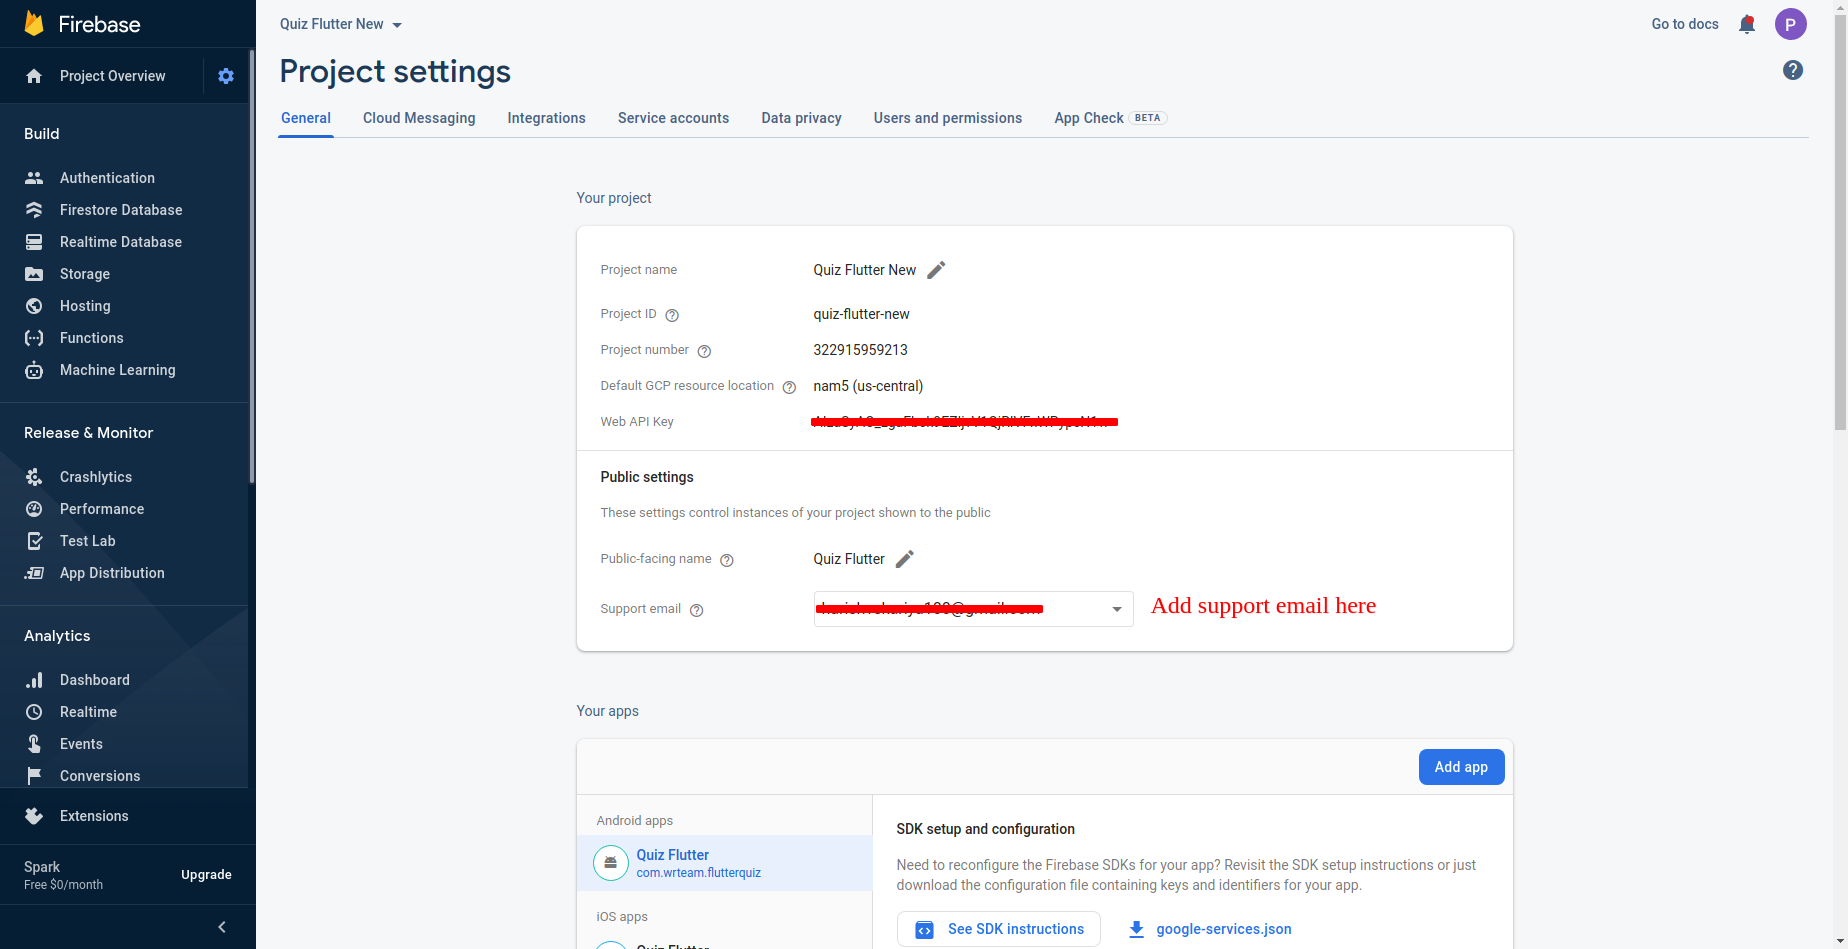
- Please add support email as shown in below image. Go to project settings -> general
-> public settings
-
If you are using phone auth in ios then follow these steps
Go to ios/Runner/GoogleService-Info.plist and copy REVERSED_CLIENT_ID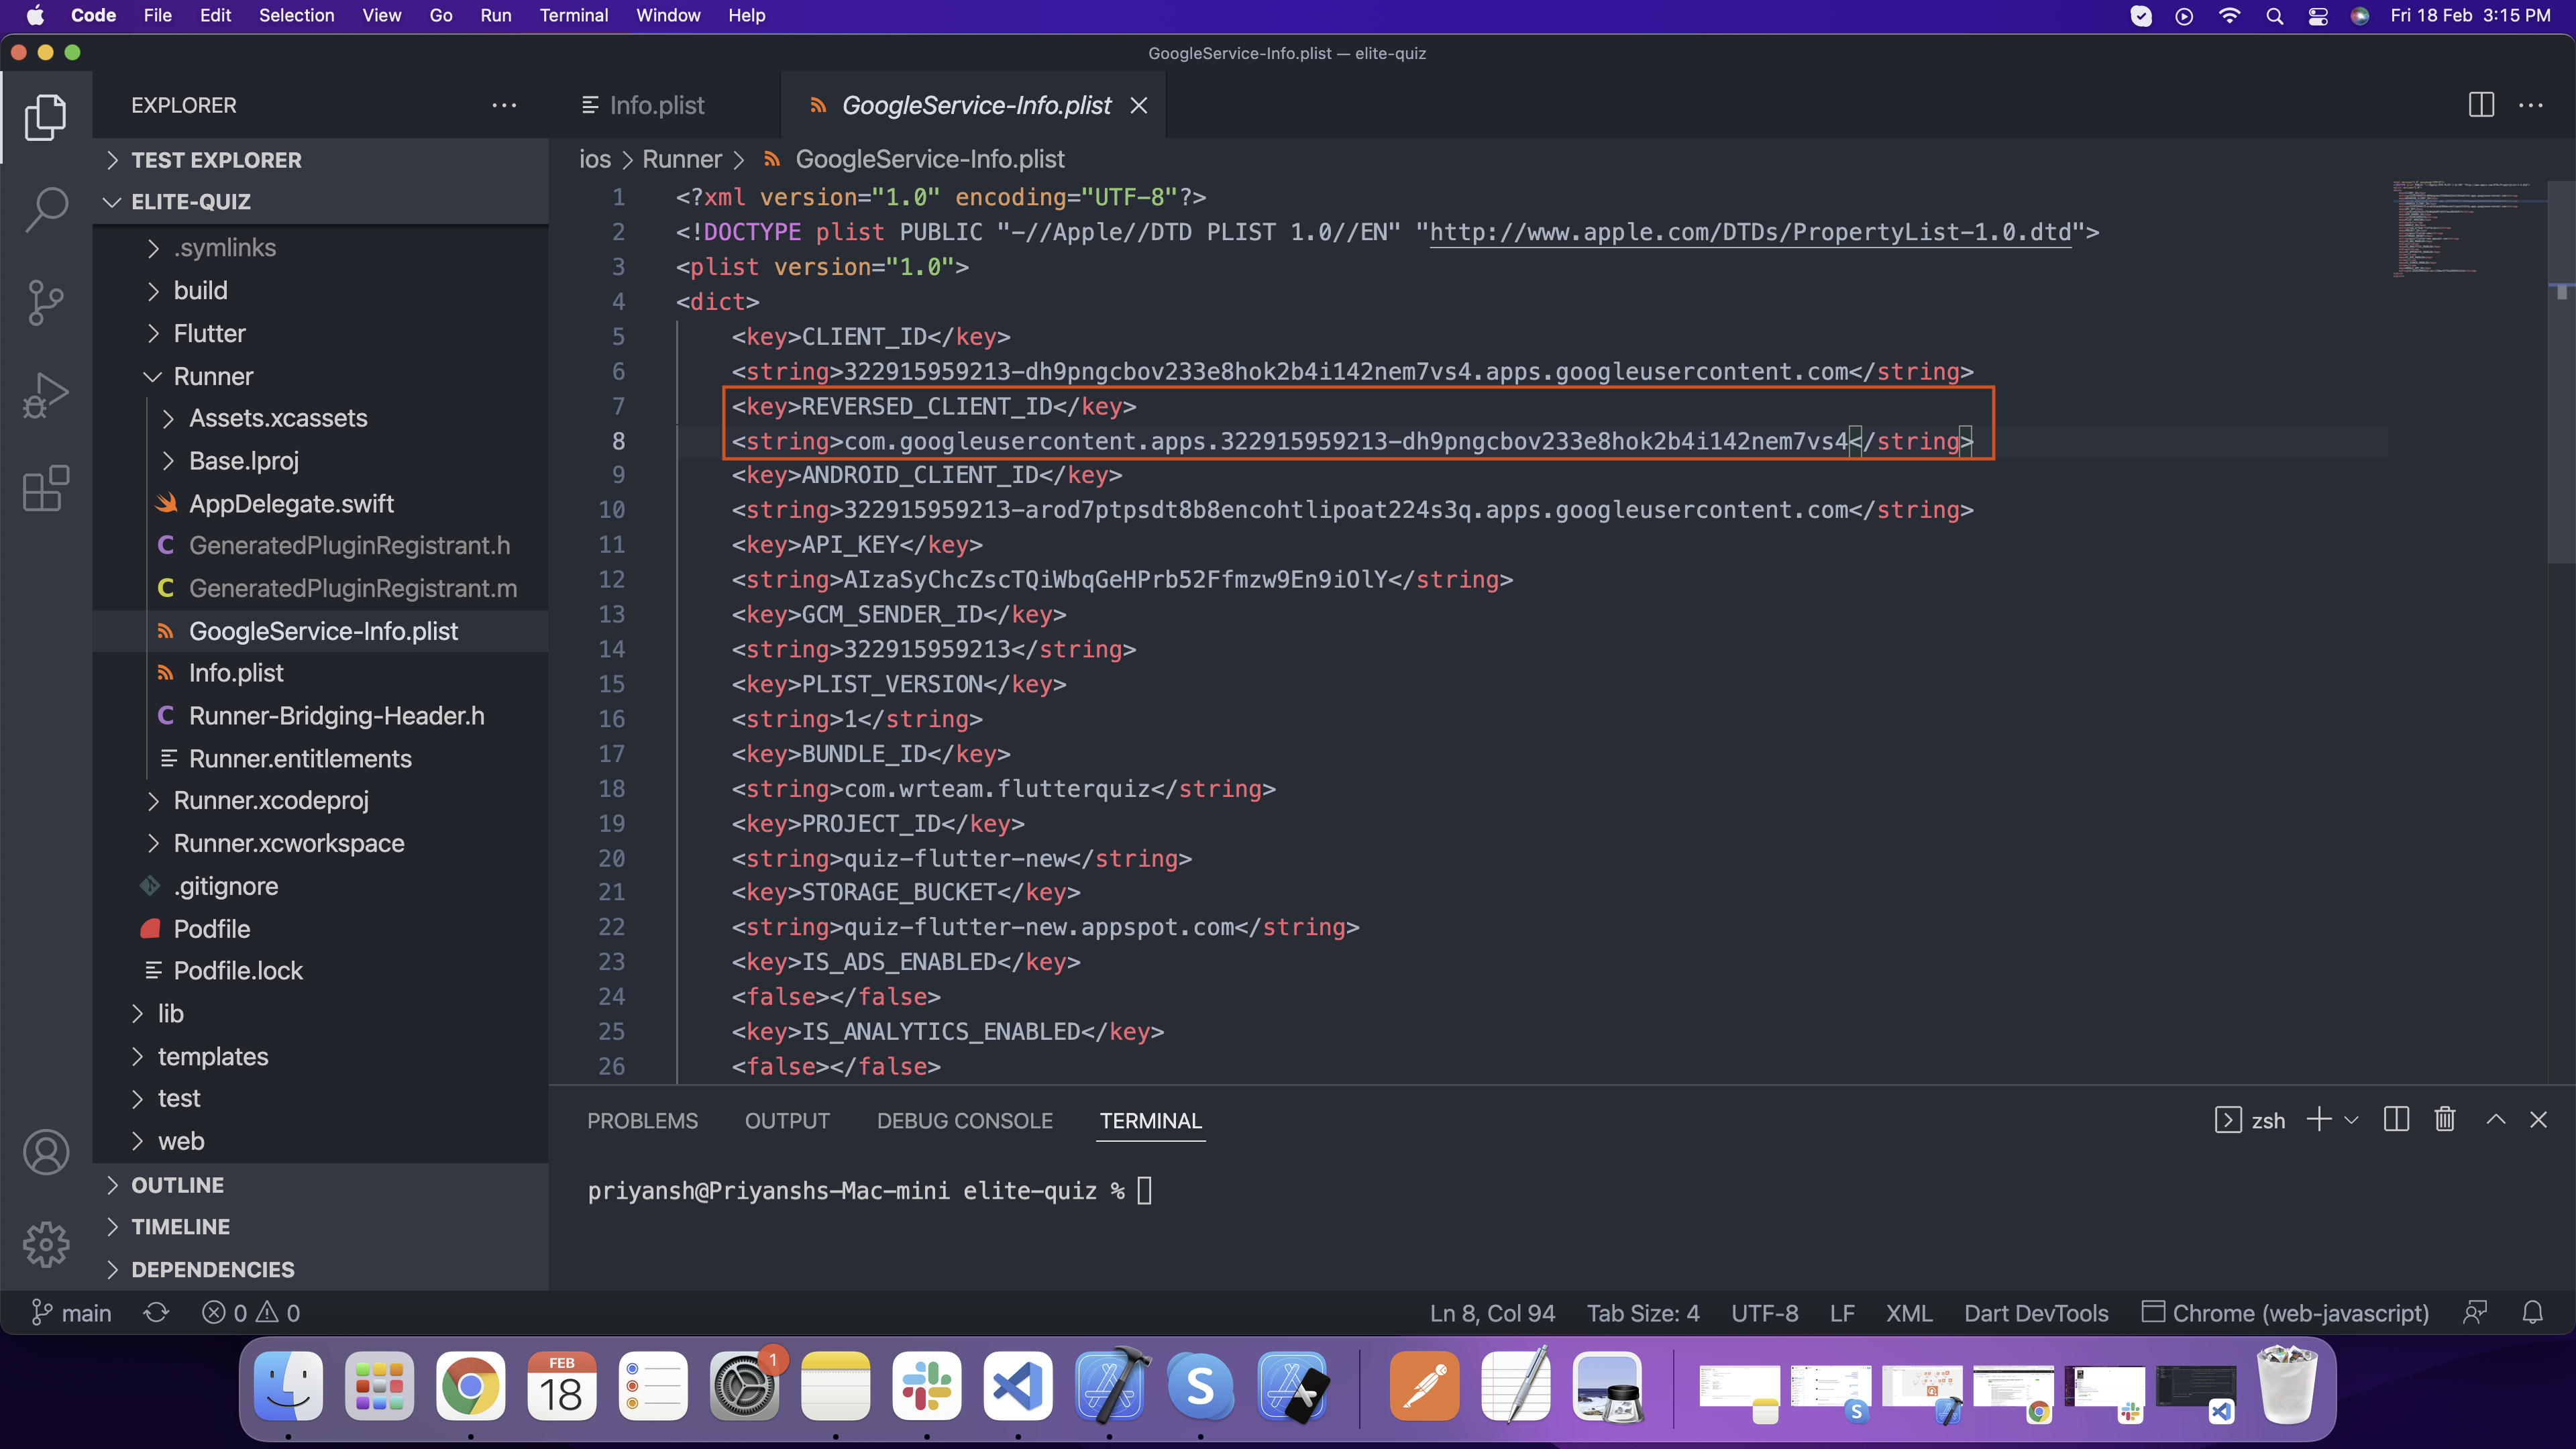
Paste in ios/Runner/Info.plist as shown in below image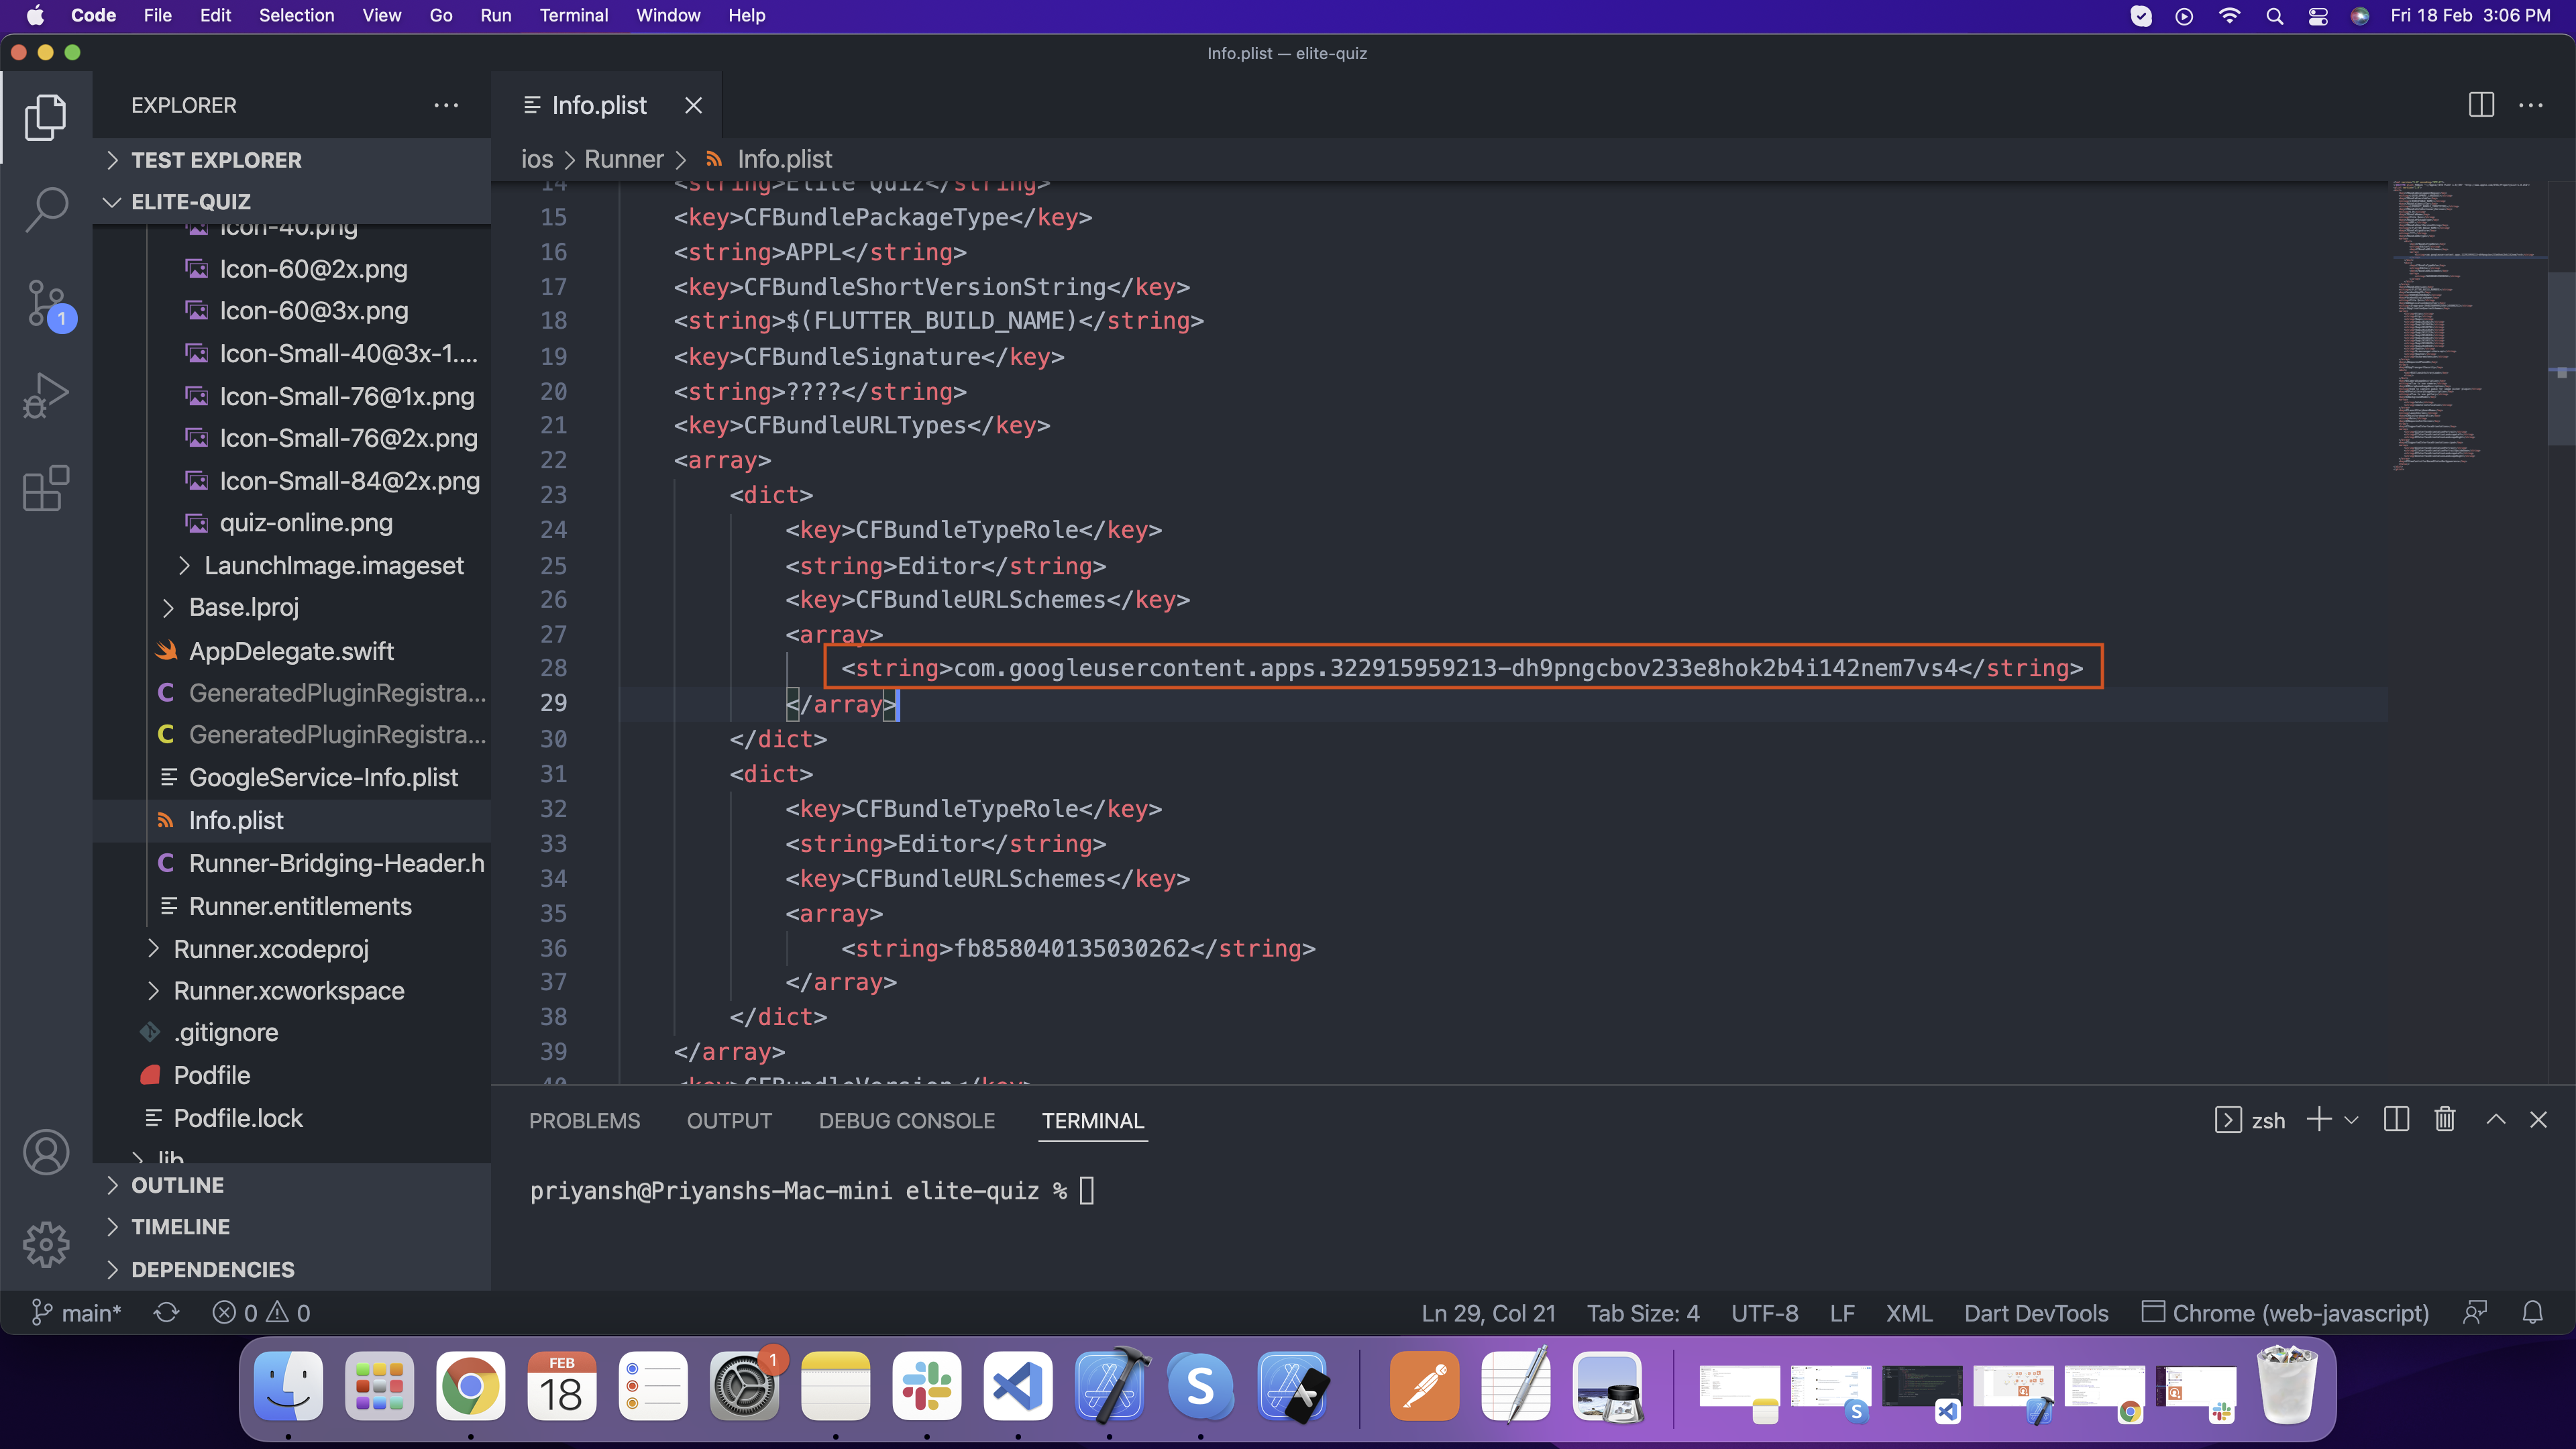
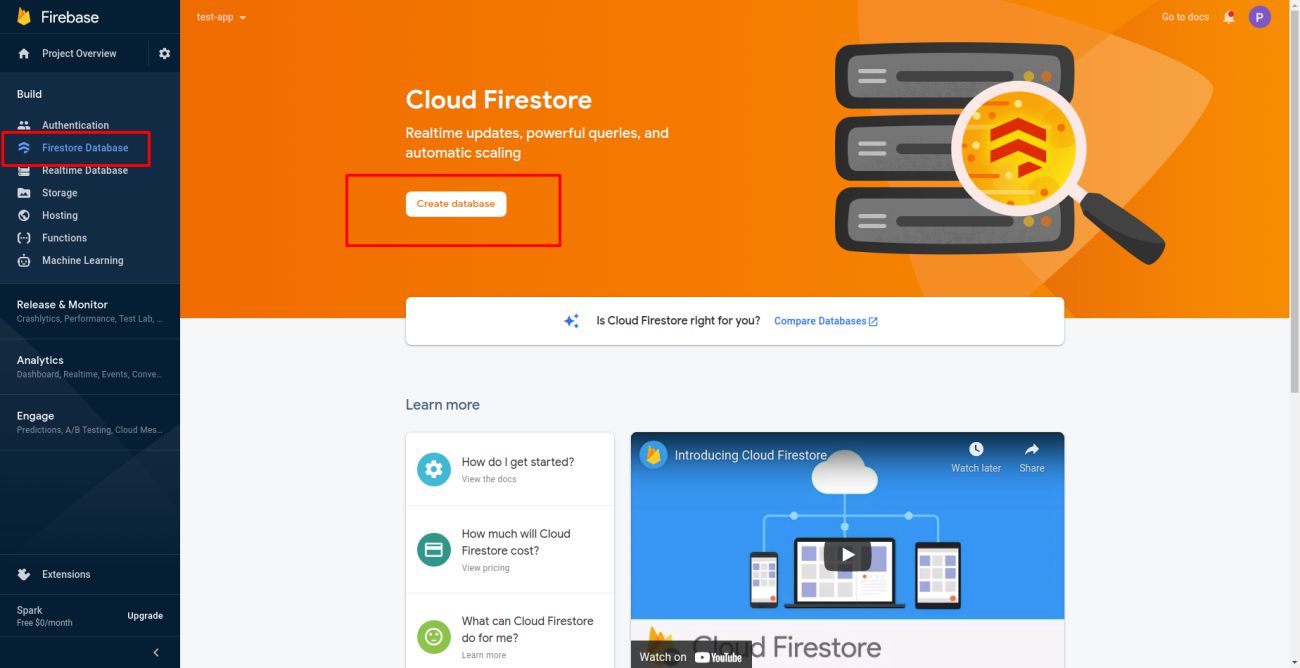
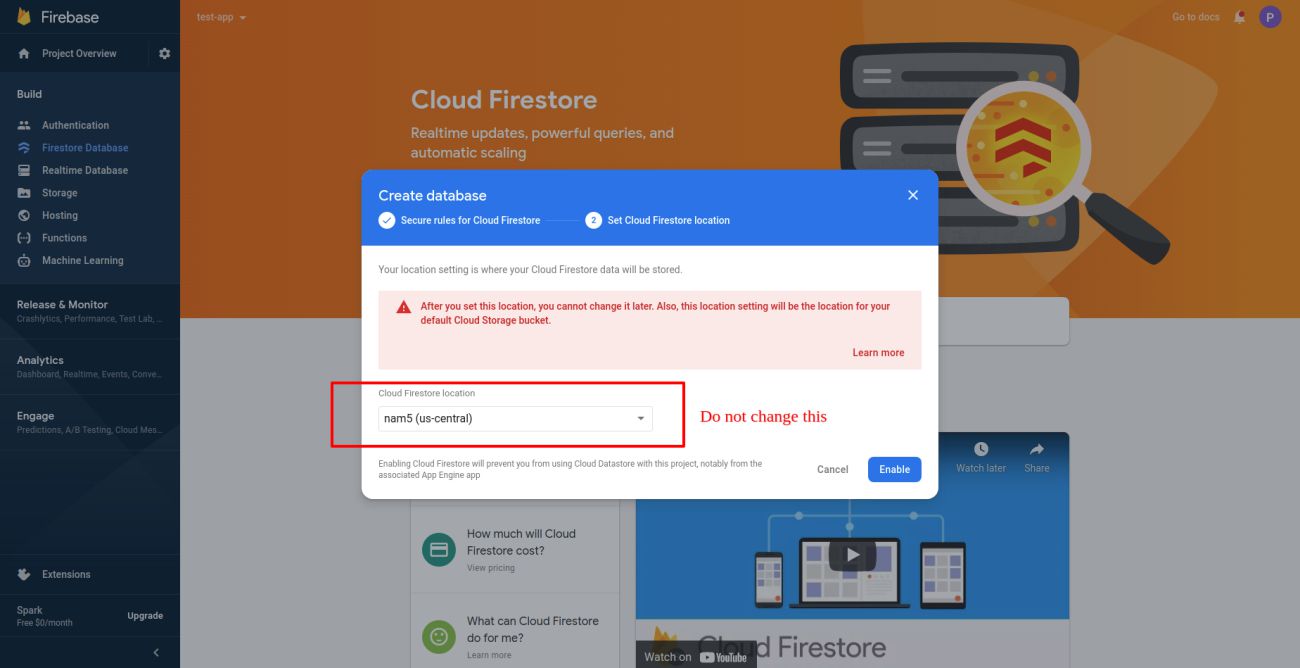
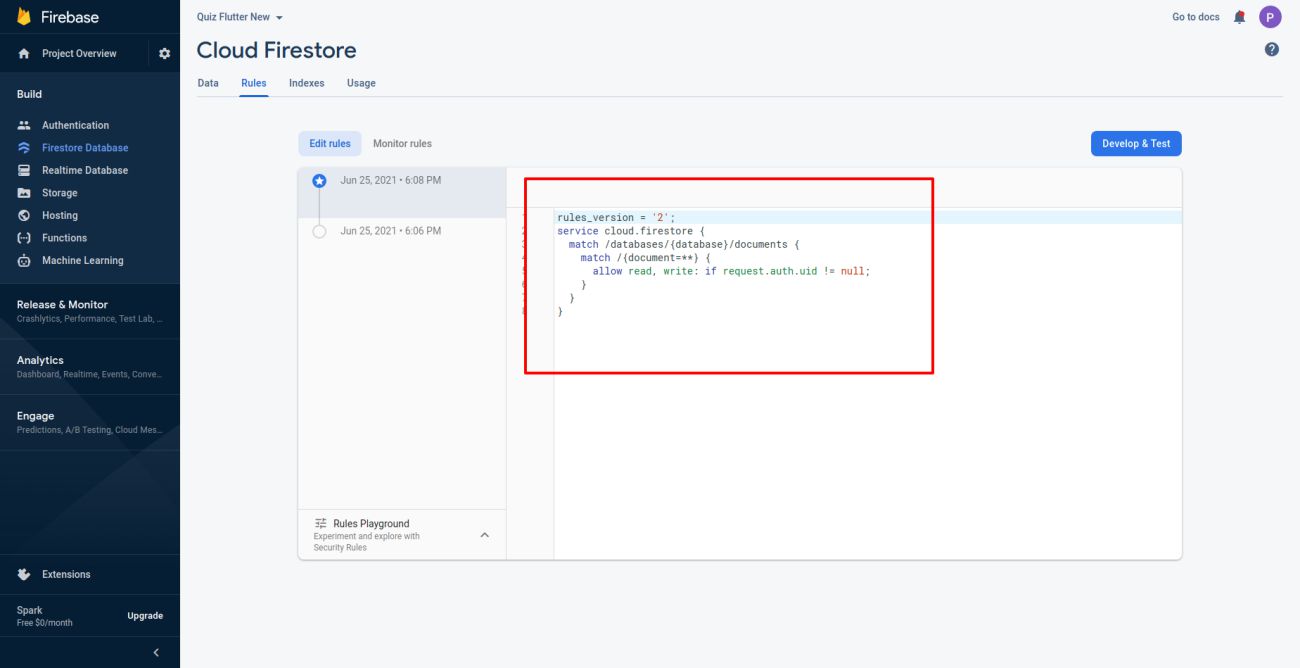
How to enable cloud firestore
- Follow this steps in order to add cloud firestore
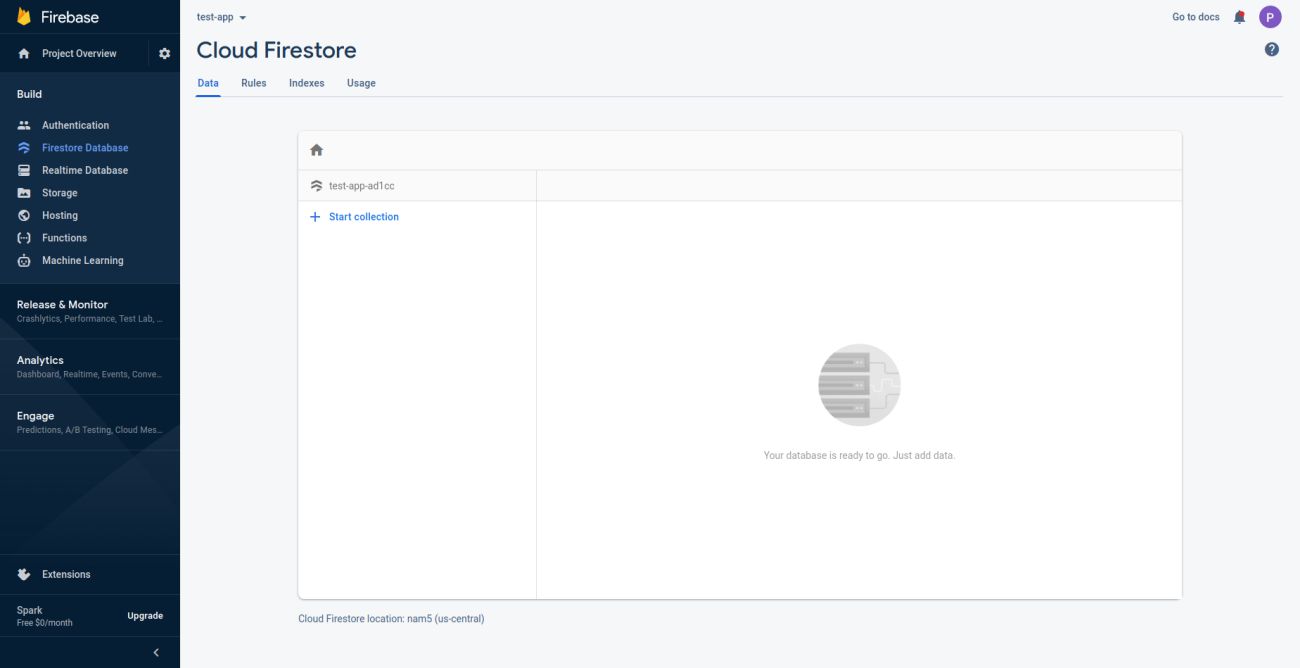
- Change security rules of cloud firestore in order to make your app more secure
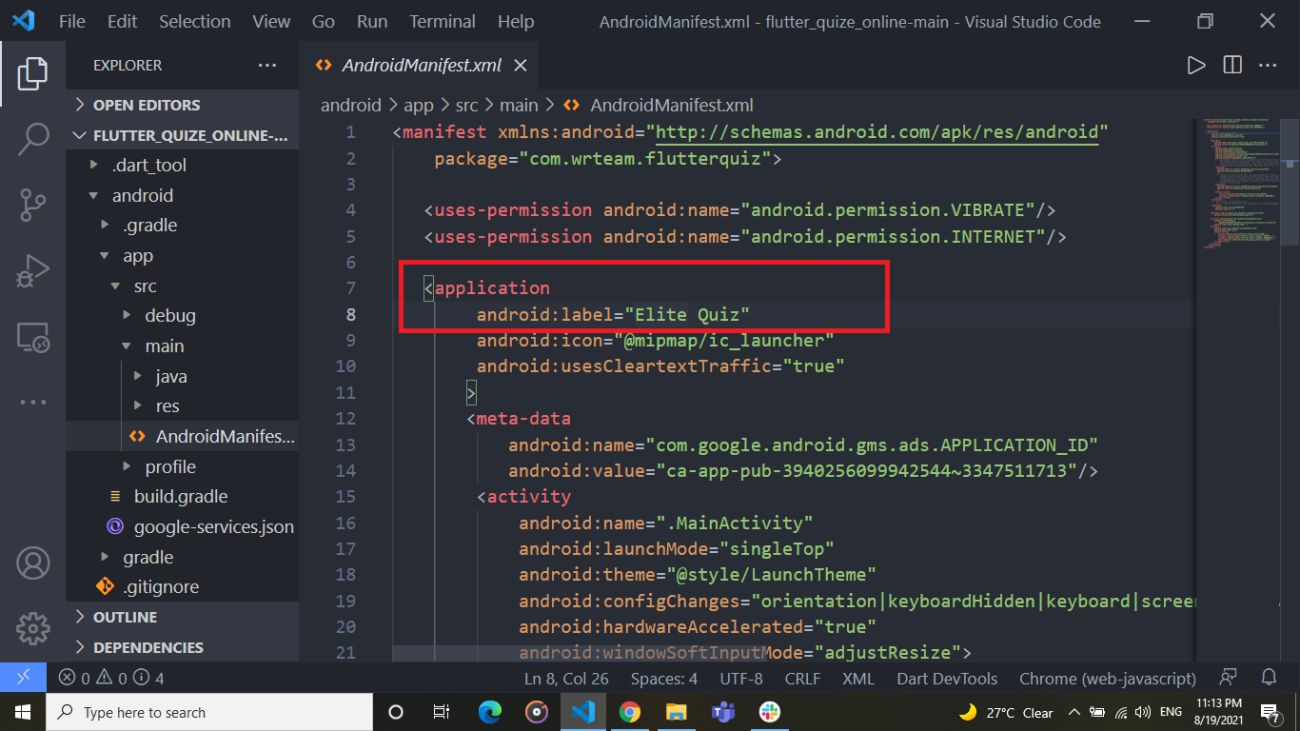
How to change application name
- Change application name for your android application. Go to
android/app/src/main/AndroidManifest.xml and change name
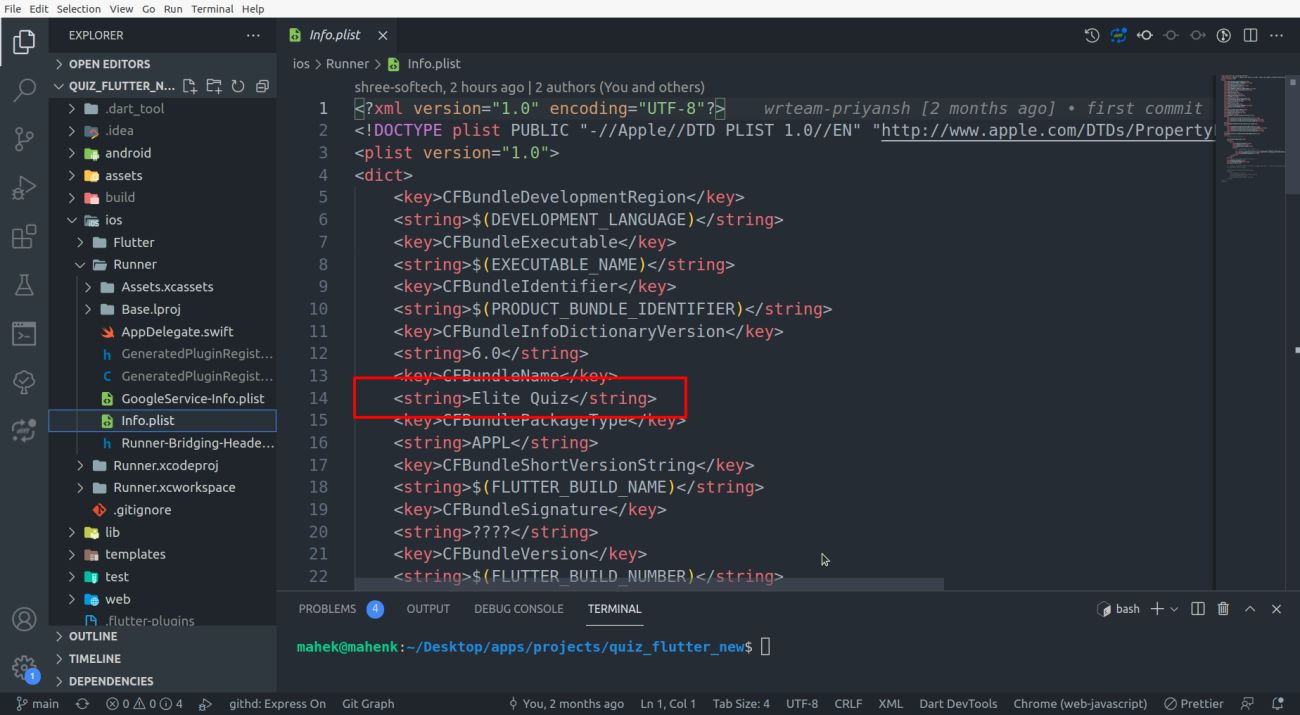
- Change application name for your ios application. Go to ios/Runner/Info.plist and
change name
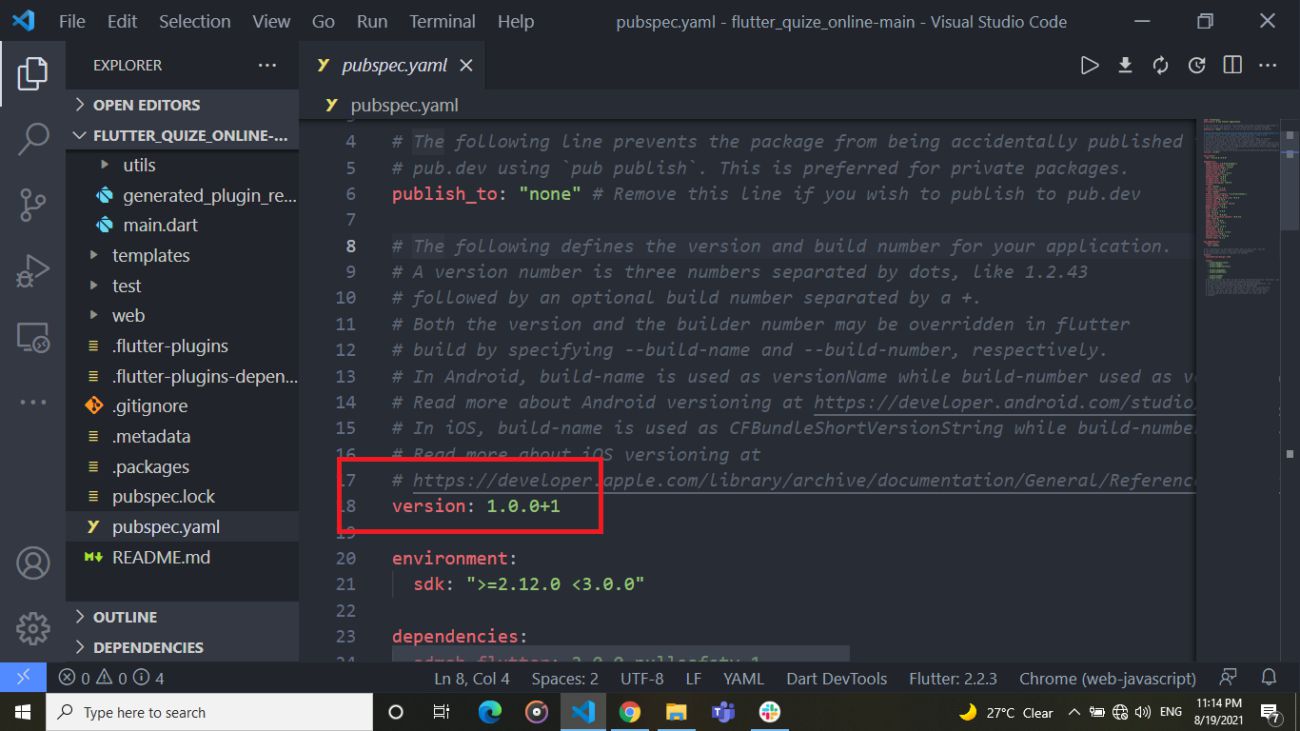
How to change application version and app launcher icon
- go to pubspec.yaml EX.Update version:A.B.C+X in pubspec.yaml.
- Do not forget to execute flutter packages get, flutter build or flutter run after this step
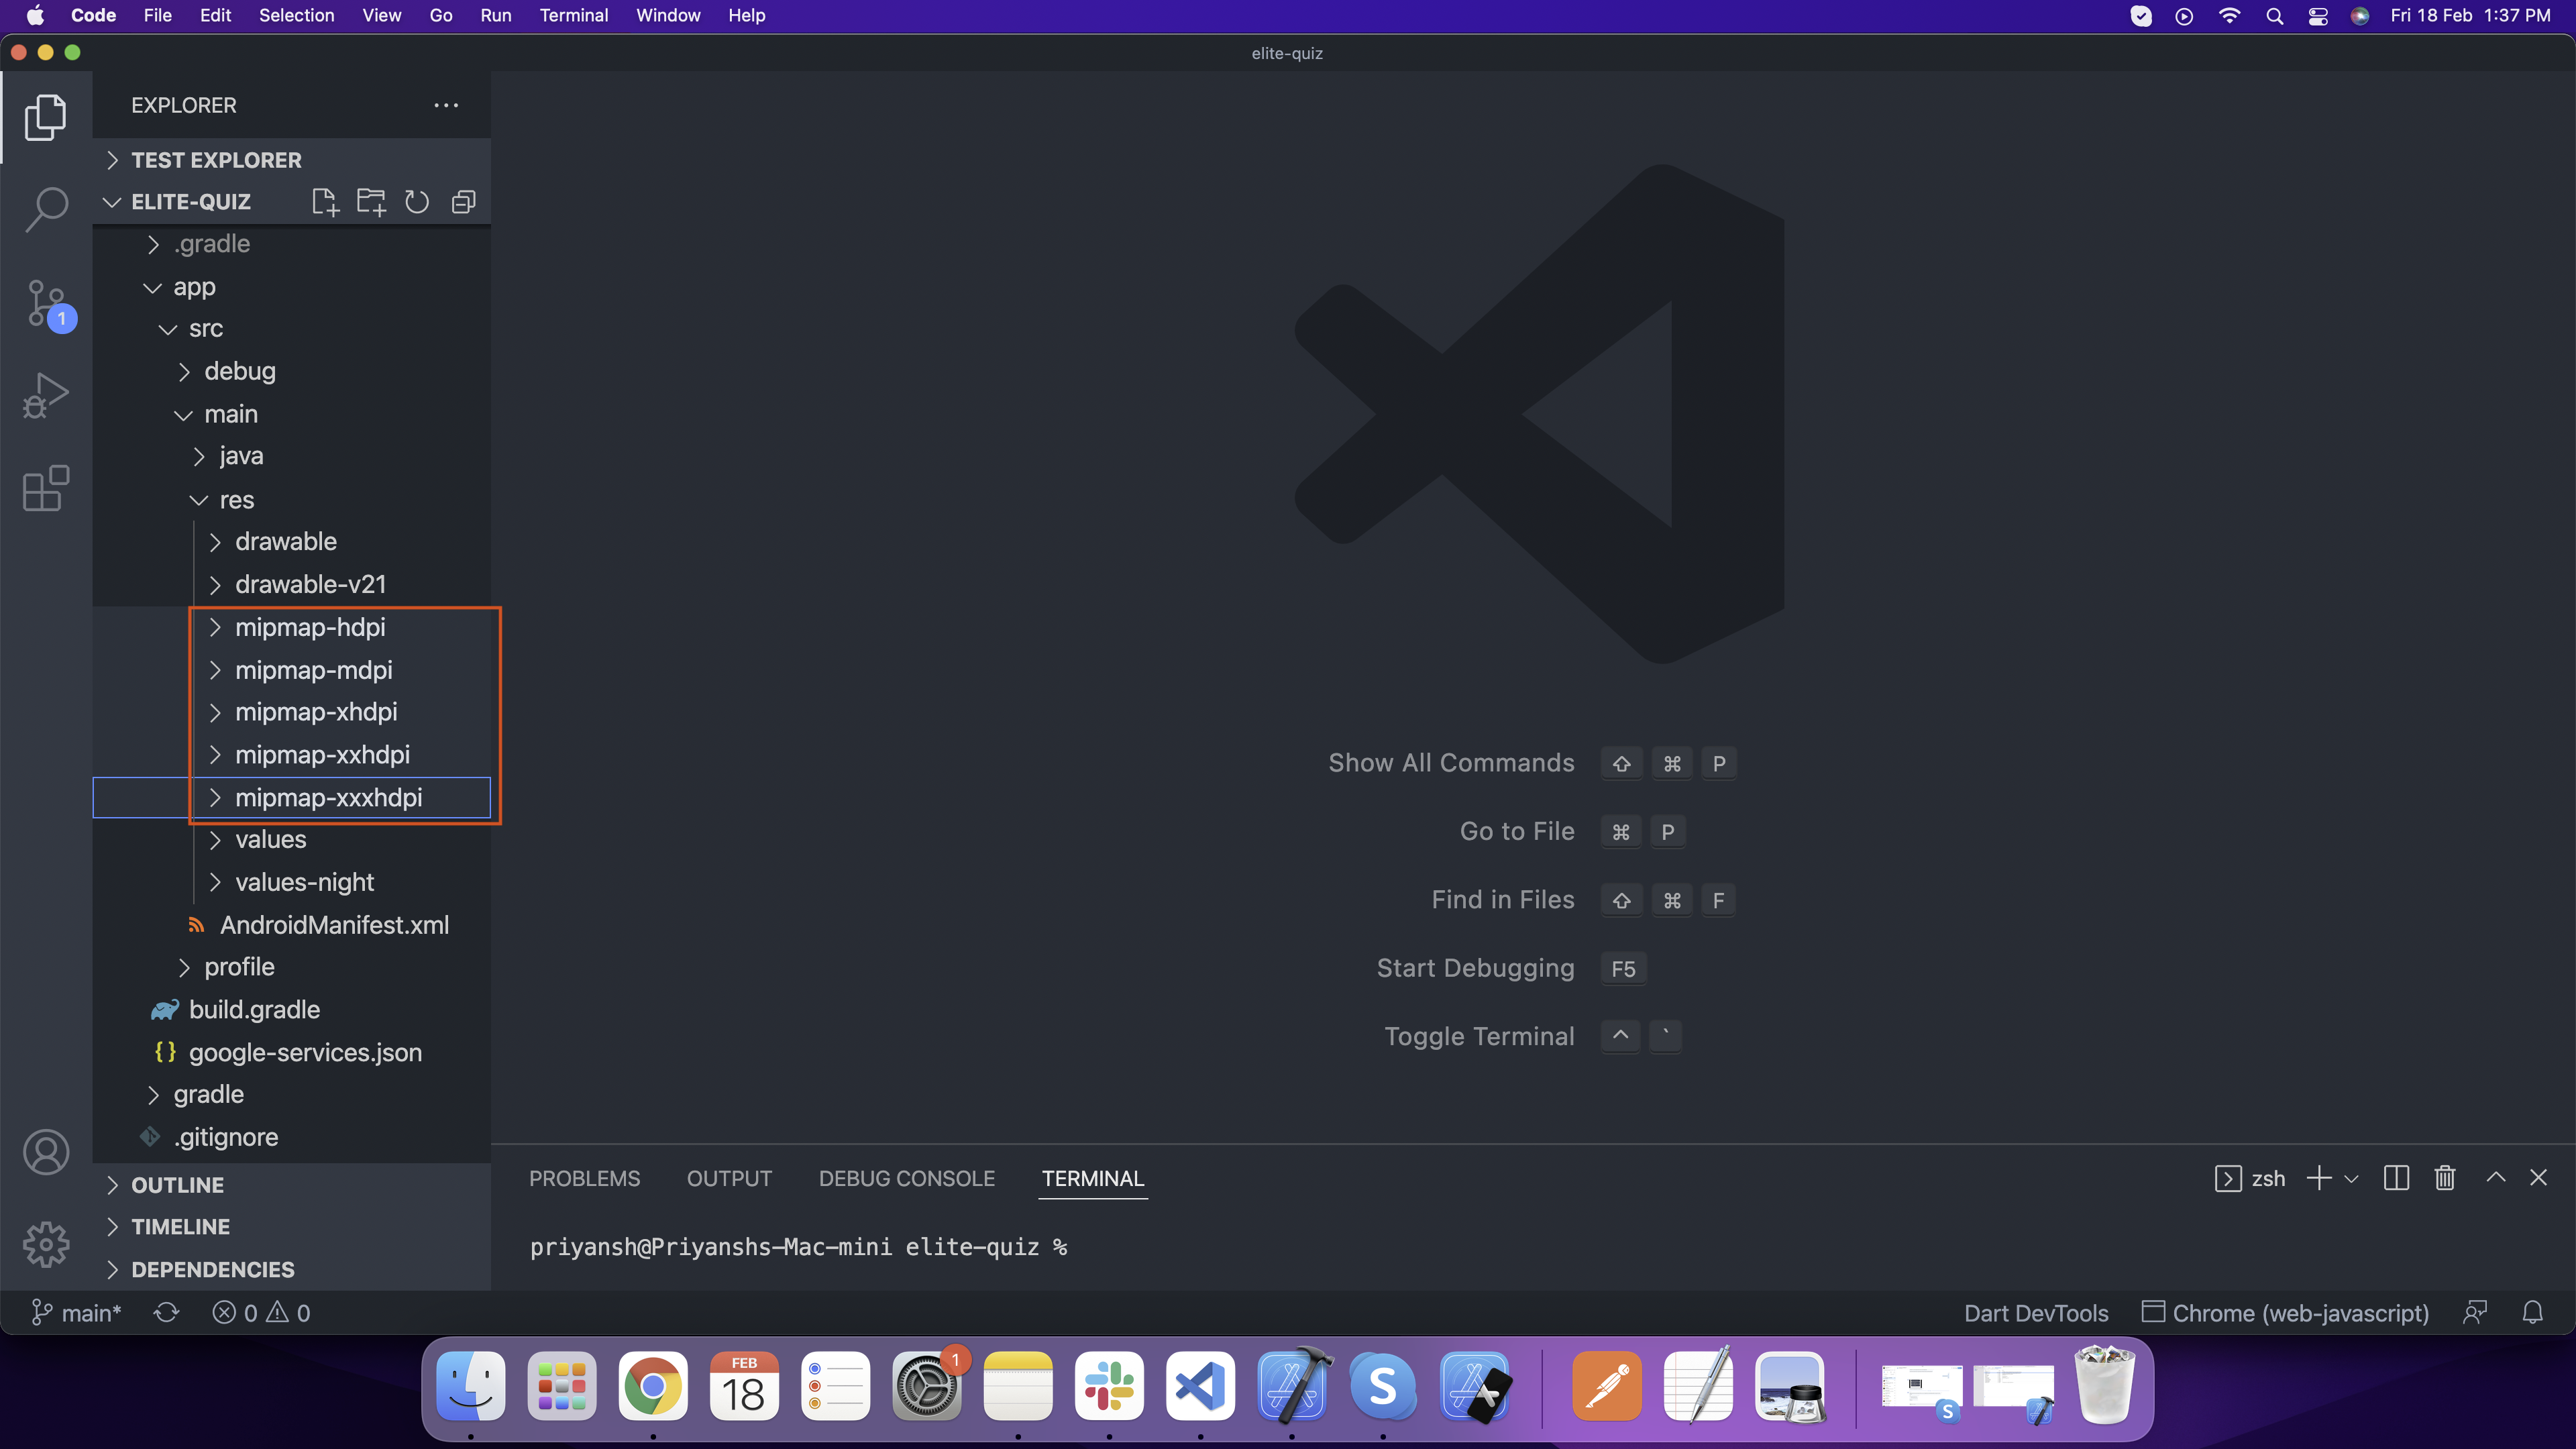
How to change application logo
- For Android For Android, open android > app > src > main > res and add here your
logo according to device screen size
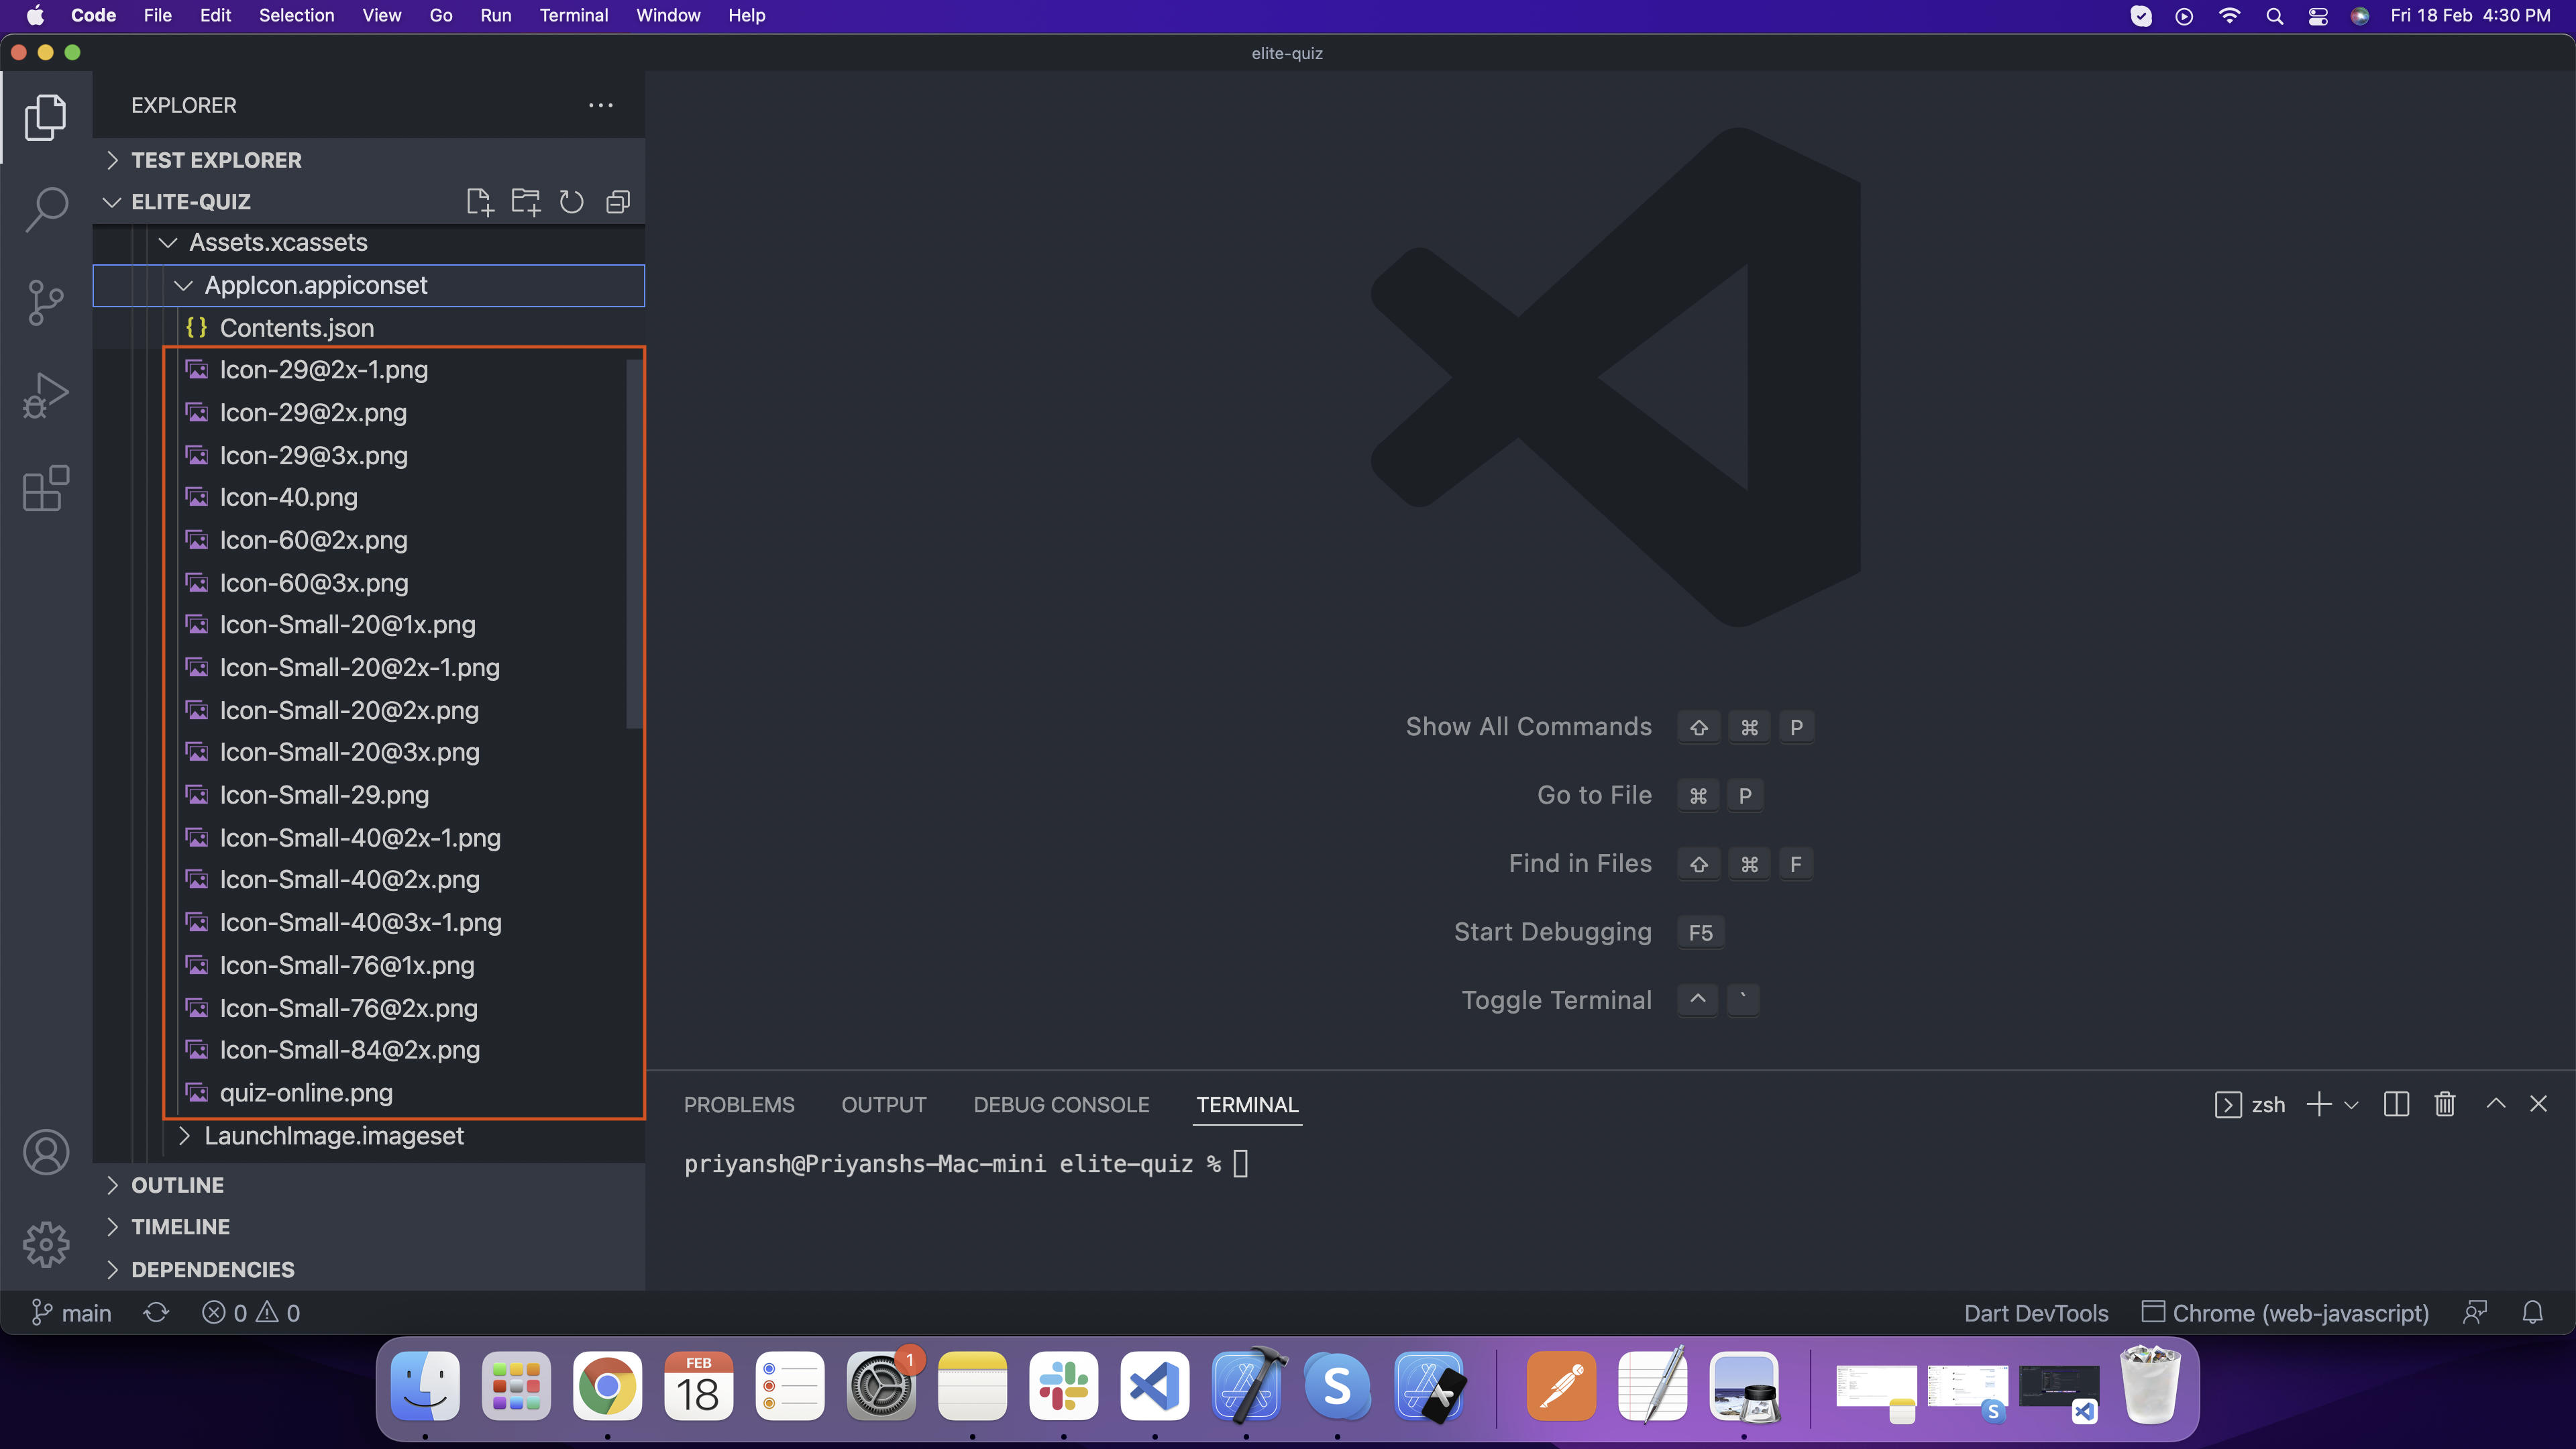
- For IOS open ios > Runner > Assets.xcassets > AppIcon.appiconset here and add your
logo according to diffrent size.
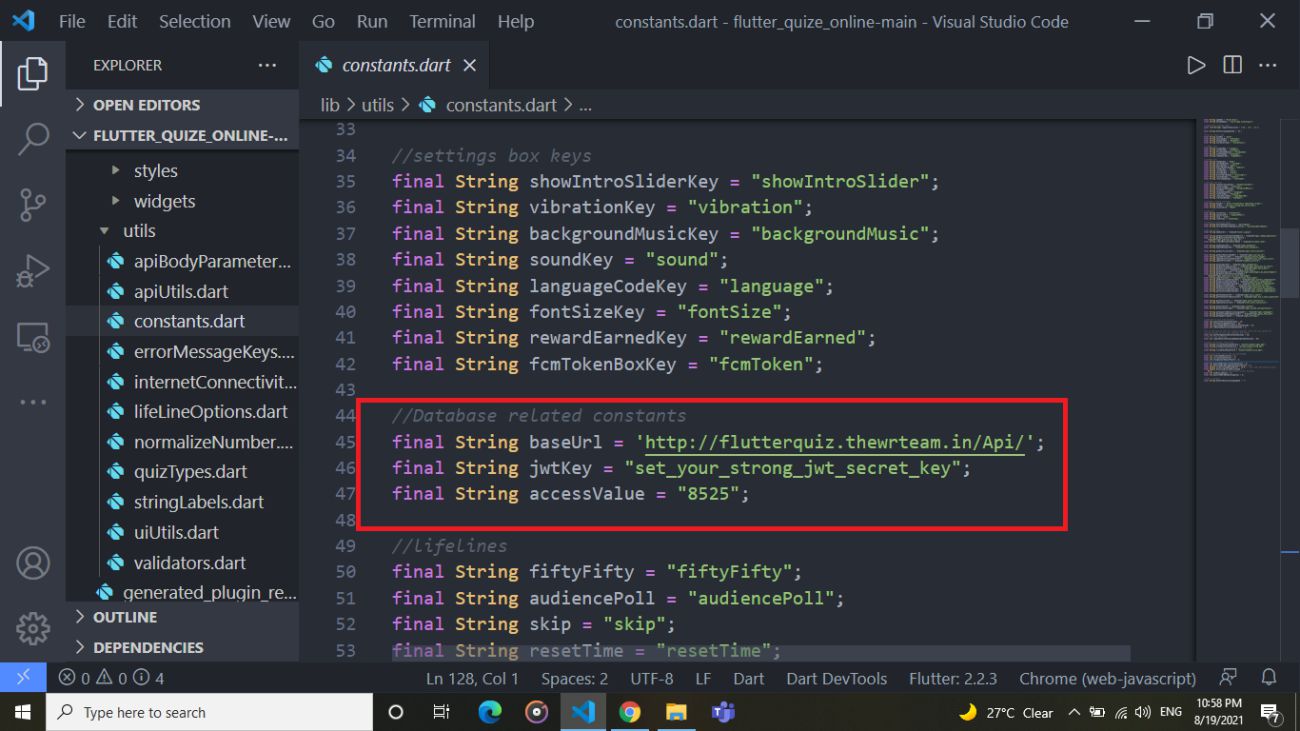
How to change database url and other backend settings
-
Go to lib/utils/constants.dart and make changes shown in below image
How to configure google ads
-
Enable ads from admin panel as show in below image.
If you do not want to add ads in app then skip the further steps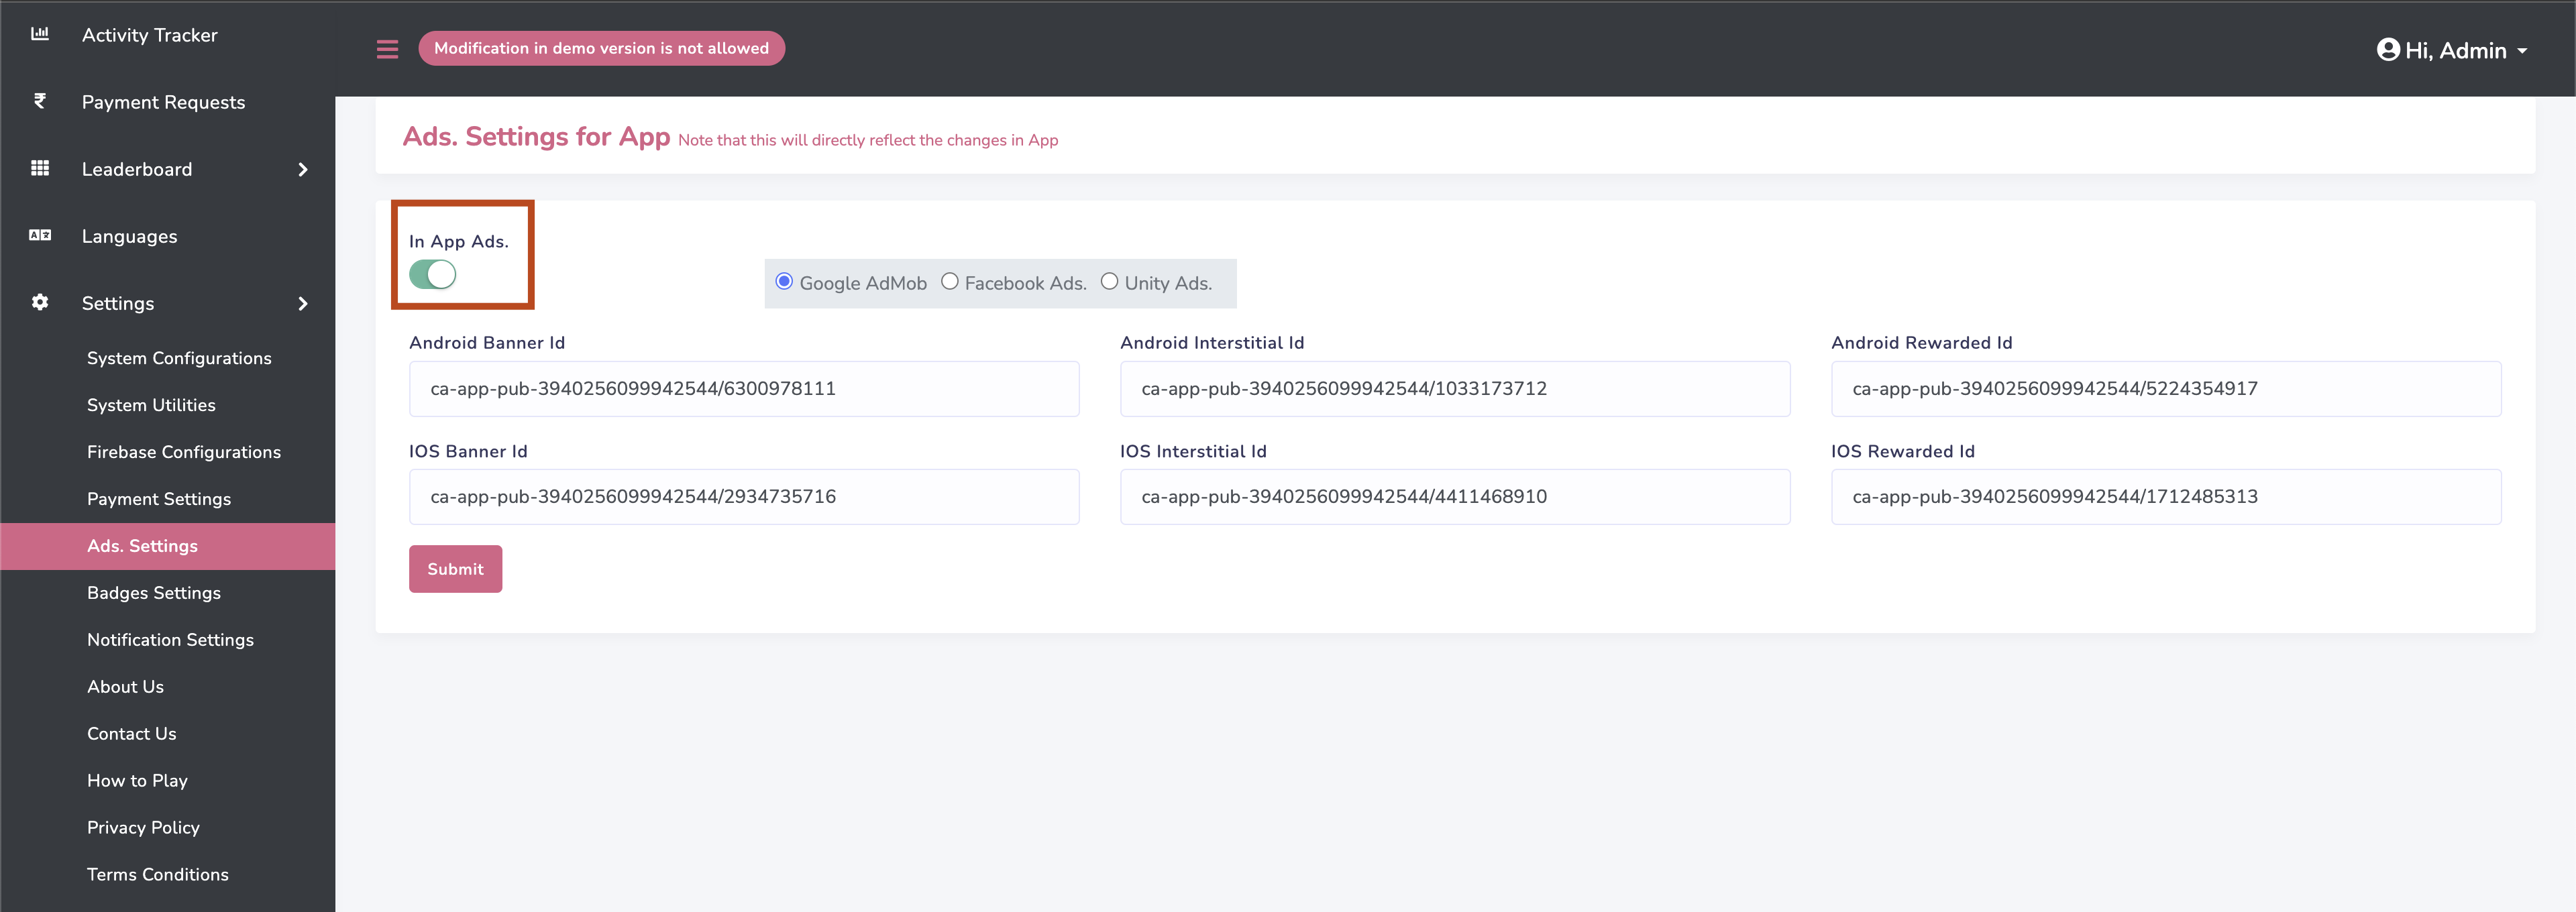
-
Set up google ads
Go to android/app/src/main/AndroidManifest.xml and enter android app id as shown in below image
Find app id of your app as mention here https://support.google.com/admob/answer/7356431?hl=en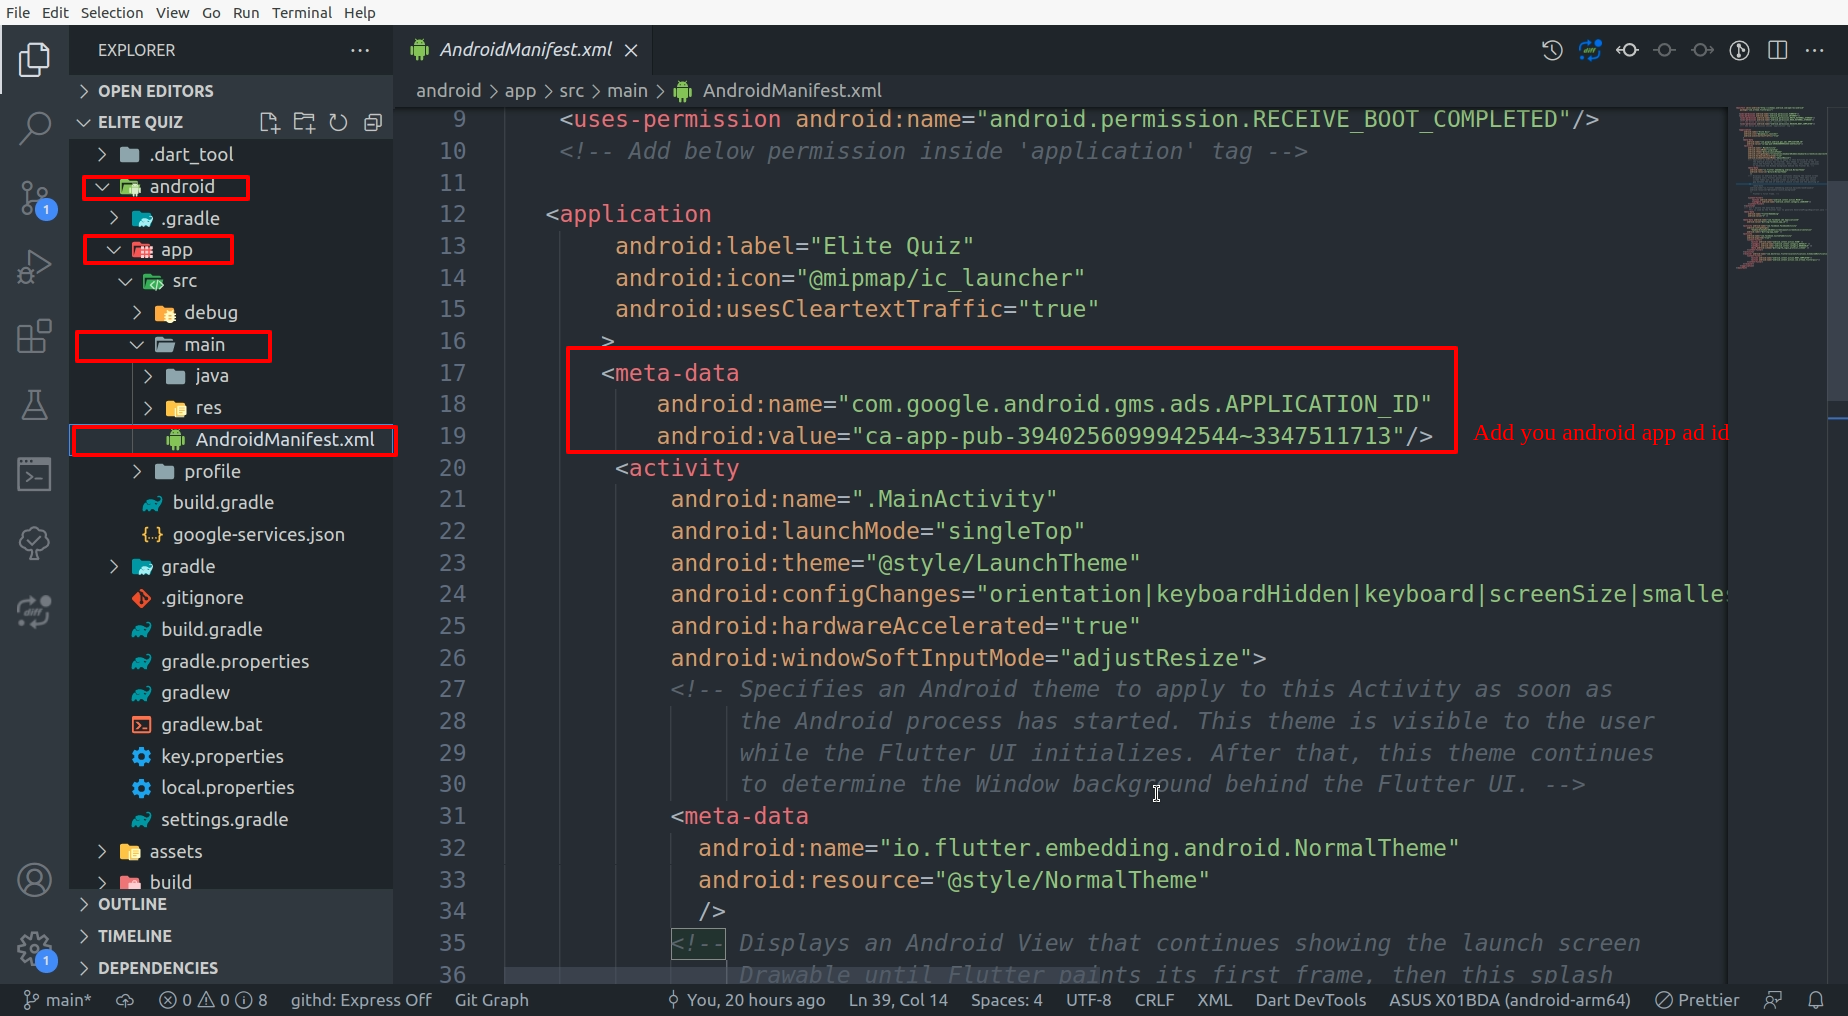
-
Go to ios/Runner/Info.plist and enter ios app id as shown in below image
Find app id of your app as mention here https://support.google.com/admob/answer/7356431?hl=en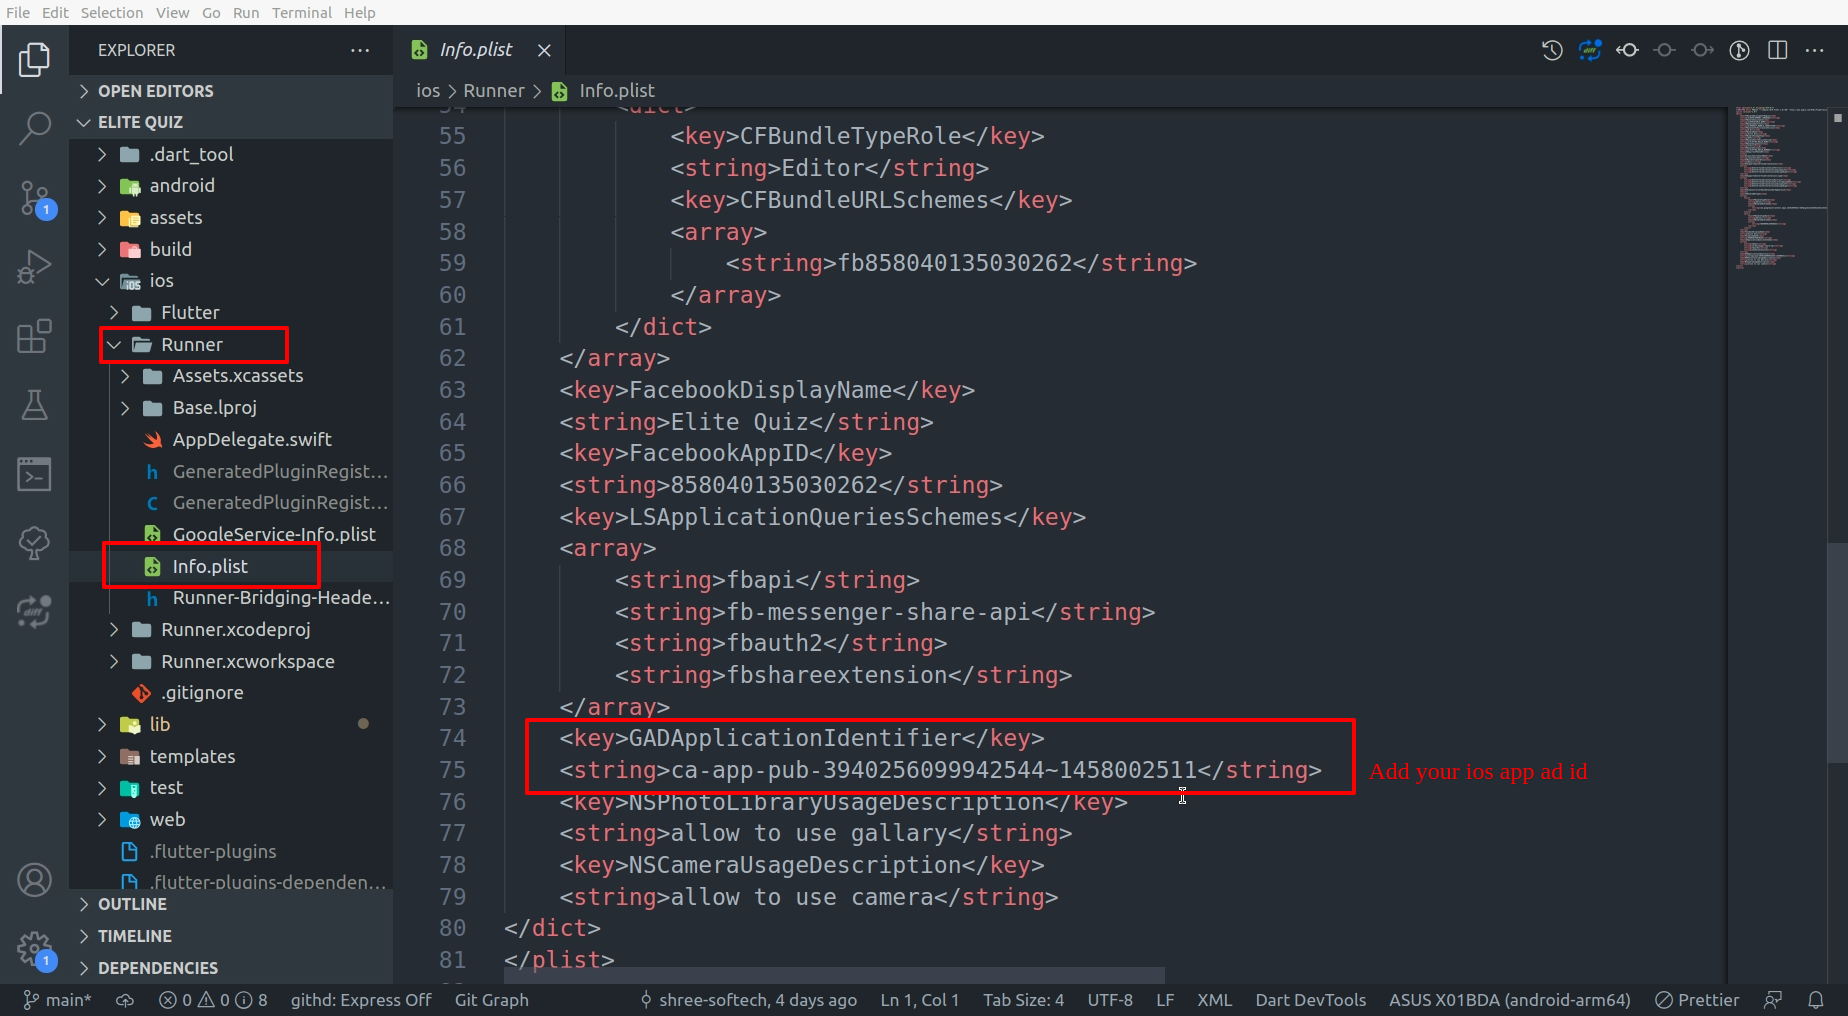
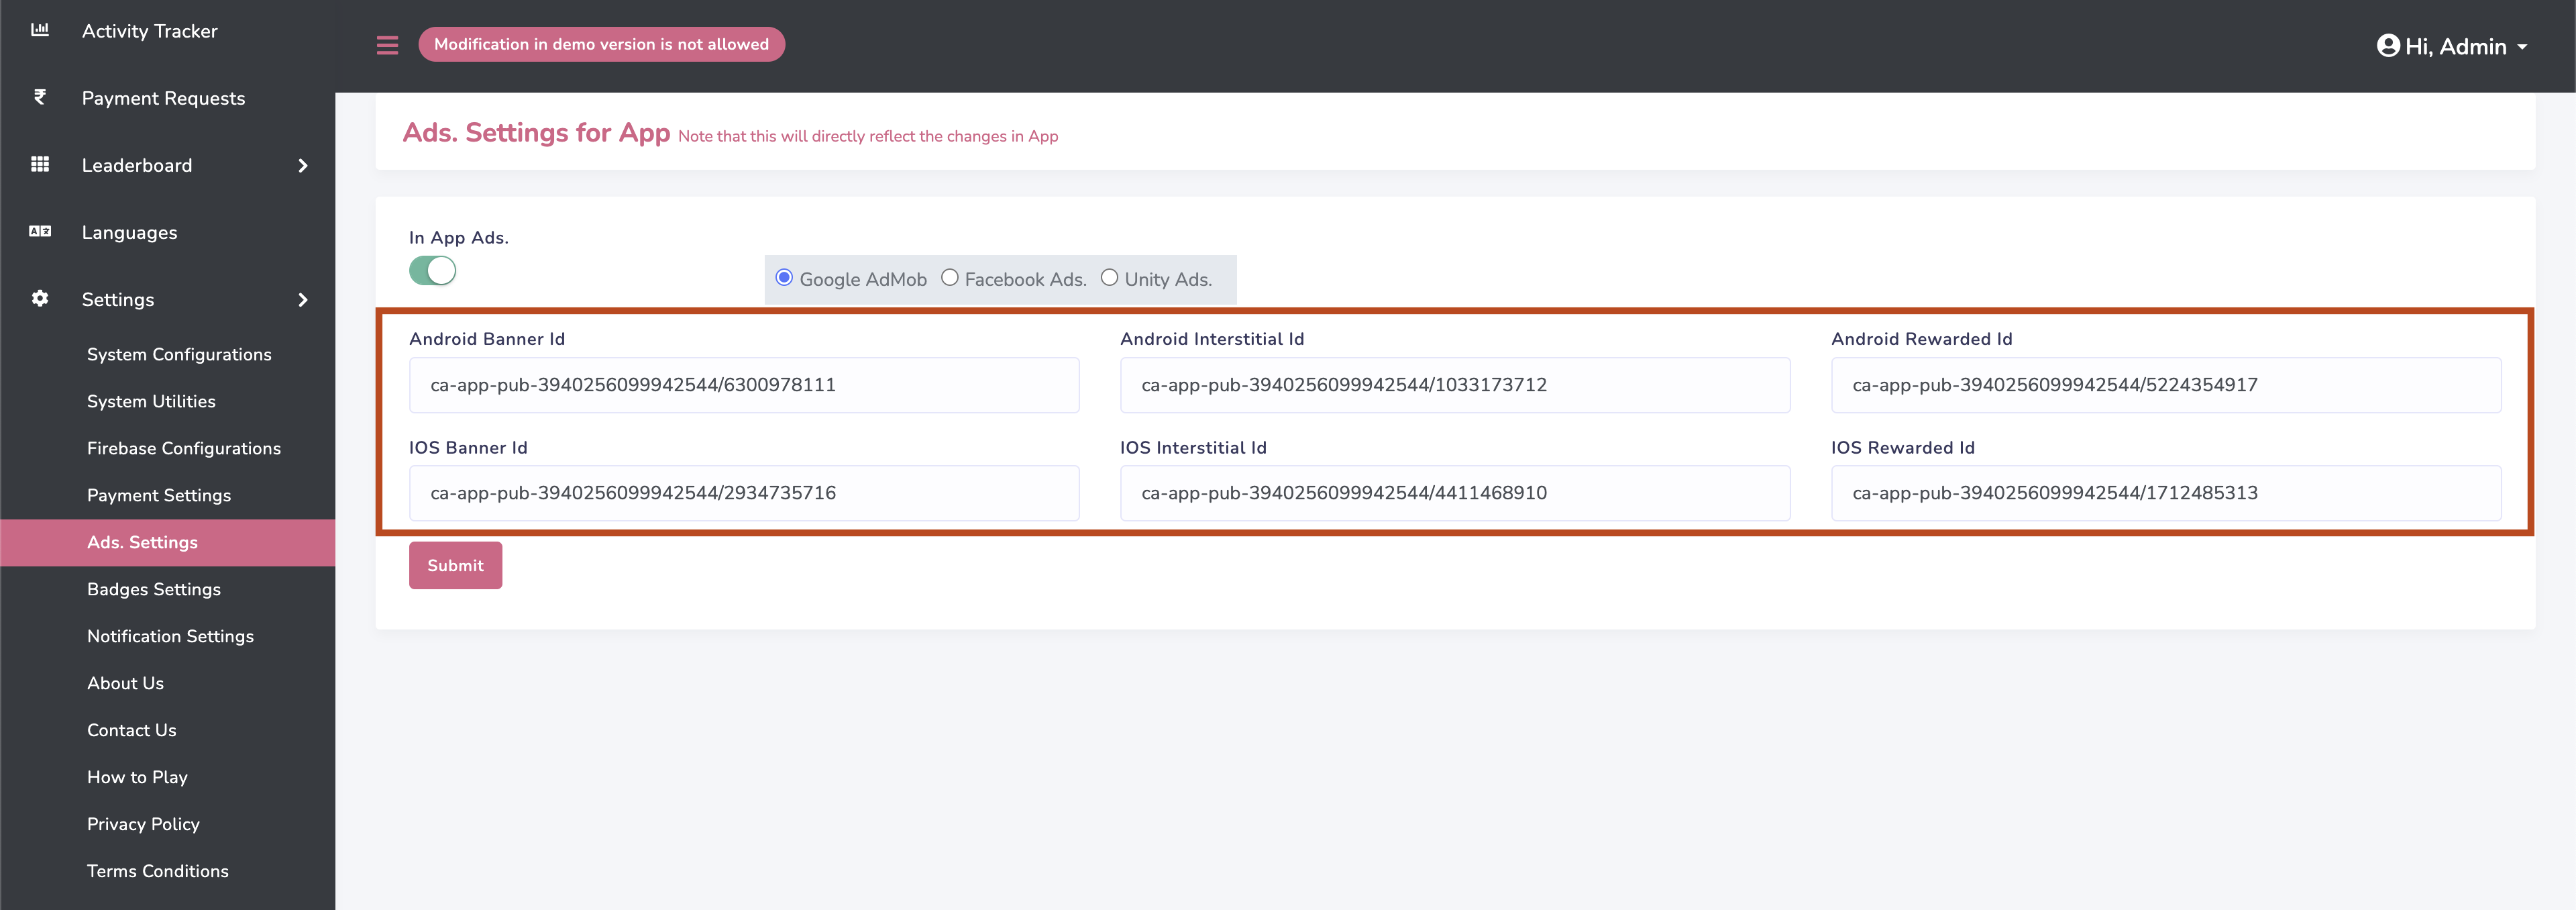
-
Go to settings/Ads.Settings in admin panel and add google ads id as shown in below
image
-
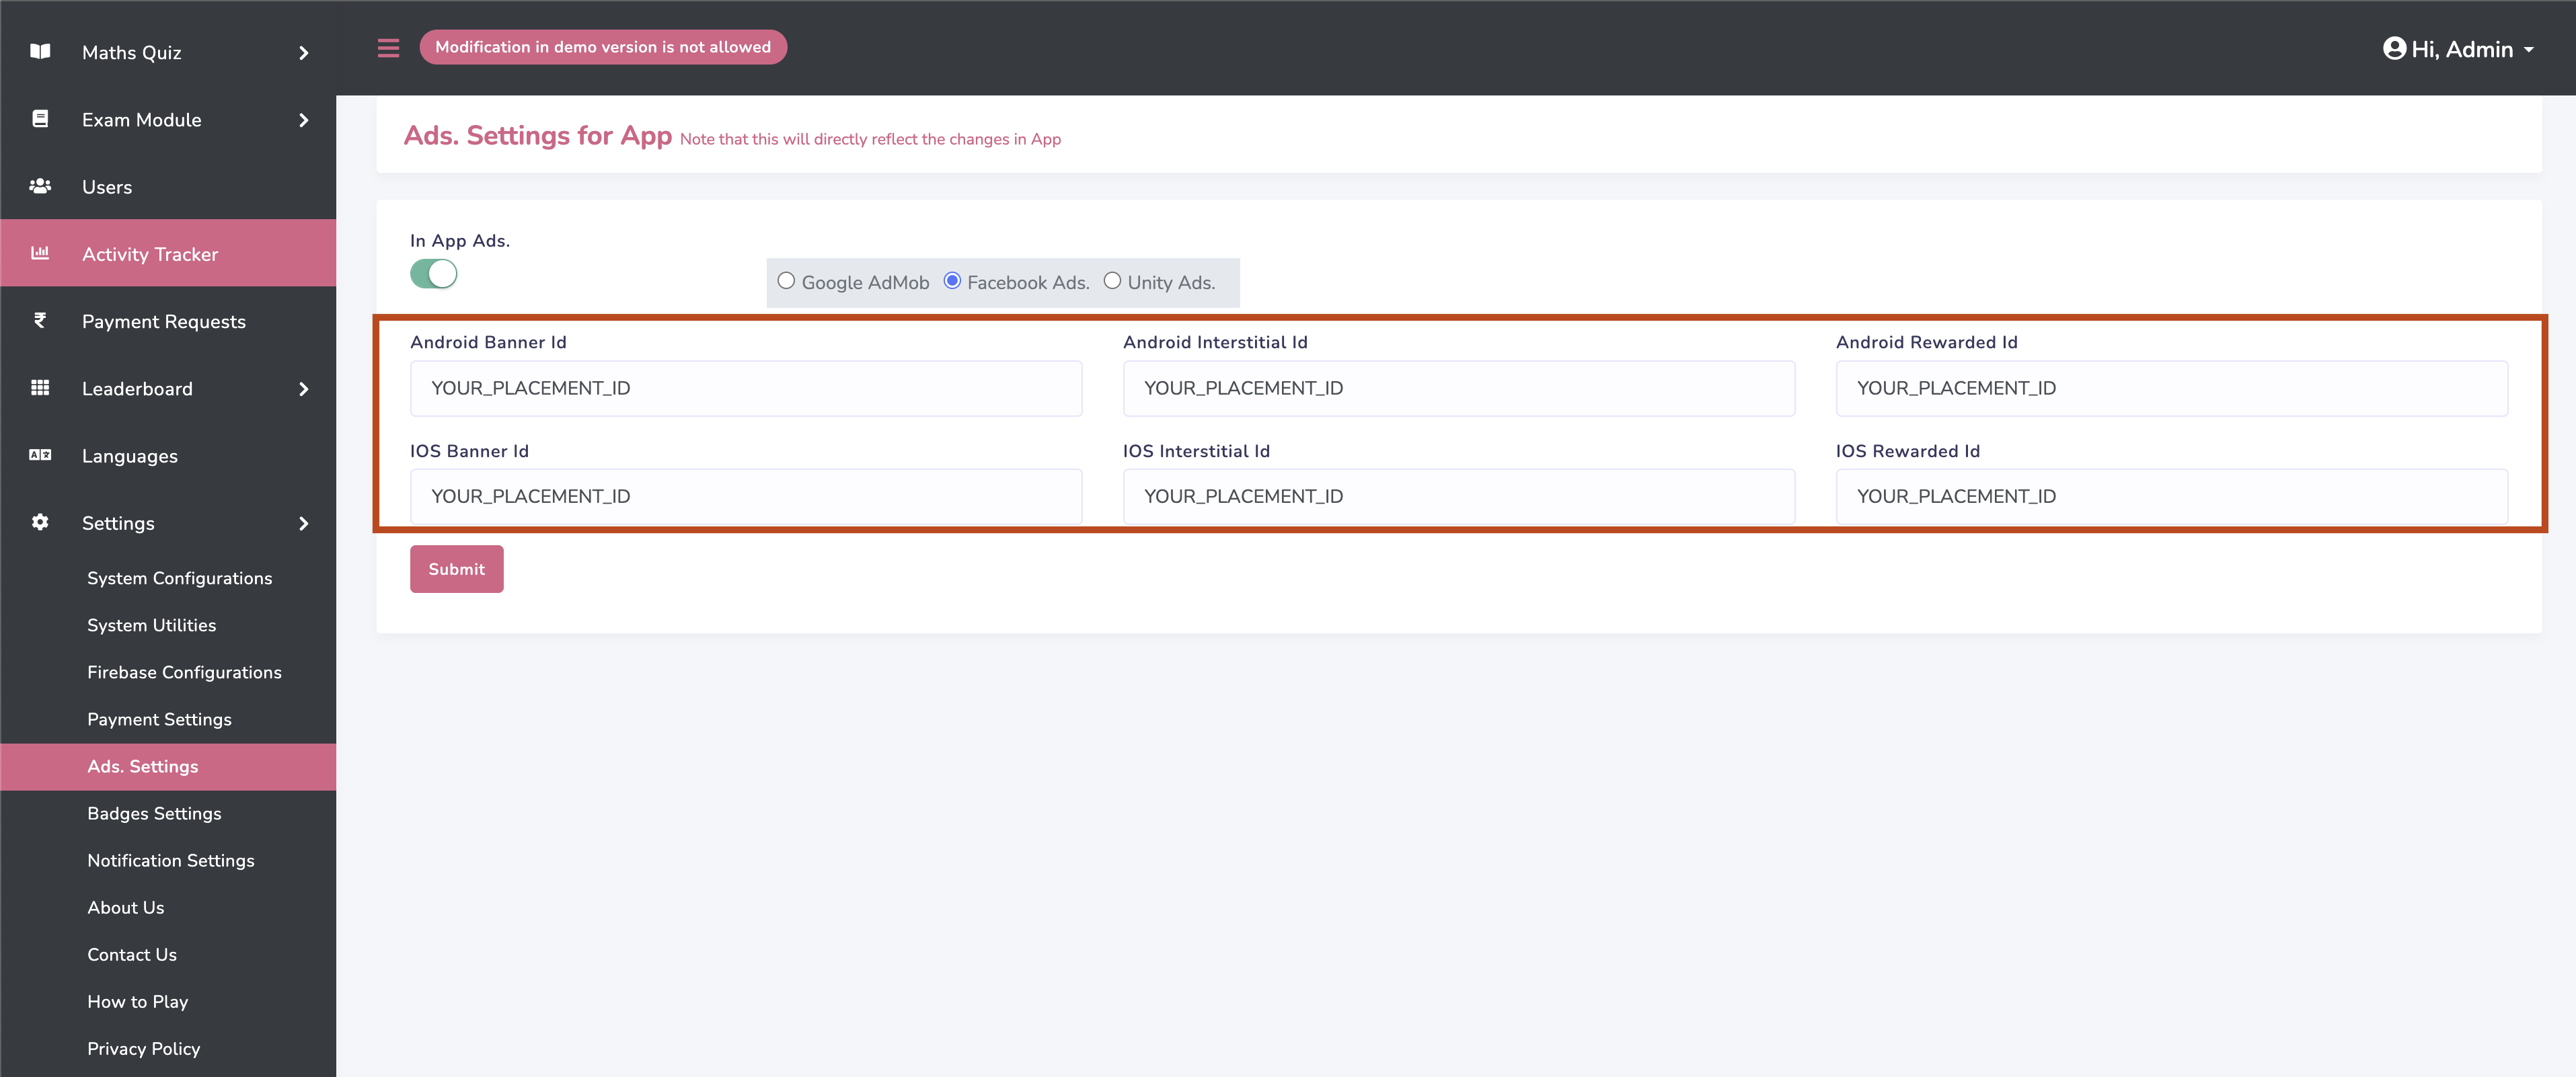
Go to settings/Ads.Settings in admin panel and add facebook ads placement id as
shown in below image.
Facebook rewarded ad is not supported for ios as of now. We will sure add support
for it in future.
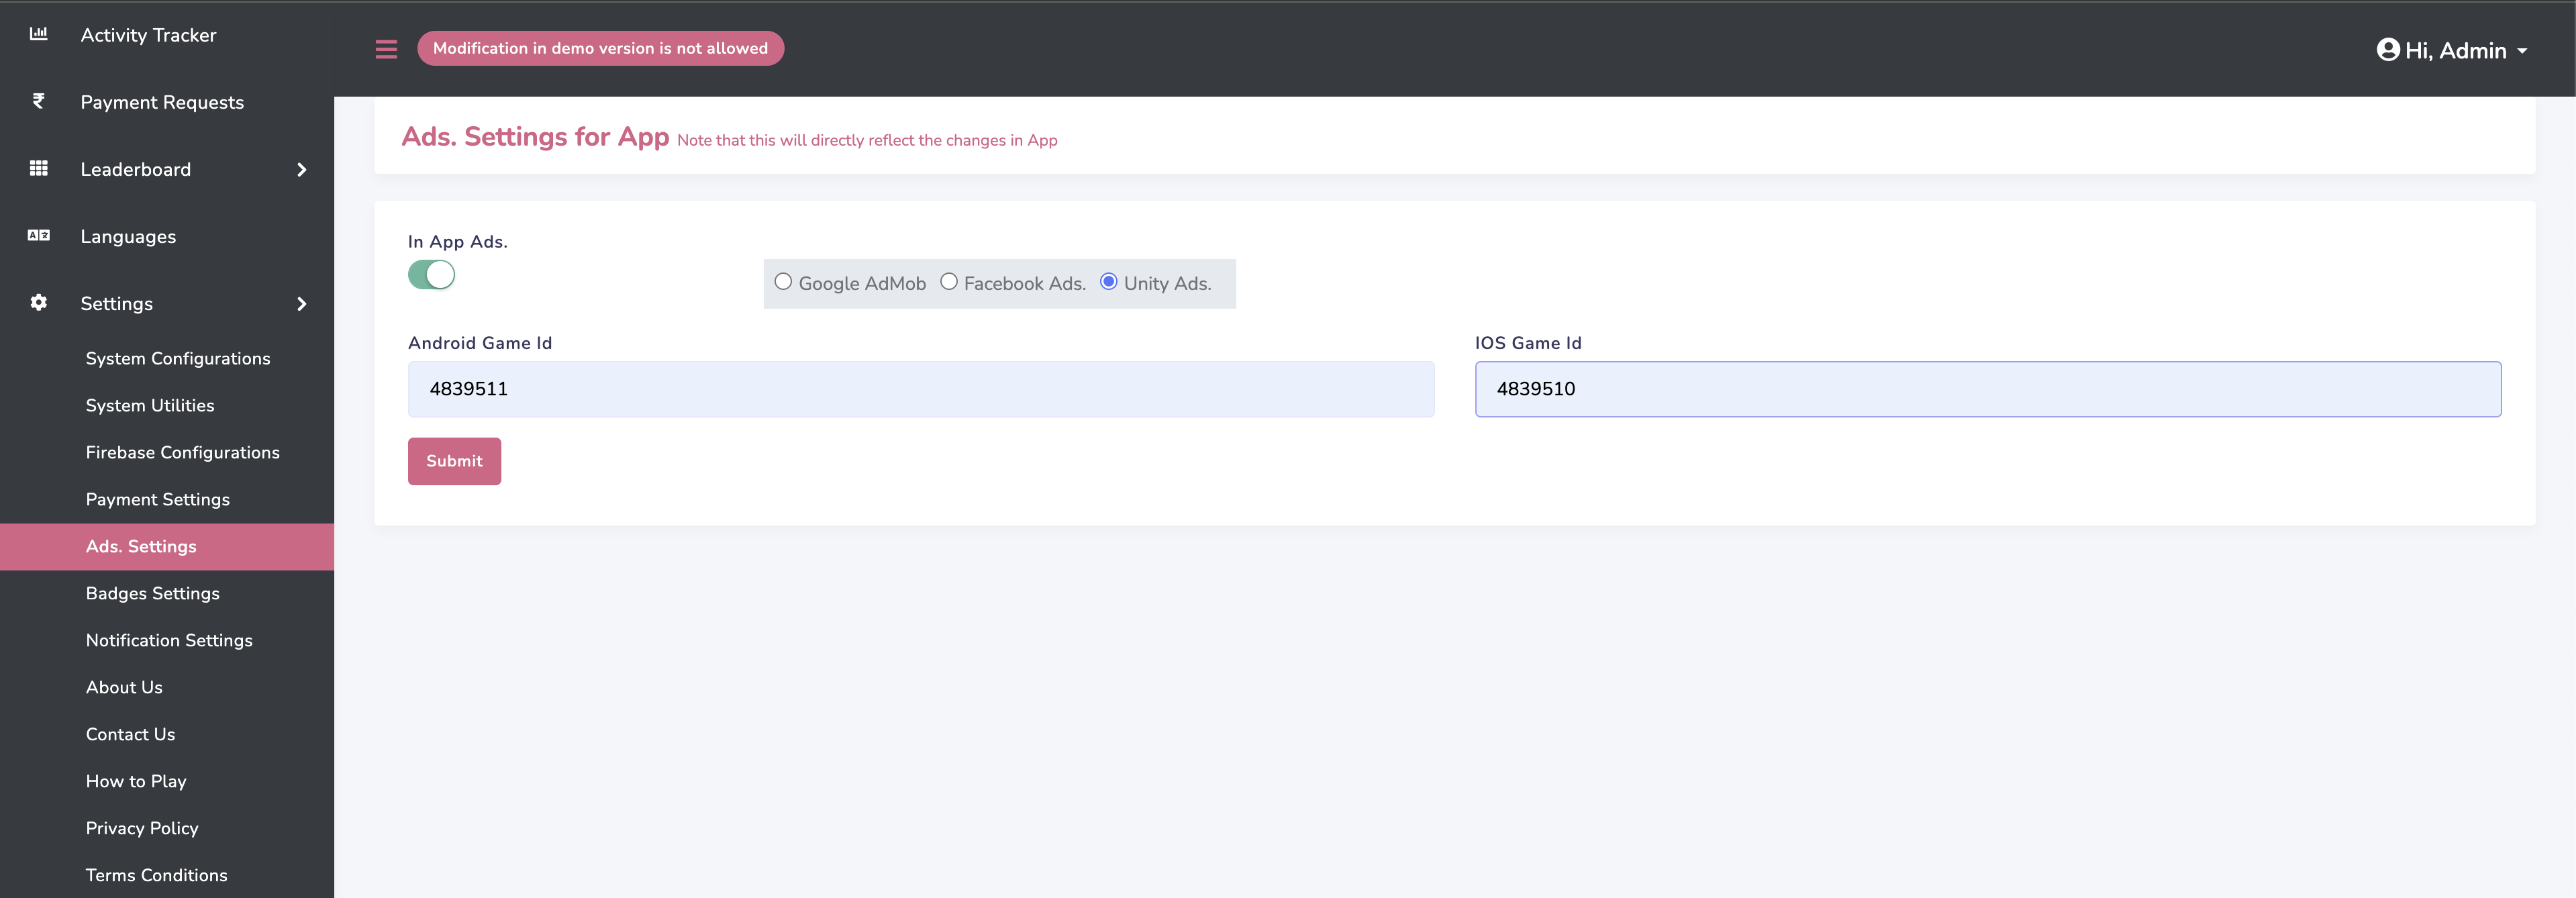
-
Go to settings/Ads.Settings in admin panel and add Unity ads id as shown in below
image
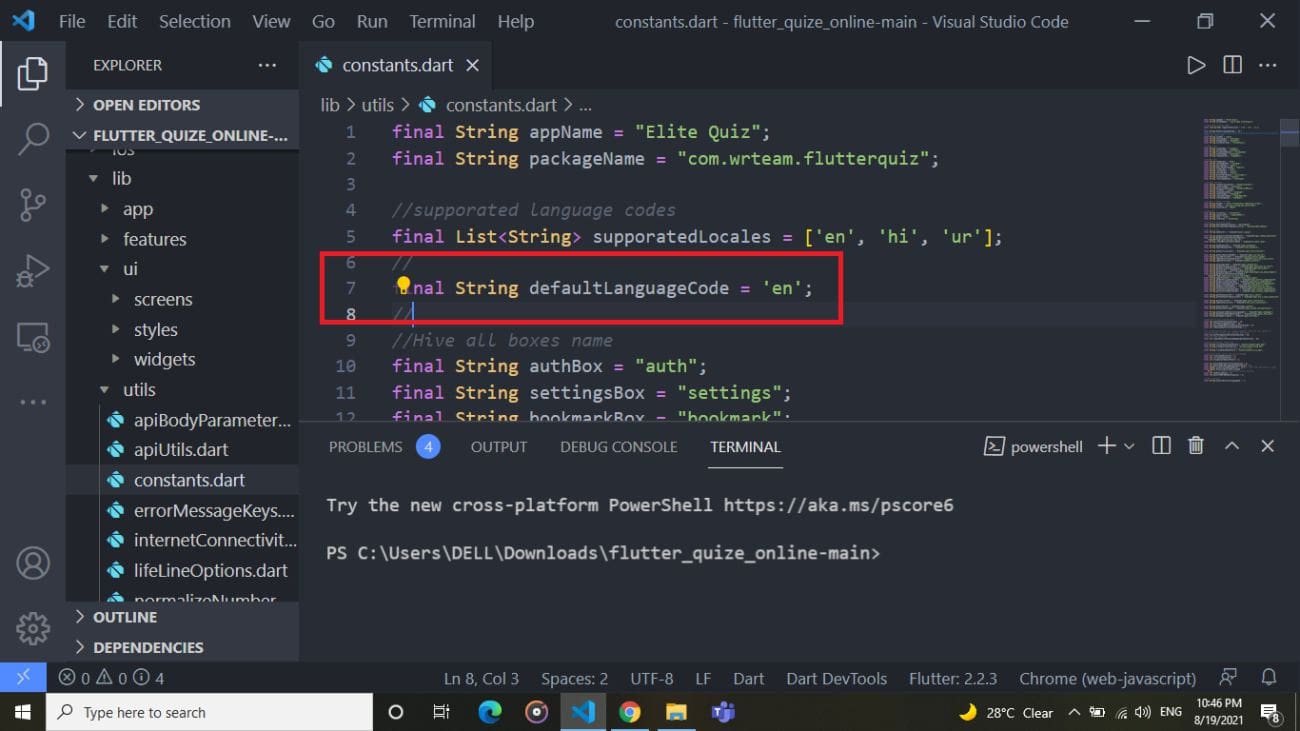
How to set default language
-
By default,default applicaiton language is english. If you want to change default
language
go to lib/utils/constants.dart and add your respective language's code shown in
below image.
Get your language code from here
https://developers.google.com/admin-sdk/directory/v1/languages.
Make sure your language code is avaialble in
https://developers.google.com/admin-sdk/directory/v1/languages.
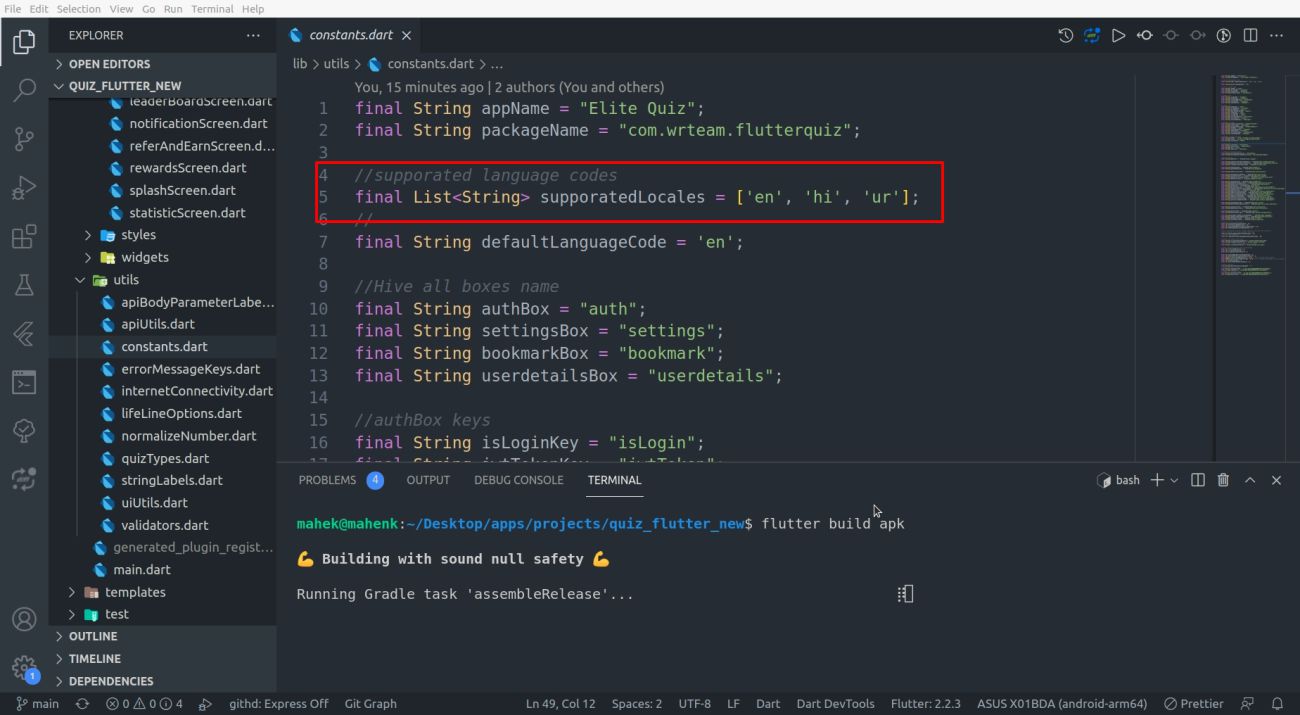
-
If your default language code is not in supported language list add language code
in list as shown in below image. Go to lib/utils/constants.dart
-
If your default language is not in assets/languages/[language-code].json then create
new file
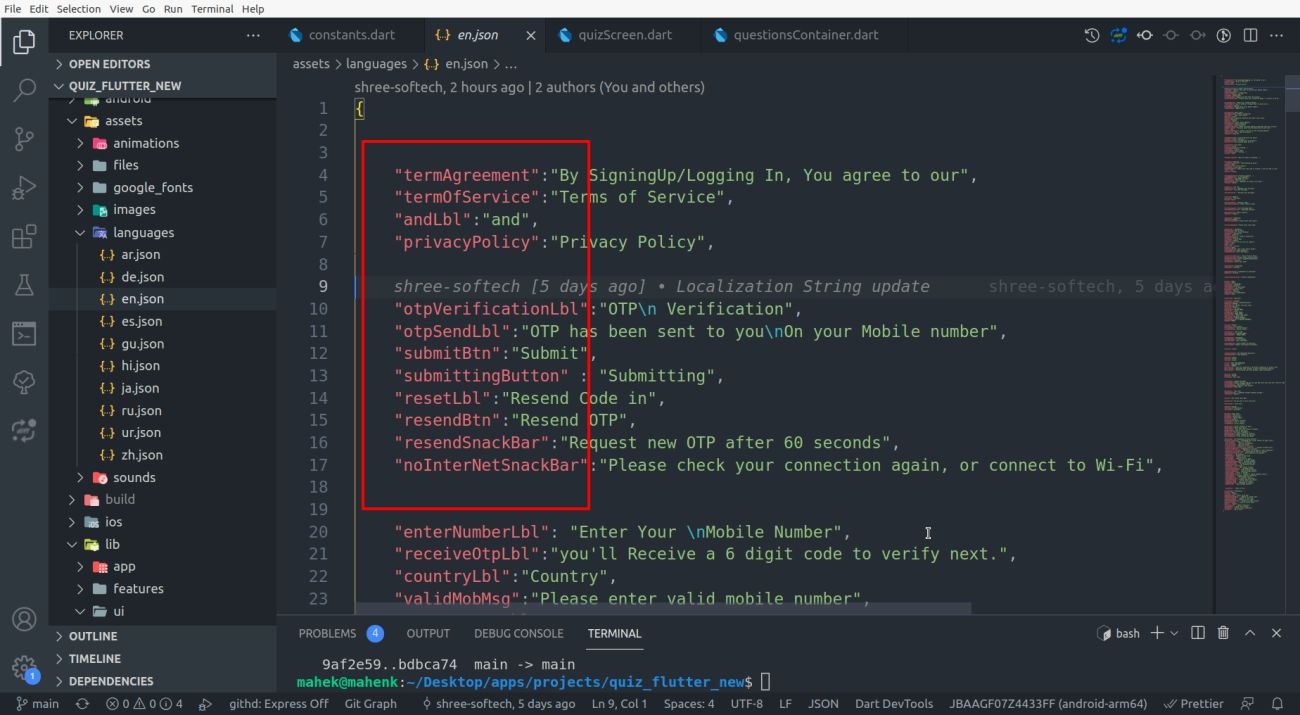
in same folder with [language-code].json. Add all the labels from en.json and
convert label values in your respective language
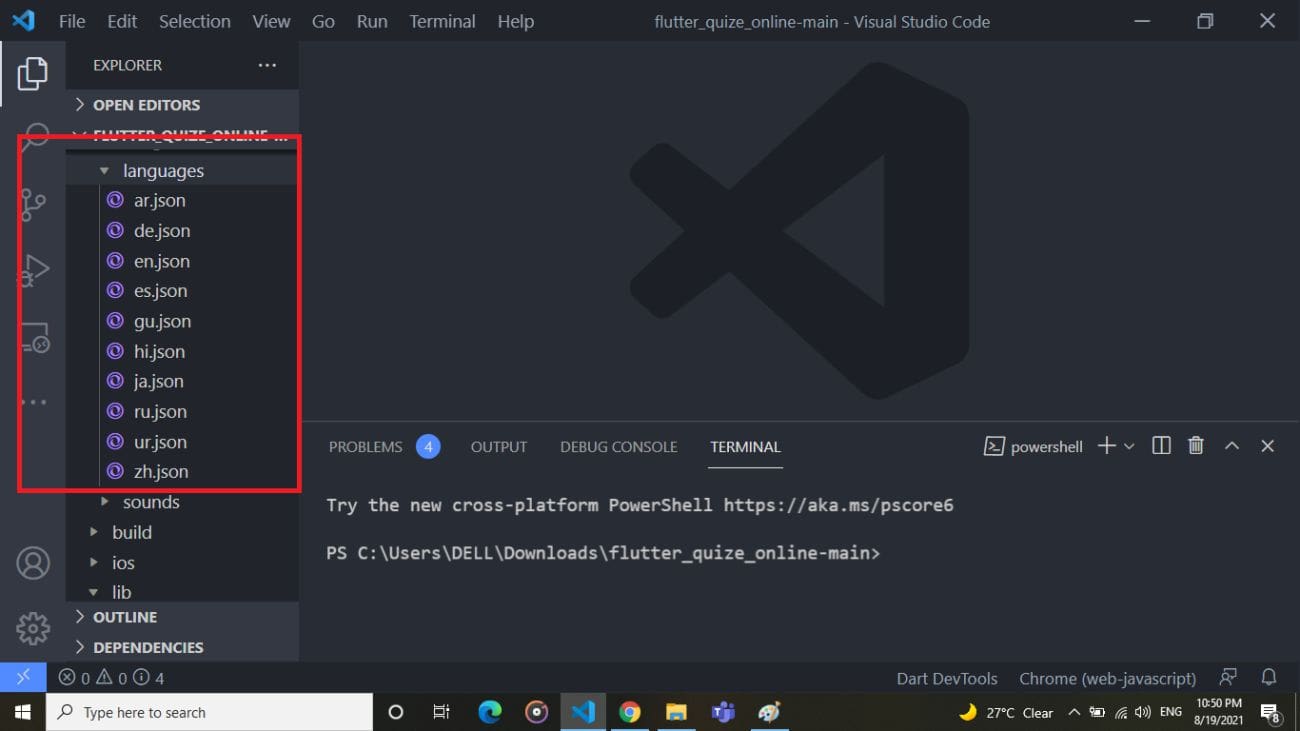
-
copy all the labels form en.json file in your [language-code].json file.
How to add new language
-
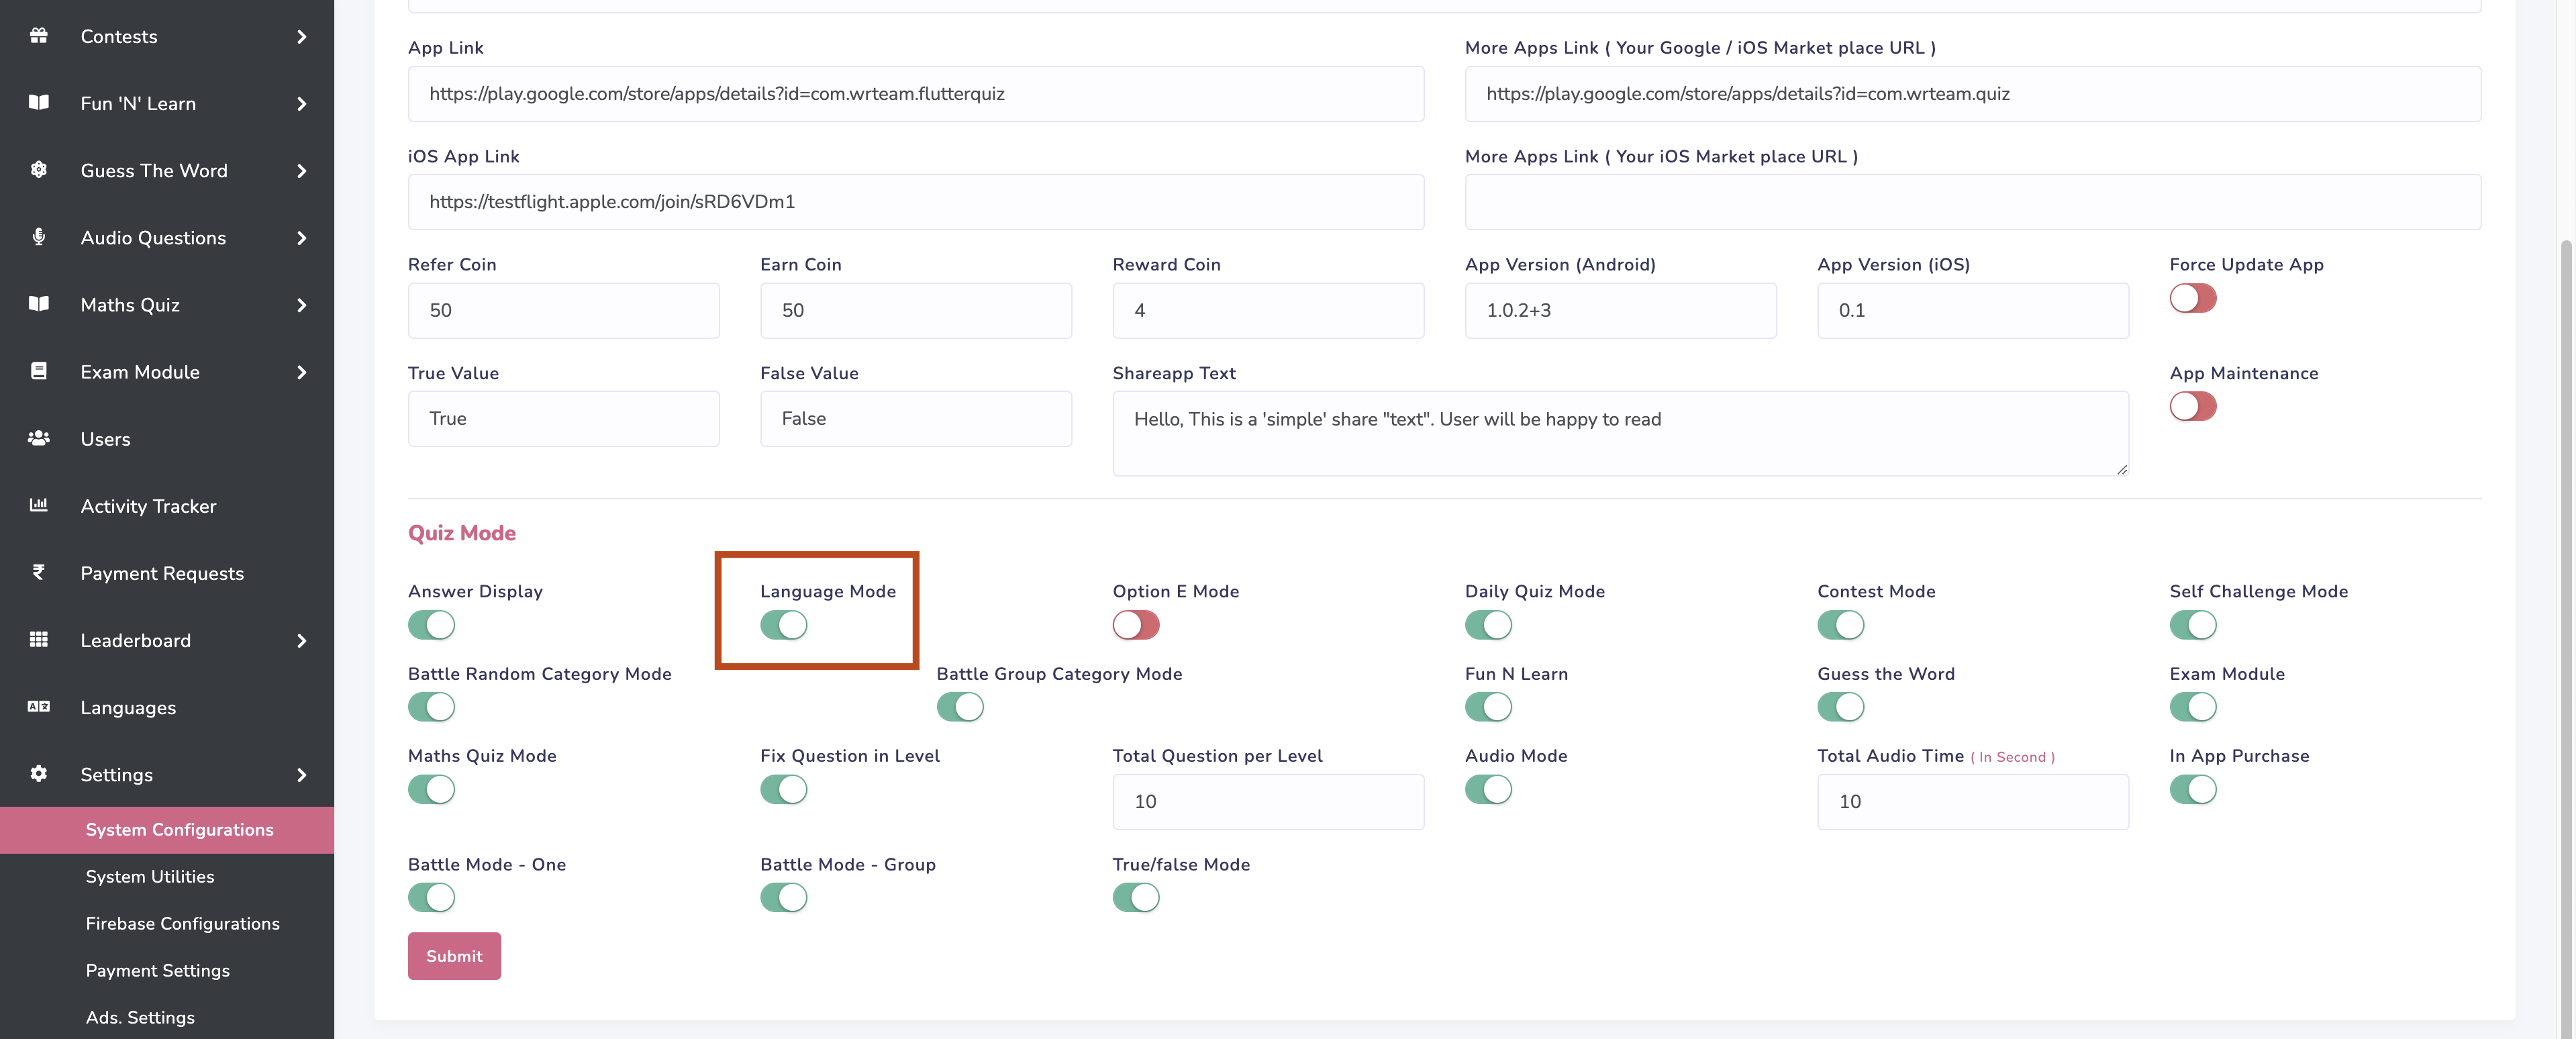
Go to your admin panel and enable language mode as shown in below image
-
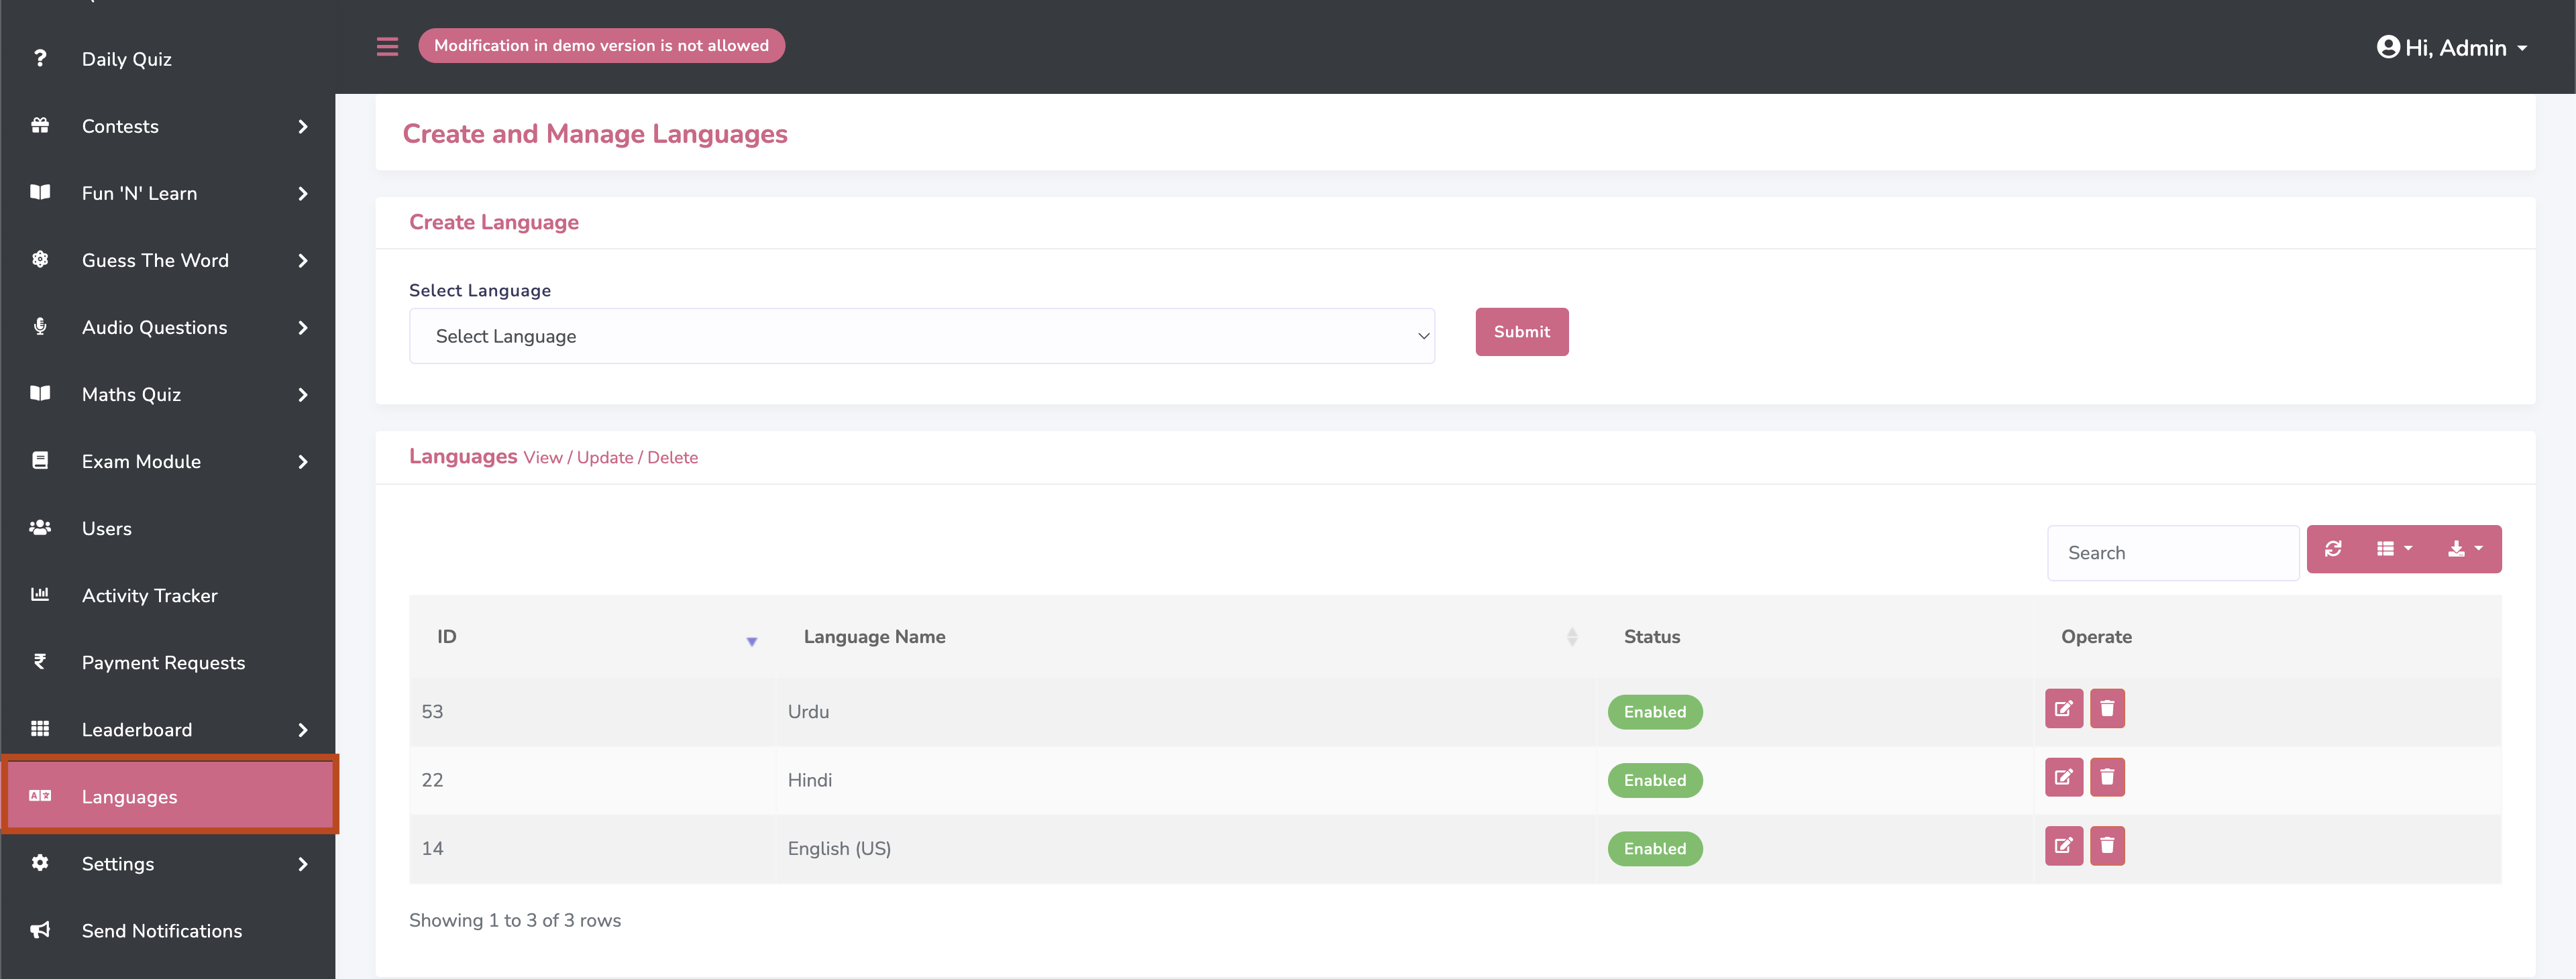
Go to your admin panel and add new language as shown in below image
-
Add newly added language code in list as shown in below image. Go to
lib/utils/constants.dart.
Get your language code from here
https://developers.google.com/admin-sdk/directory/v1/languages.
Make sure your language code is avaialble in
https://developers.google.com/admin-sdk/directory/v1/languages.
-
Create new file
in assets/languages/ with [language-code].json. Add all the labels from en.json and
convert label values in your respective language
-
copy all the labels form en.json file in your [language-code].json file.
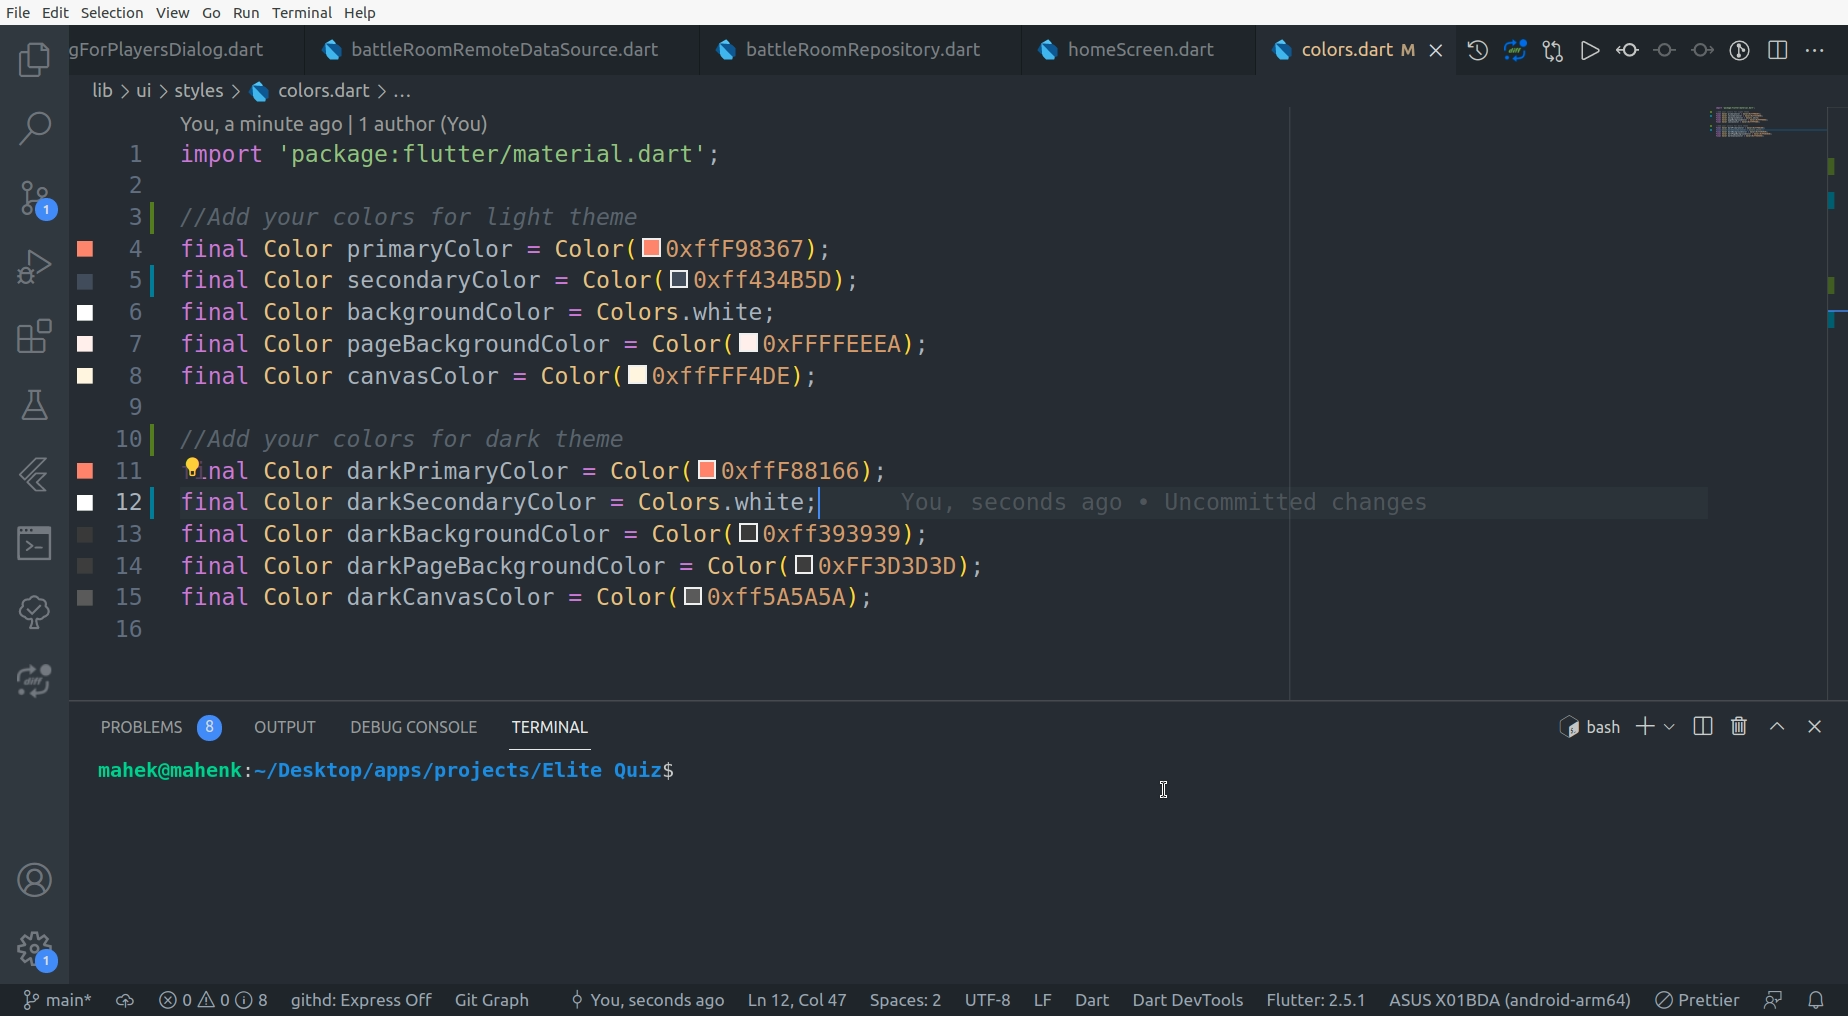
How to change application colors
-
Add your colors in lib/ui/styles/colors.dart and do not change the color variables
name
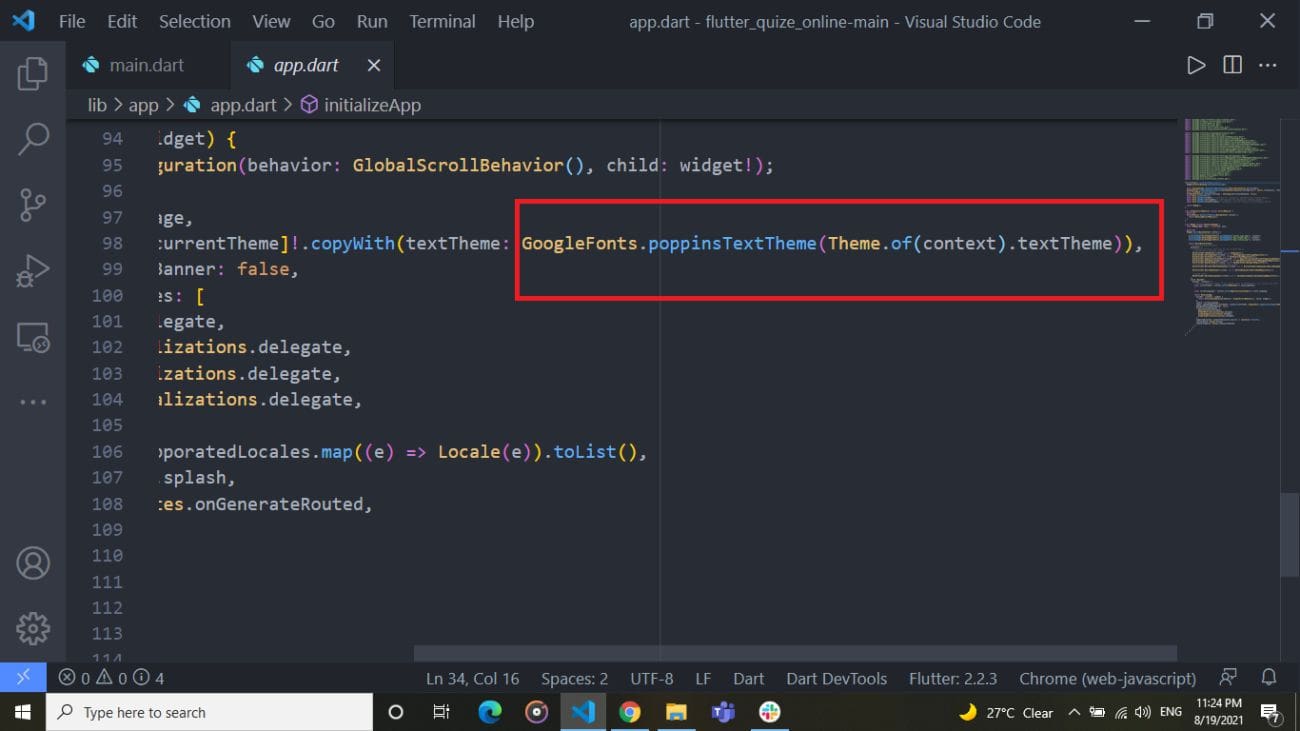
How to change application font
-
Go to lib/app/app.dart and add your font as shown in image
-
Go to assets/google_fonts/ and add .tff files of fonts.

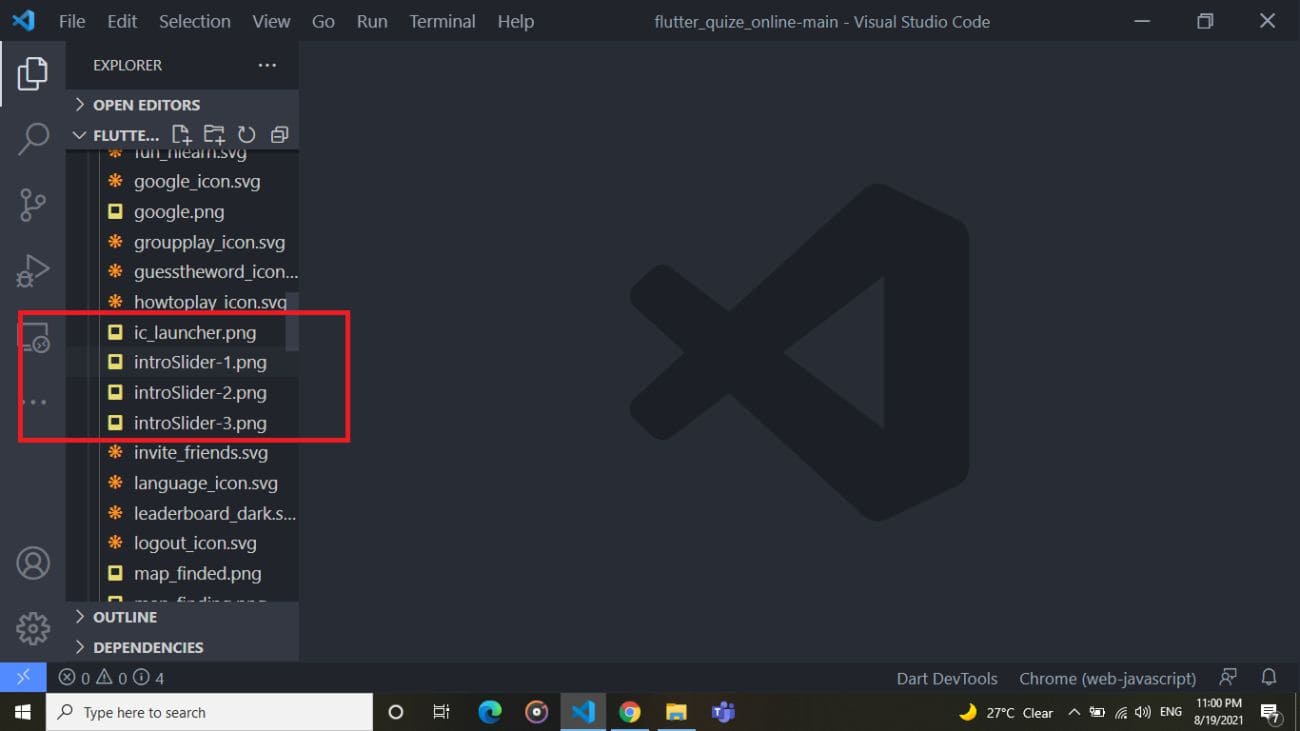
How to change intro slider images
-
Go to assets > images folder and add your intro slide images.It is recommended to
follow same naming convention shown in below image
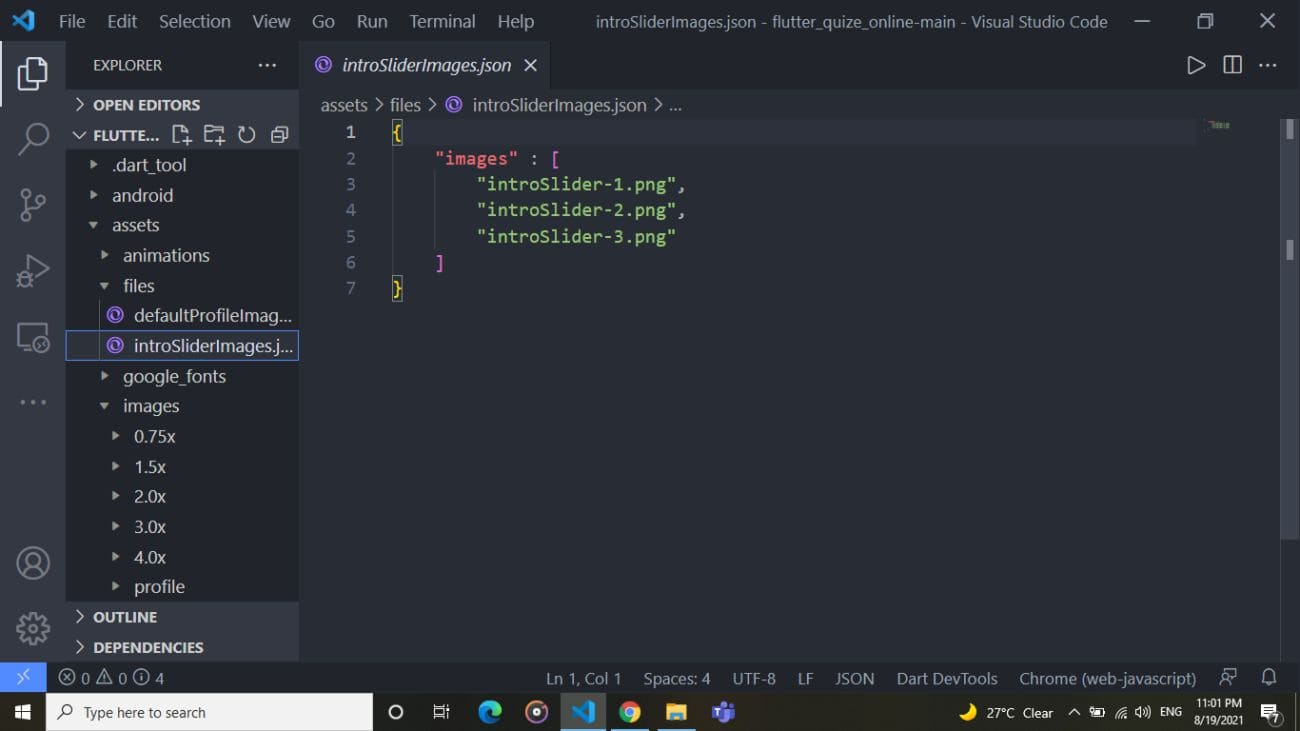
-
Go to assets > files > introSliderImages.json file and add intro slider image's name
in this this file as shown in below image
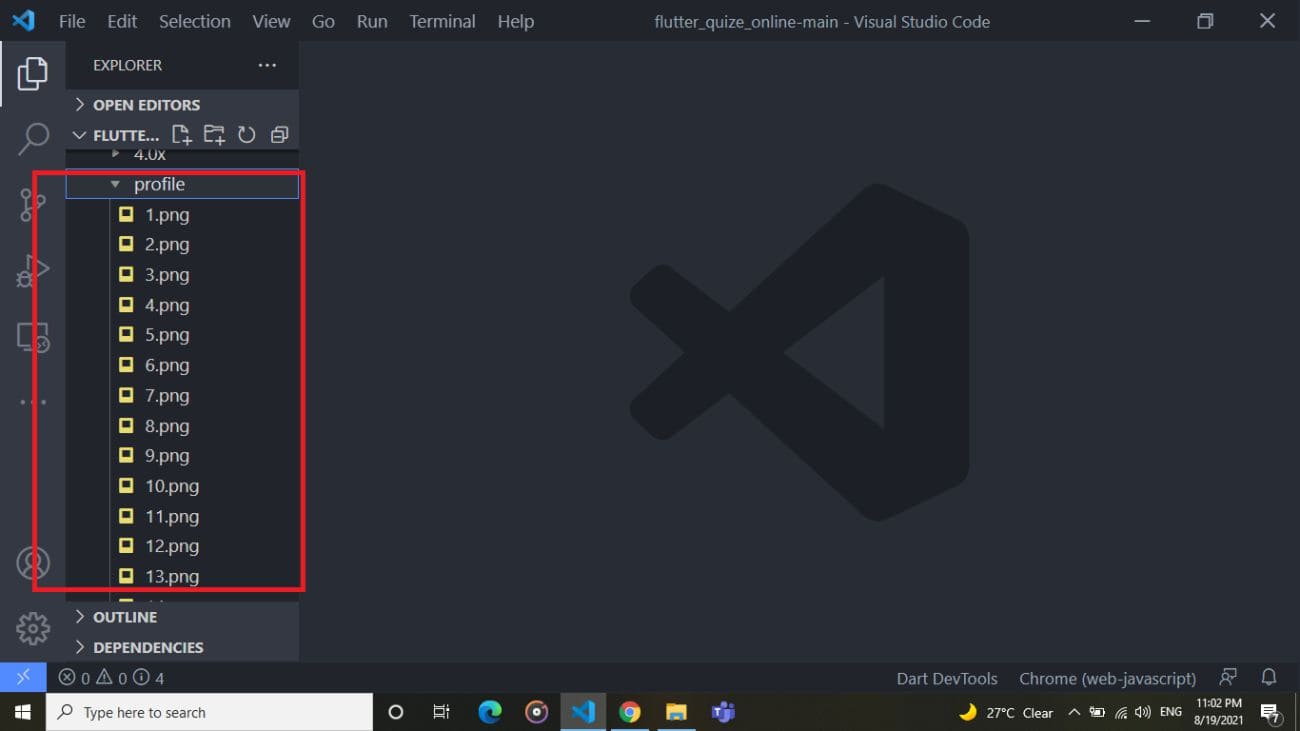
How to change default profile images
-
Go to assets > images > profile folder and add your default profile images.It is
recommended to follow same naming convention shown in below image
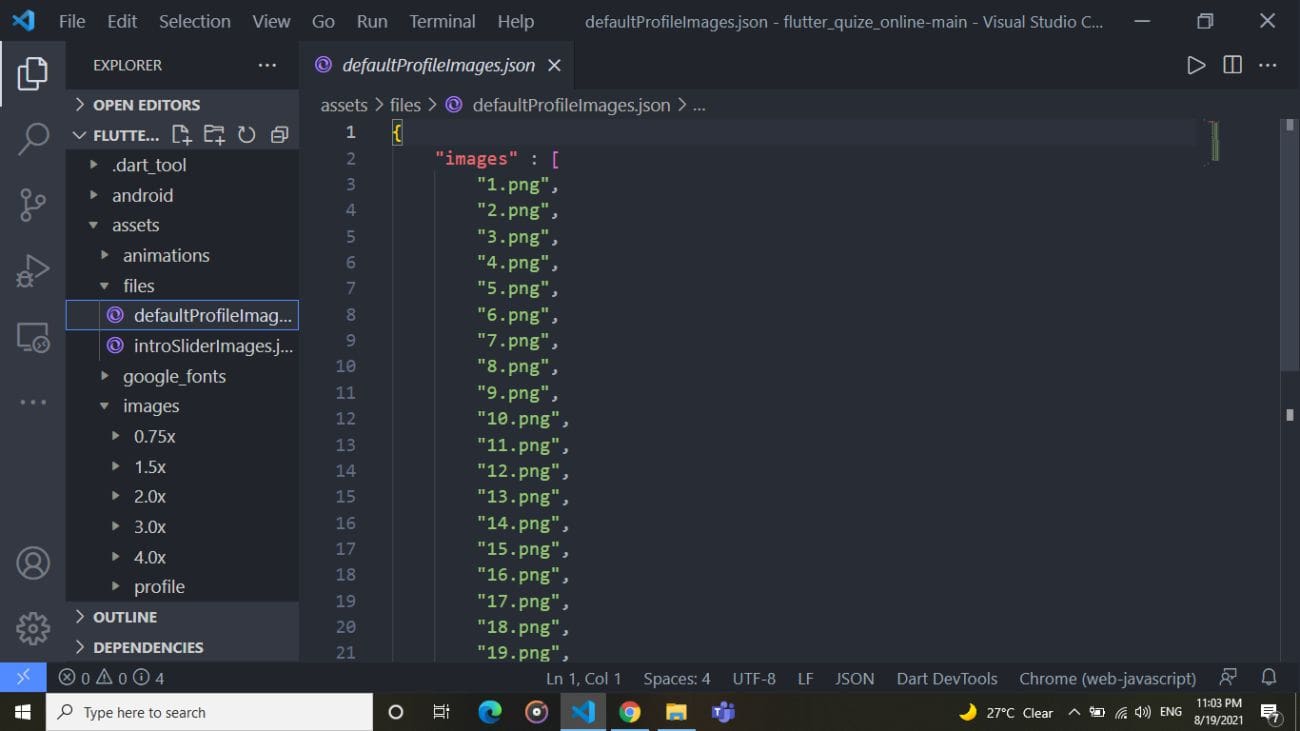
-
Go to assets > files > defaultProfileImages.json file and add default profile
image's name in this this file as shown in below image
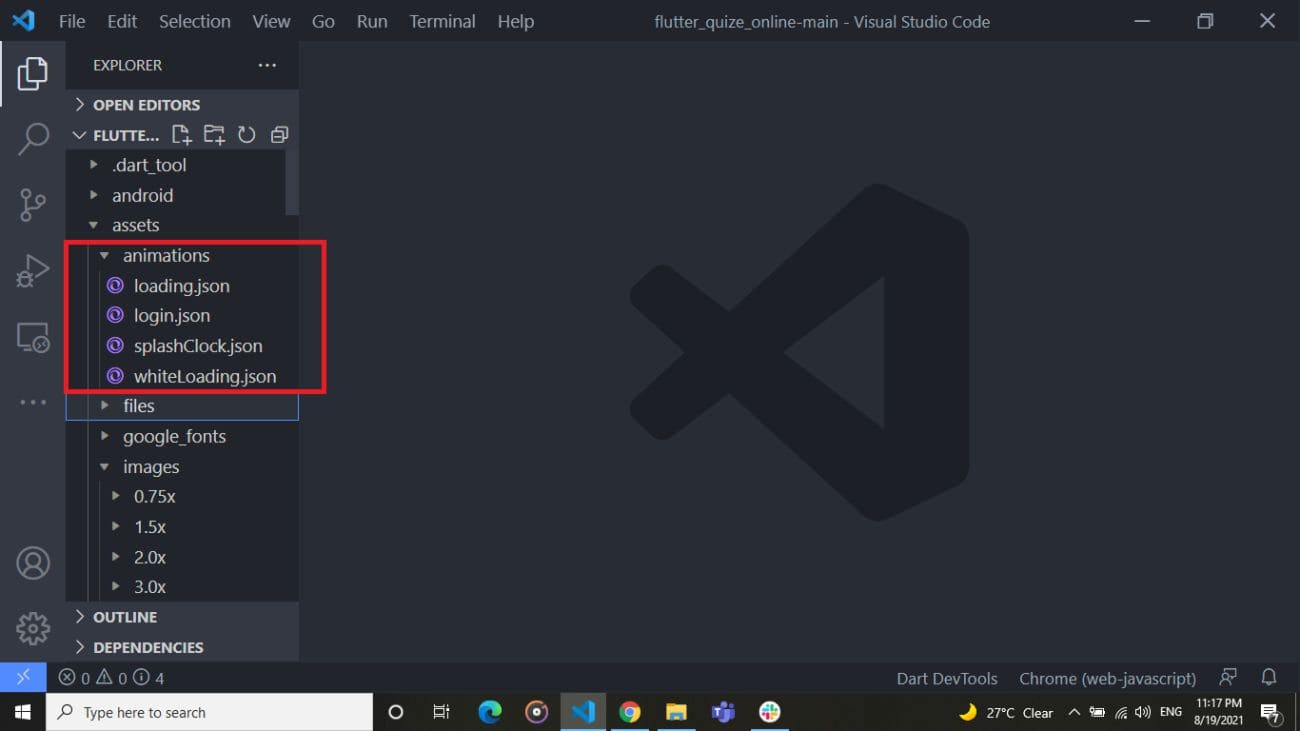
How to change json animations
-
Go to assets > animations folder and add json animaiton files. Make sure to use same
name shown in below image
How to configure in-app purchase
- Configure in-app purchase for android applicaiton.
Upload your application in playstore and create in-app products for your applicaiton
as shown in below image.
Id of in-app products (consumable product) in apple and play store must be same.
Apple In-app purchase Document Link :- Apple In-app purchase
Google In-app purchase Document Link :- Google In-app purchase 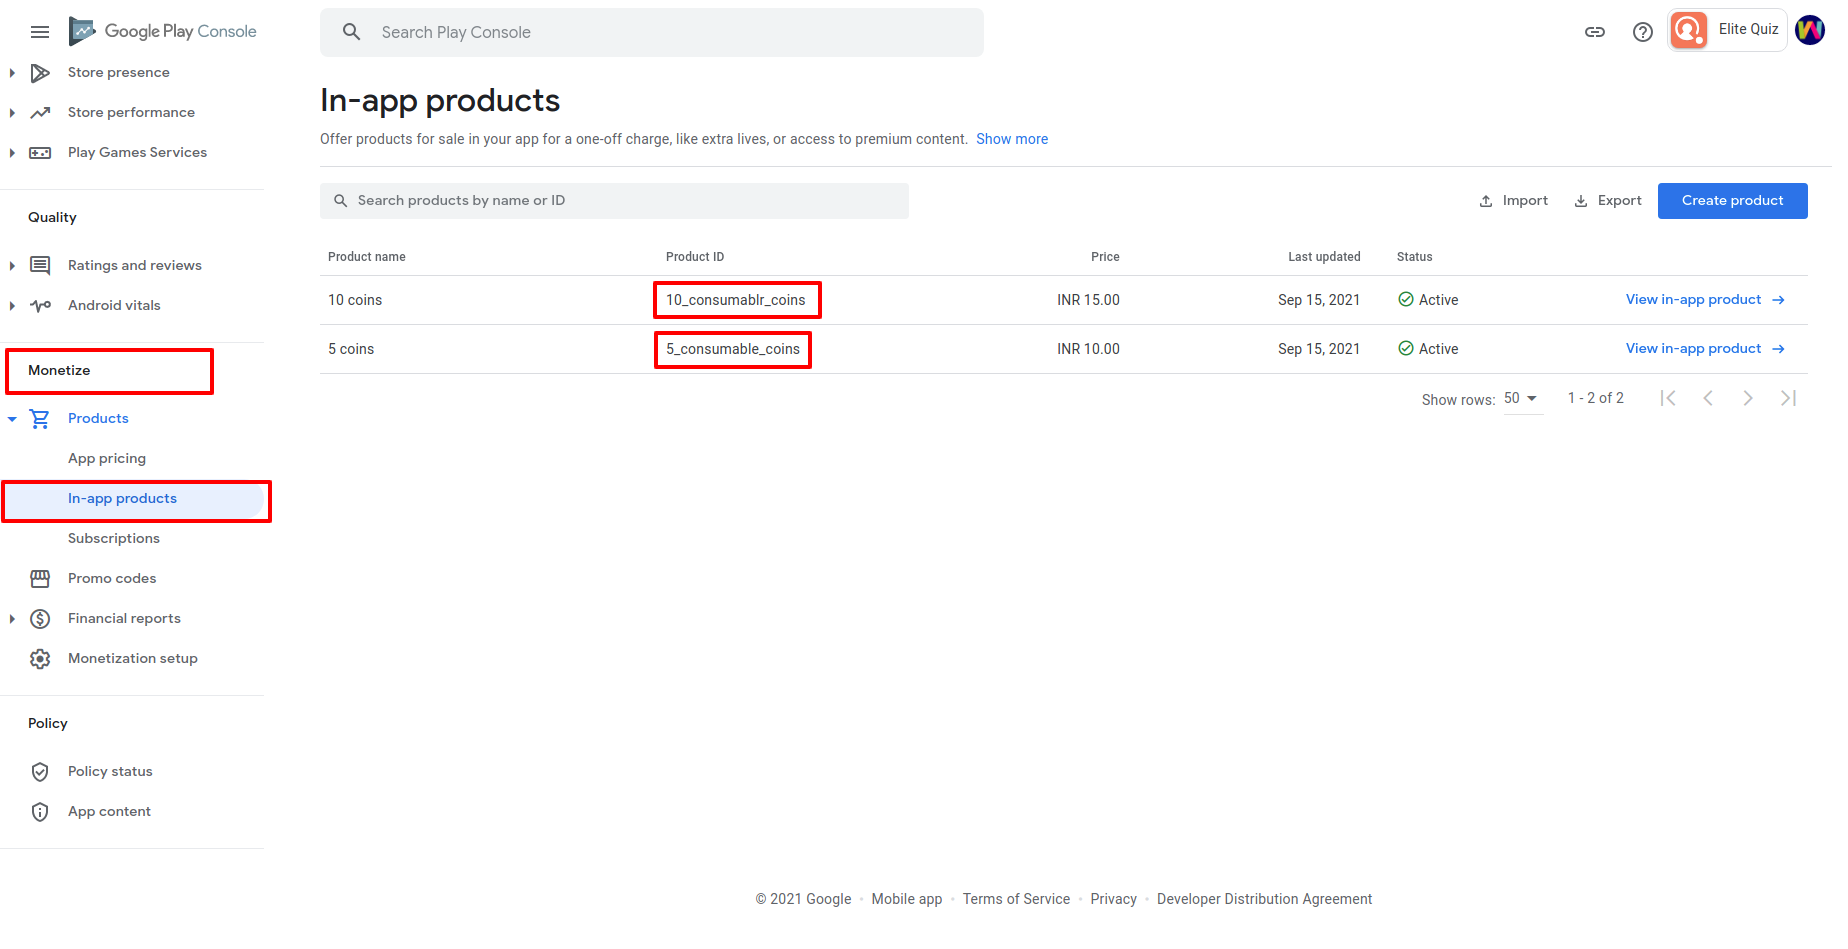
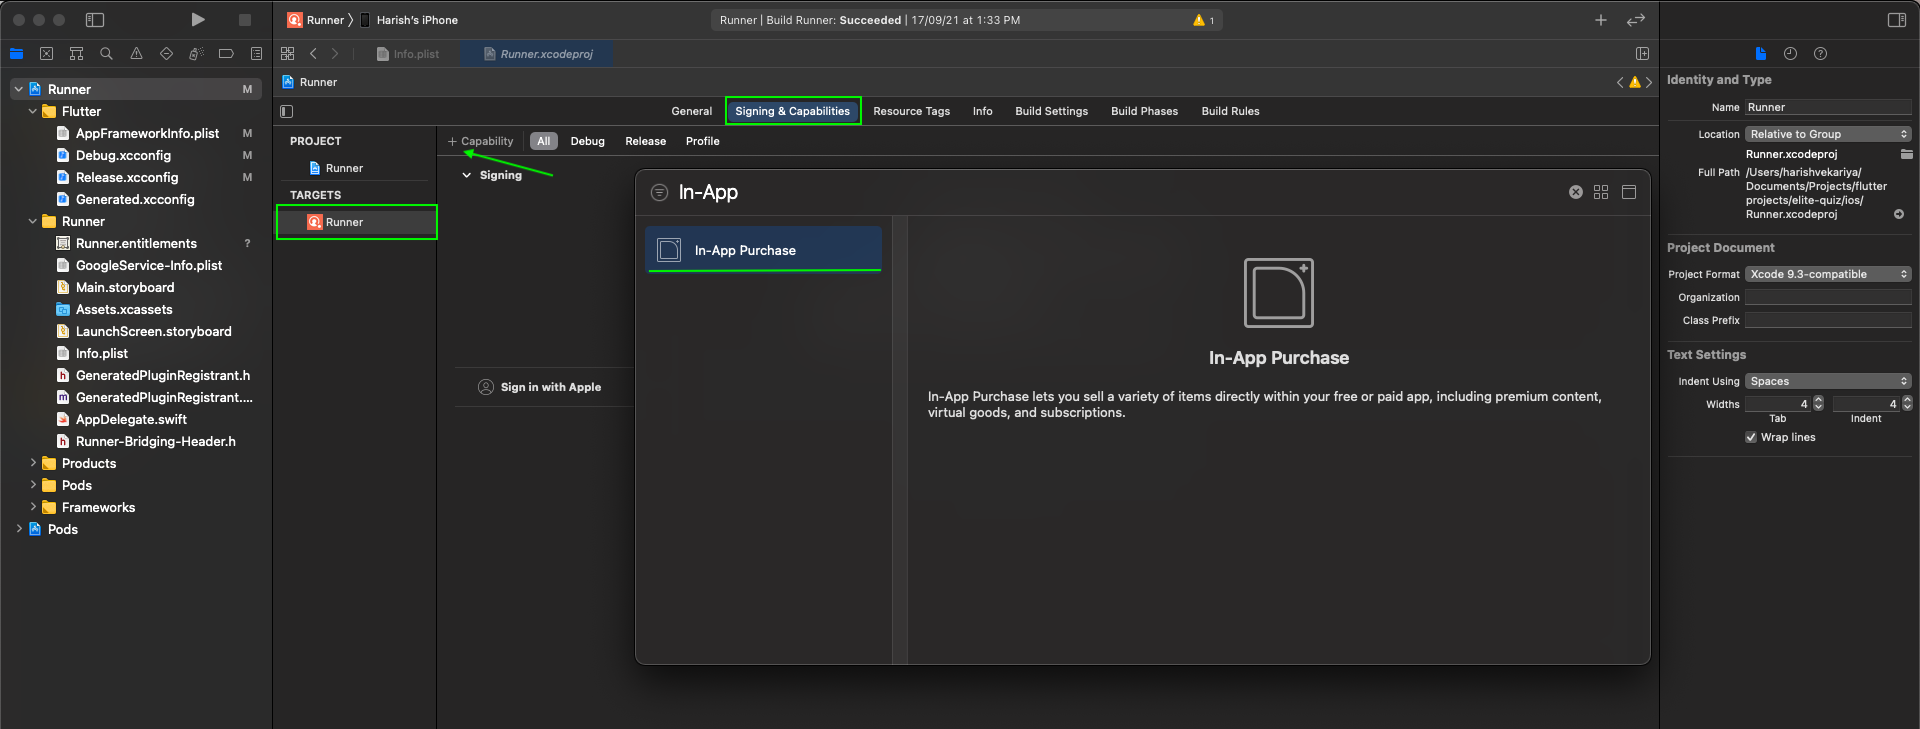
- Configure in-app purchase for ios applicaiton.
Add capibility in your project using xcode as show in below image.
Follow this links in order to enable in-purchase.
https://help.apple.com/app-store-connect/#/devae49fb316.
https://help.apple.com/app-store-connect/#/devb57be10e7.
For more help visit this https://developer.apple.com/in-app-purchase/.
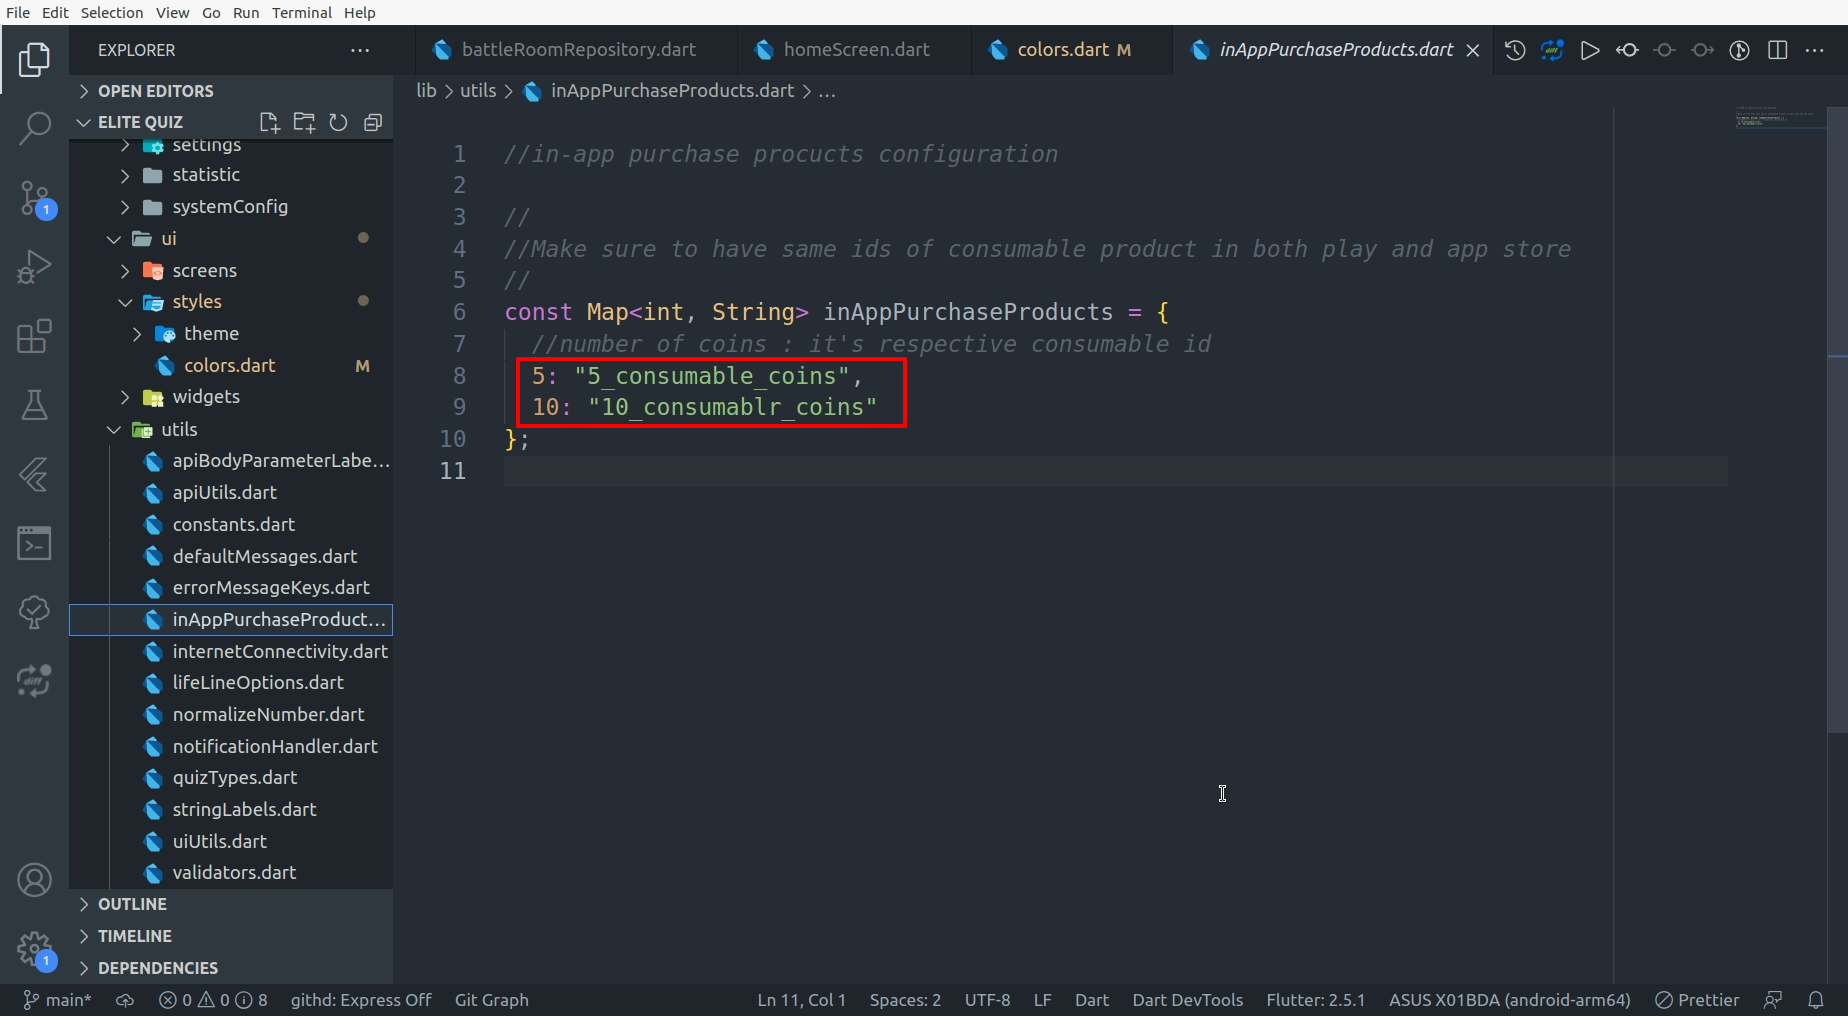
Id of in-app products (consumable product) in apple and play store must be same. -
Go to lib/utils/inAppPurchaseProducts.dart.
Enter coins and in-app product's id (created previously) respective to coin as shown
in image.
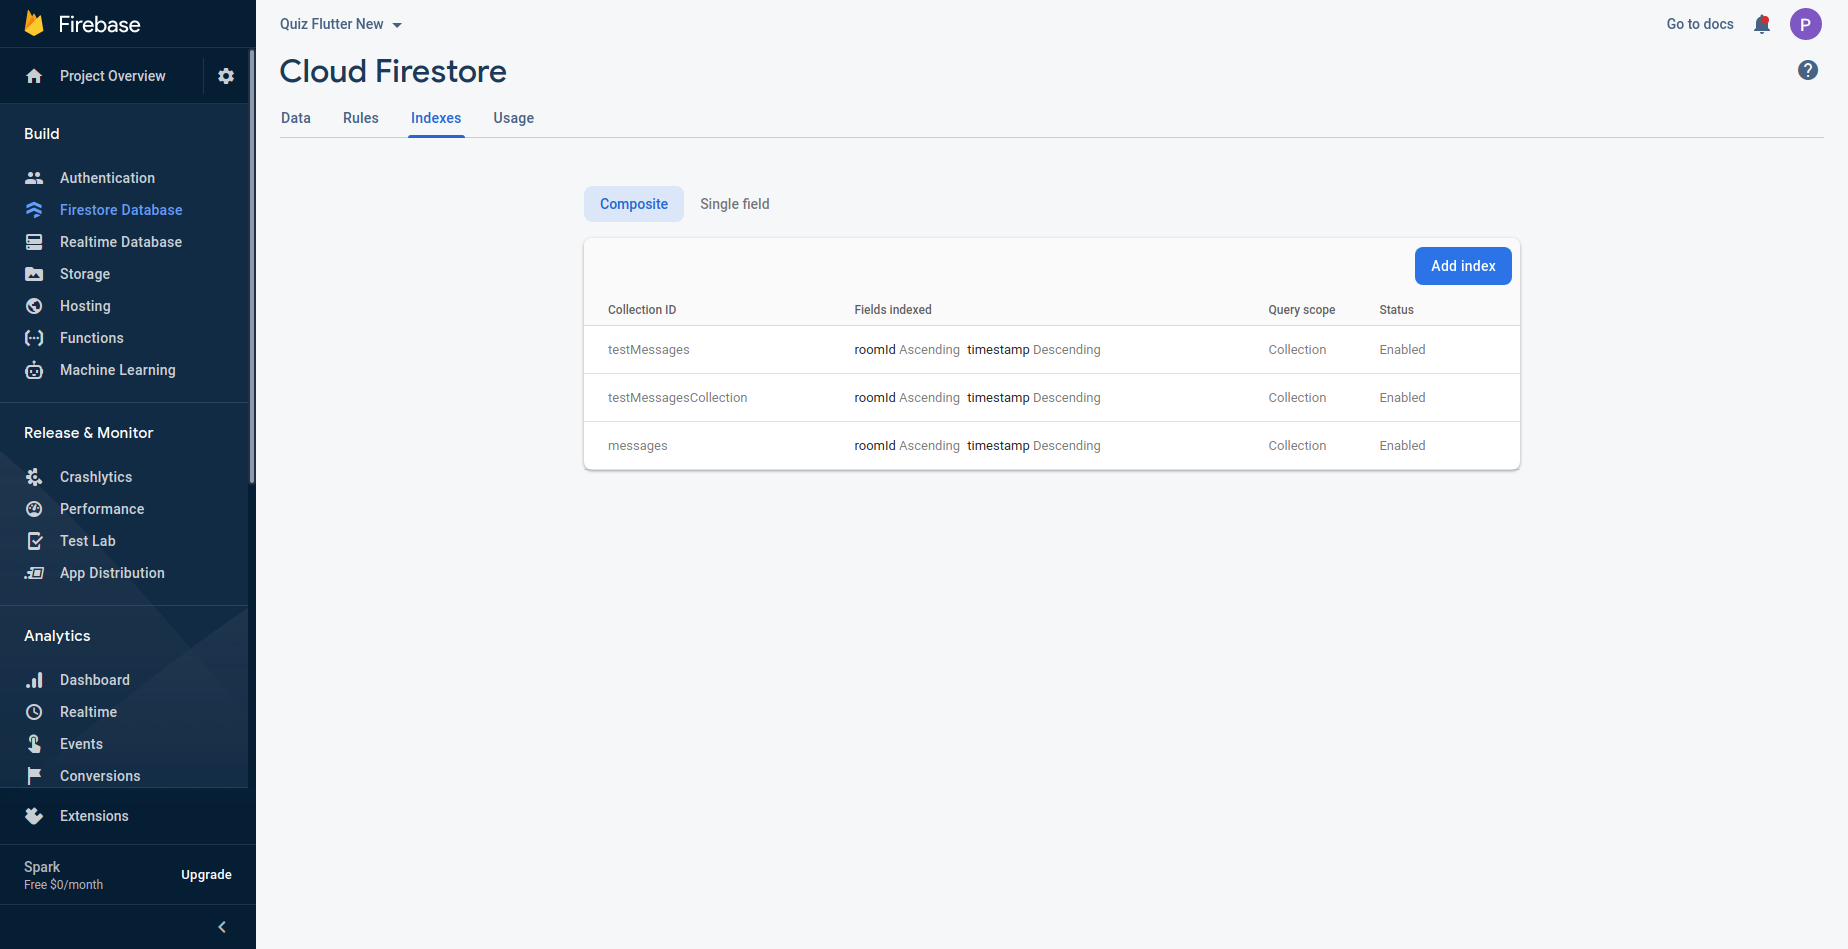
How to enable message feature in battle
-
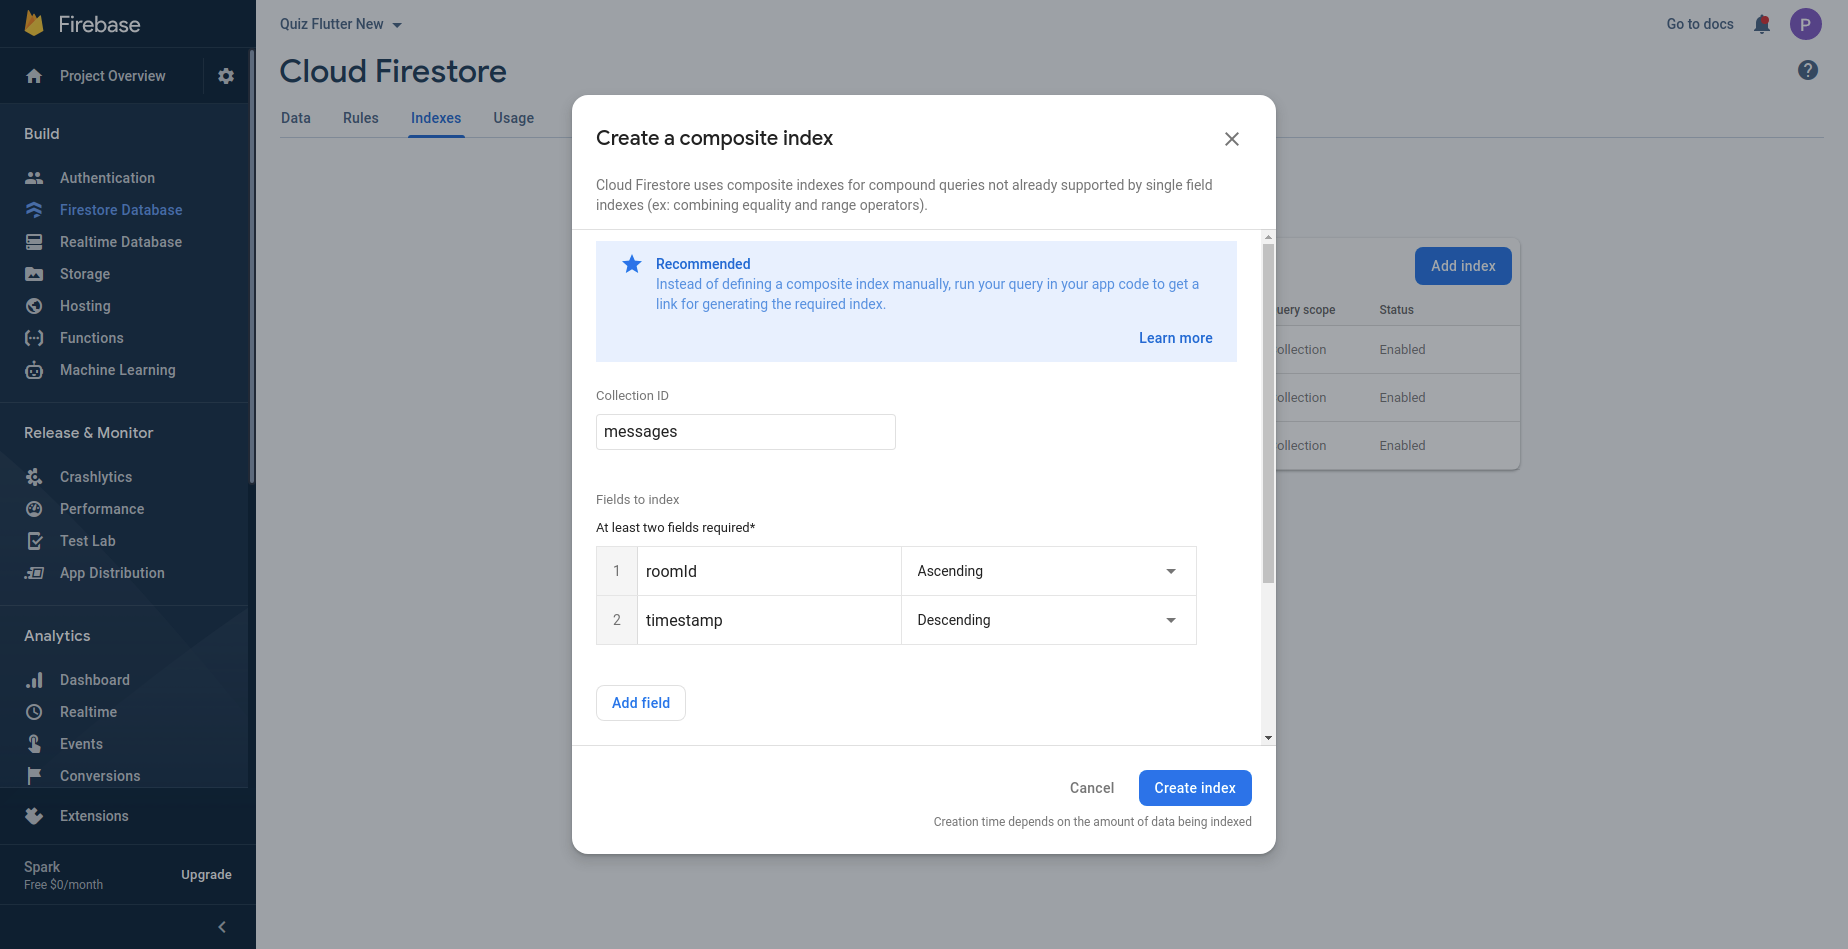
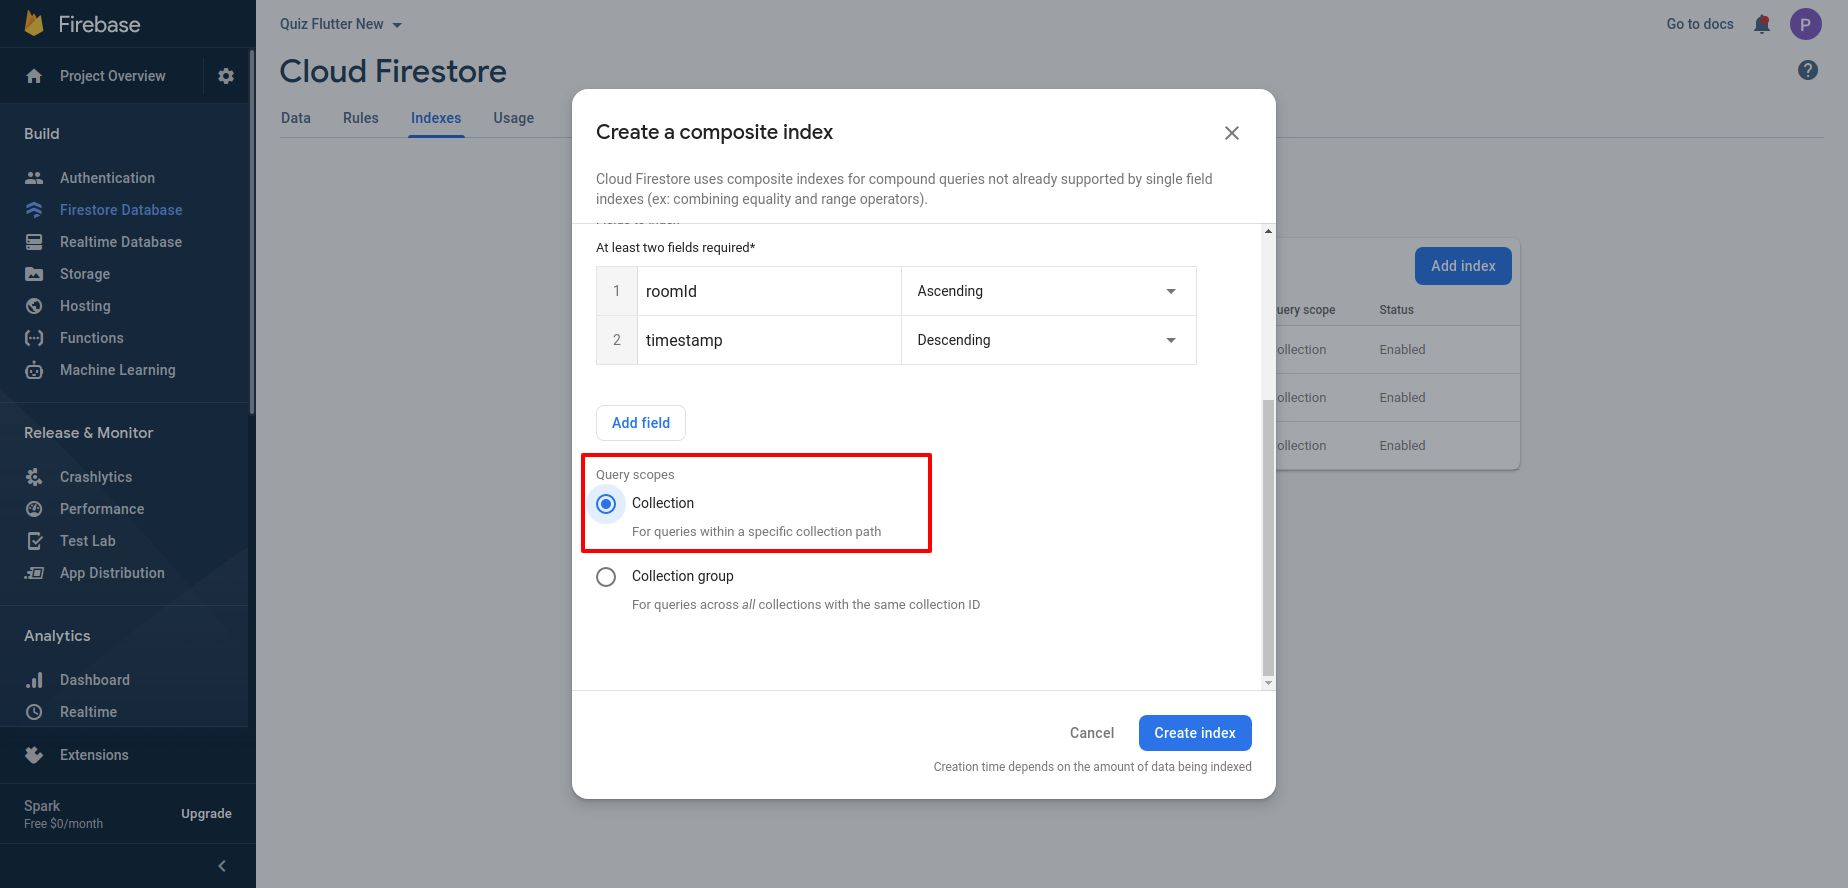
Go to firebase project, firestore database -> indexes and create composite query
index as shown in below images.
-
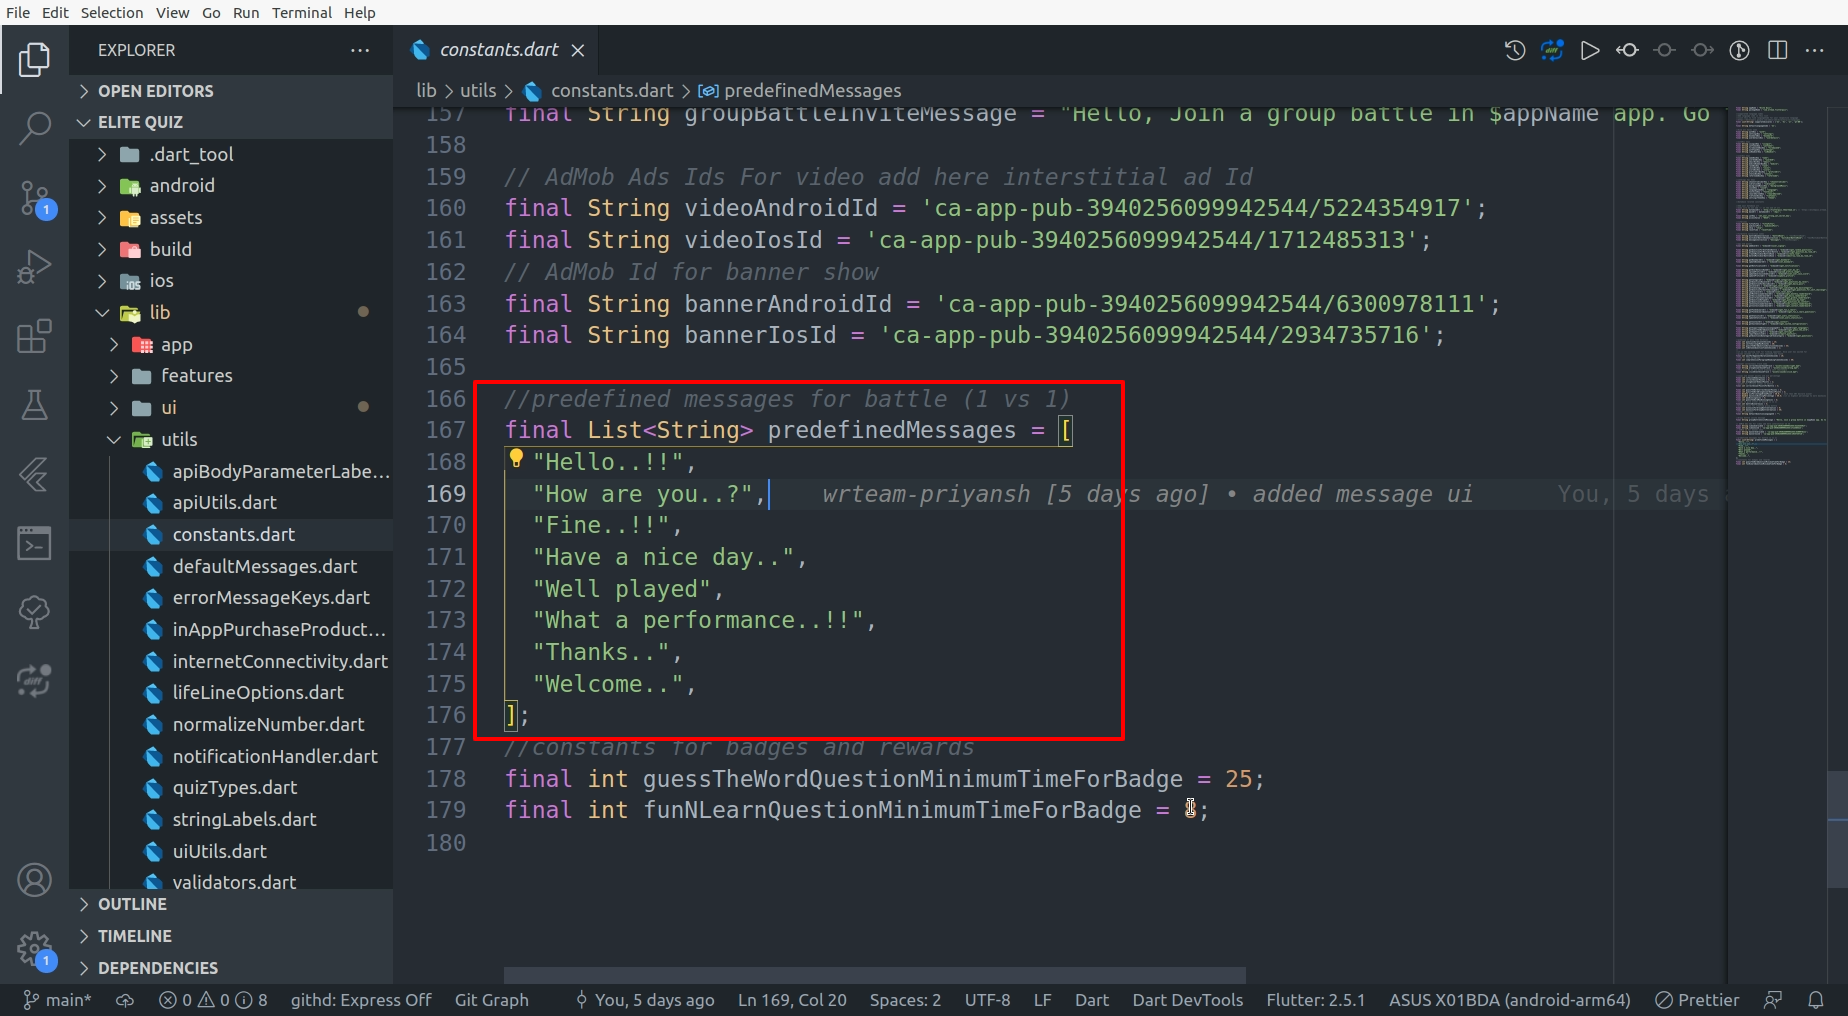
Go to lib/utils/constants.dart and add predefined messages as per your desire.
-
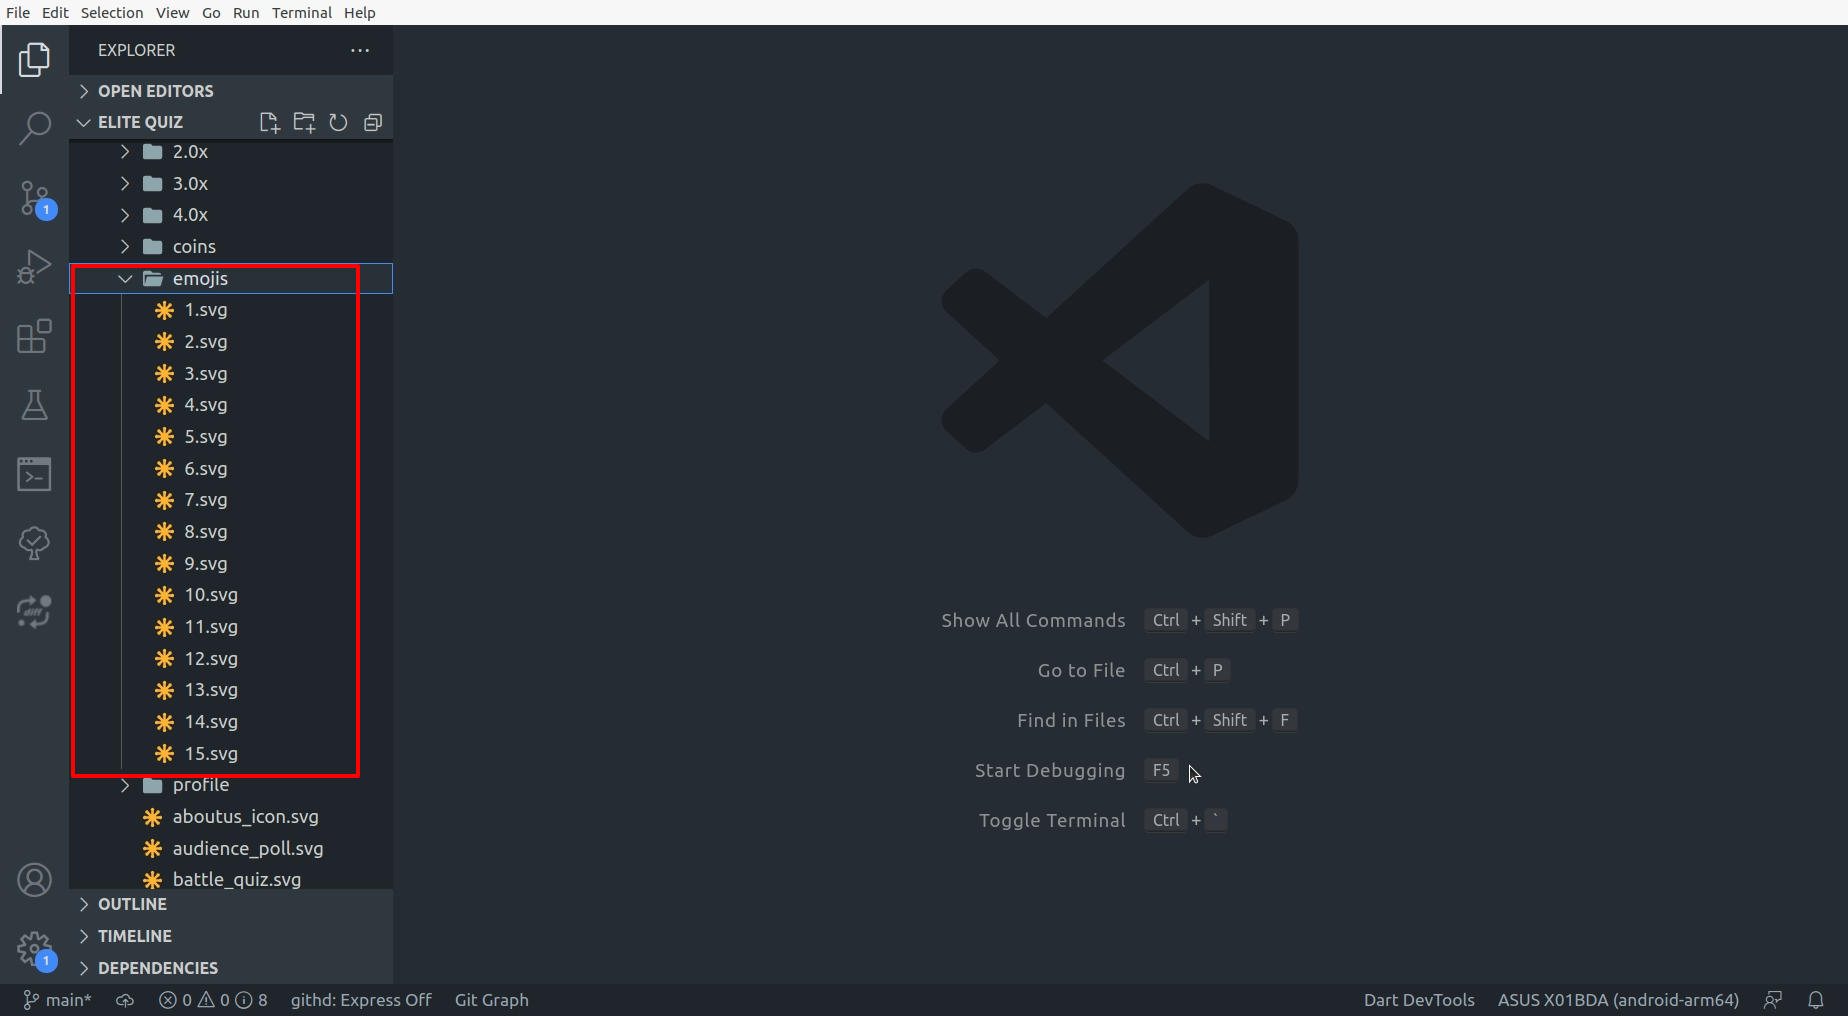
If you want to update emojis then follow these steps.
Go to assets/images/emojis/ and add new emoji.
File format of emoji must be svg.
-
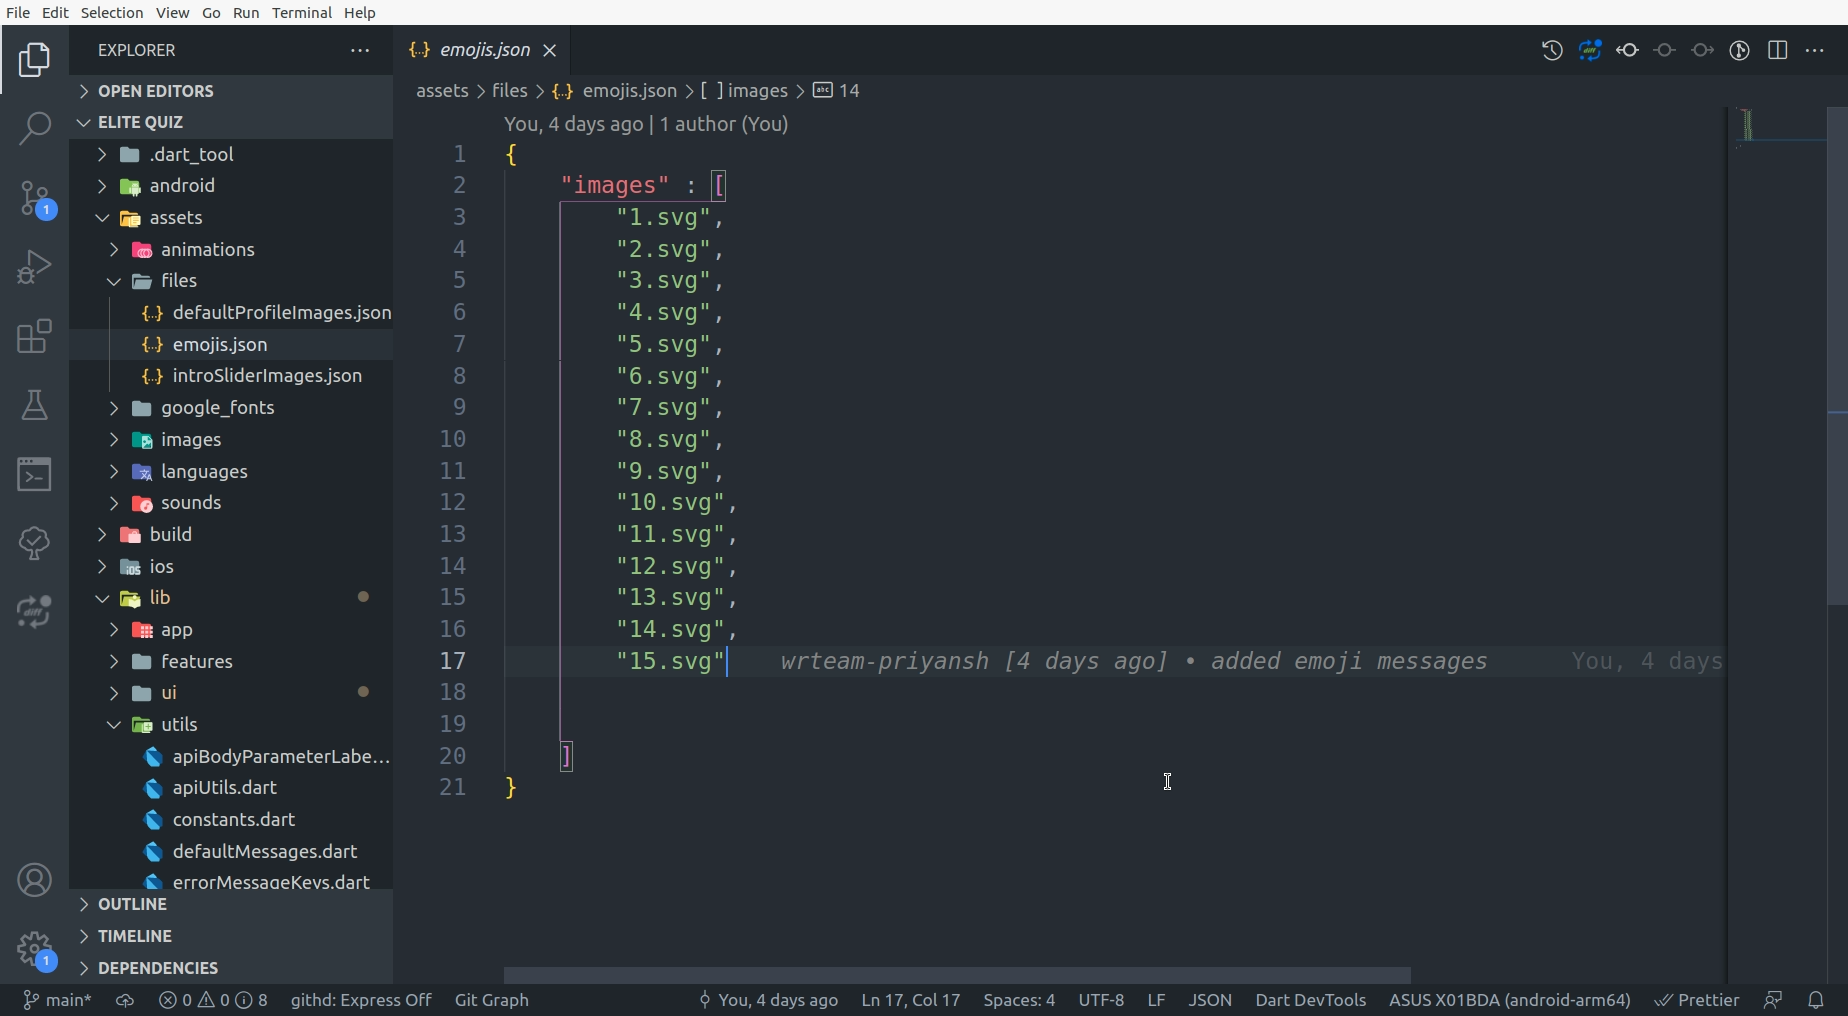
Add file name of newly added emoji in assets/files/emojis.json file.
How to configure force update
-
Go to admin panel in settings -> system configurations and enable force update as
shown in image.

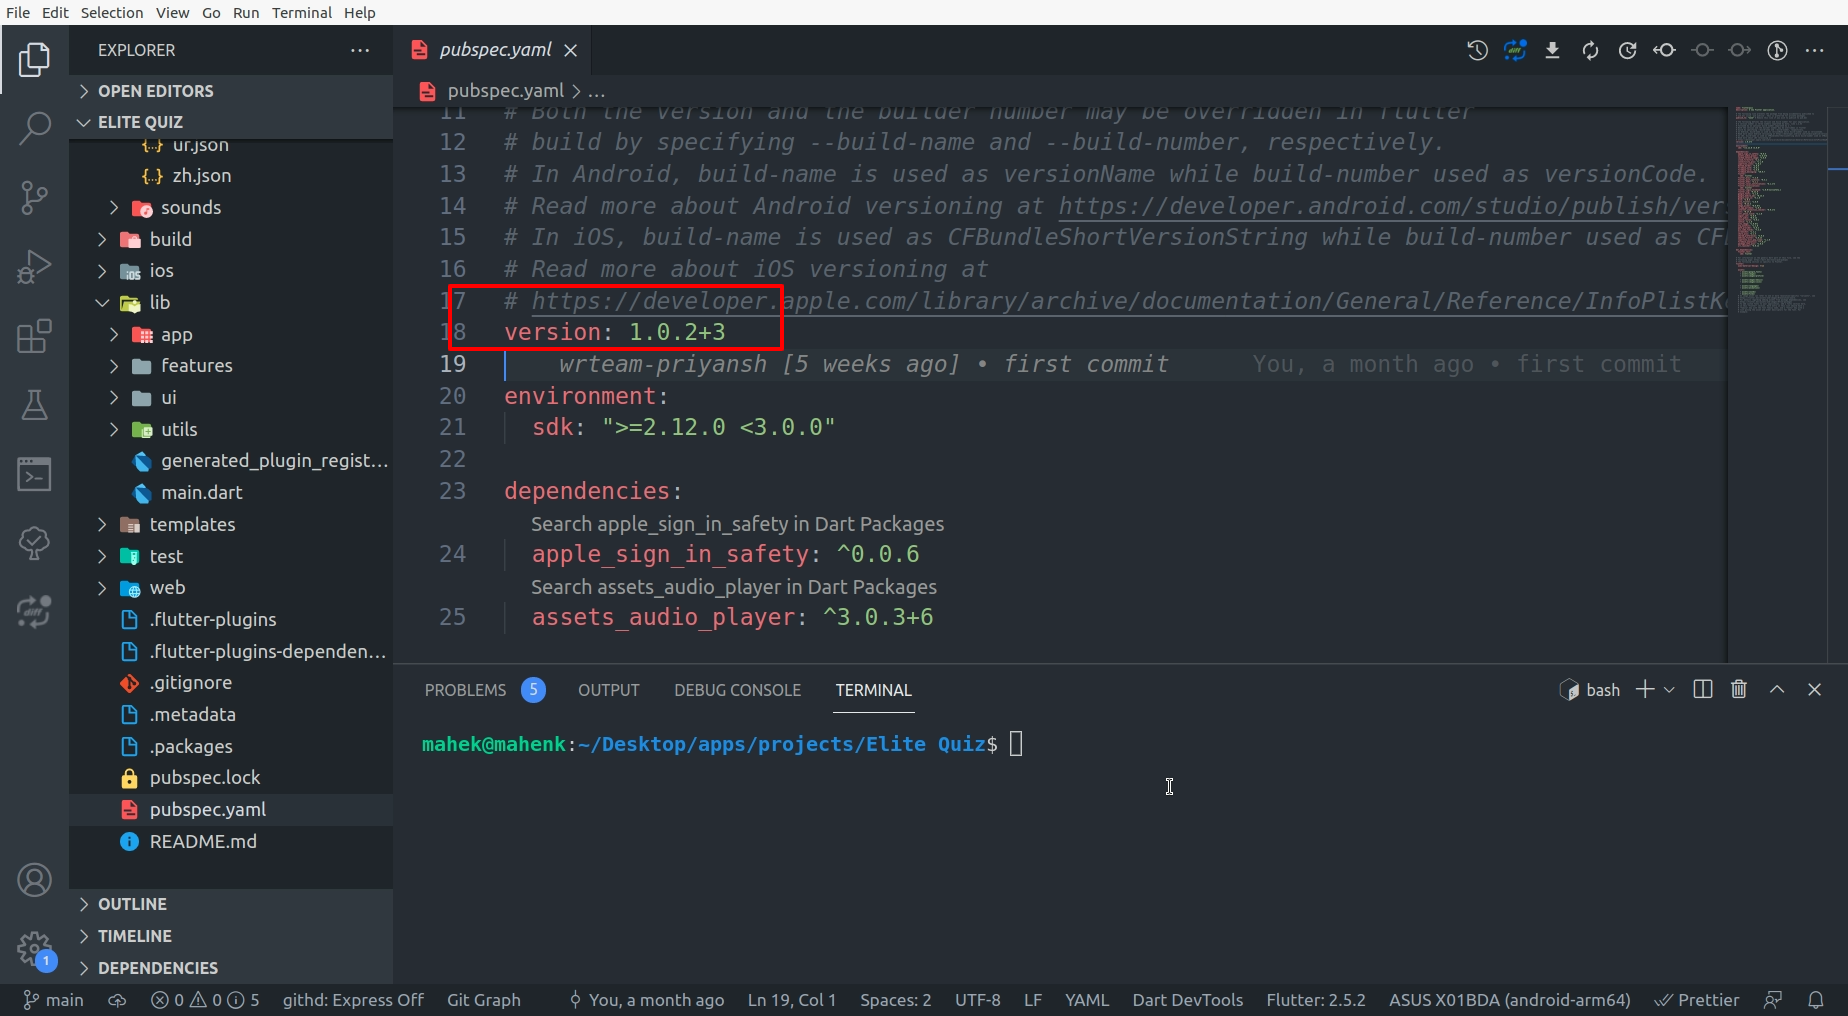
-
Go to pubspec.yaml and copy the version number of application.
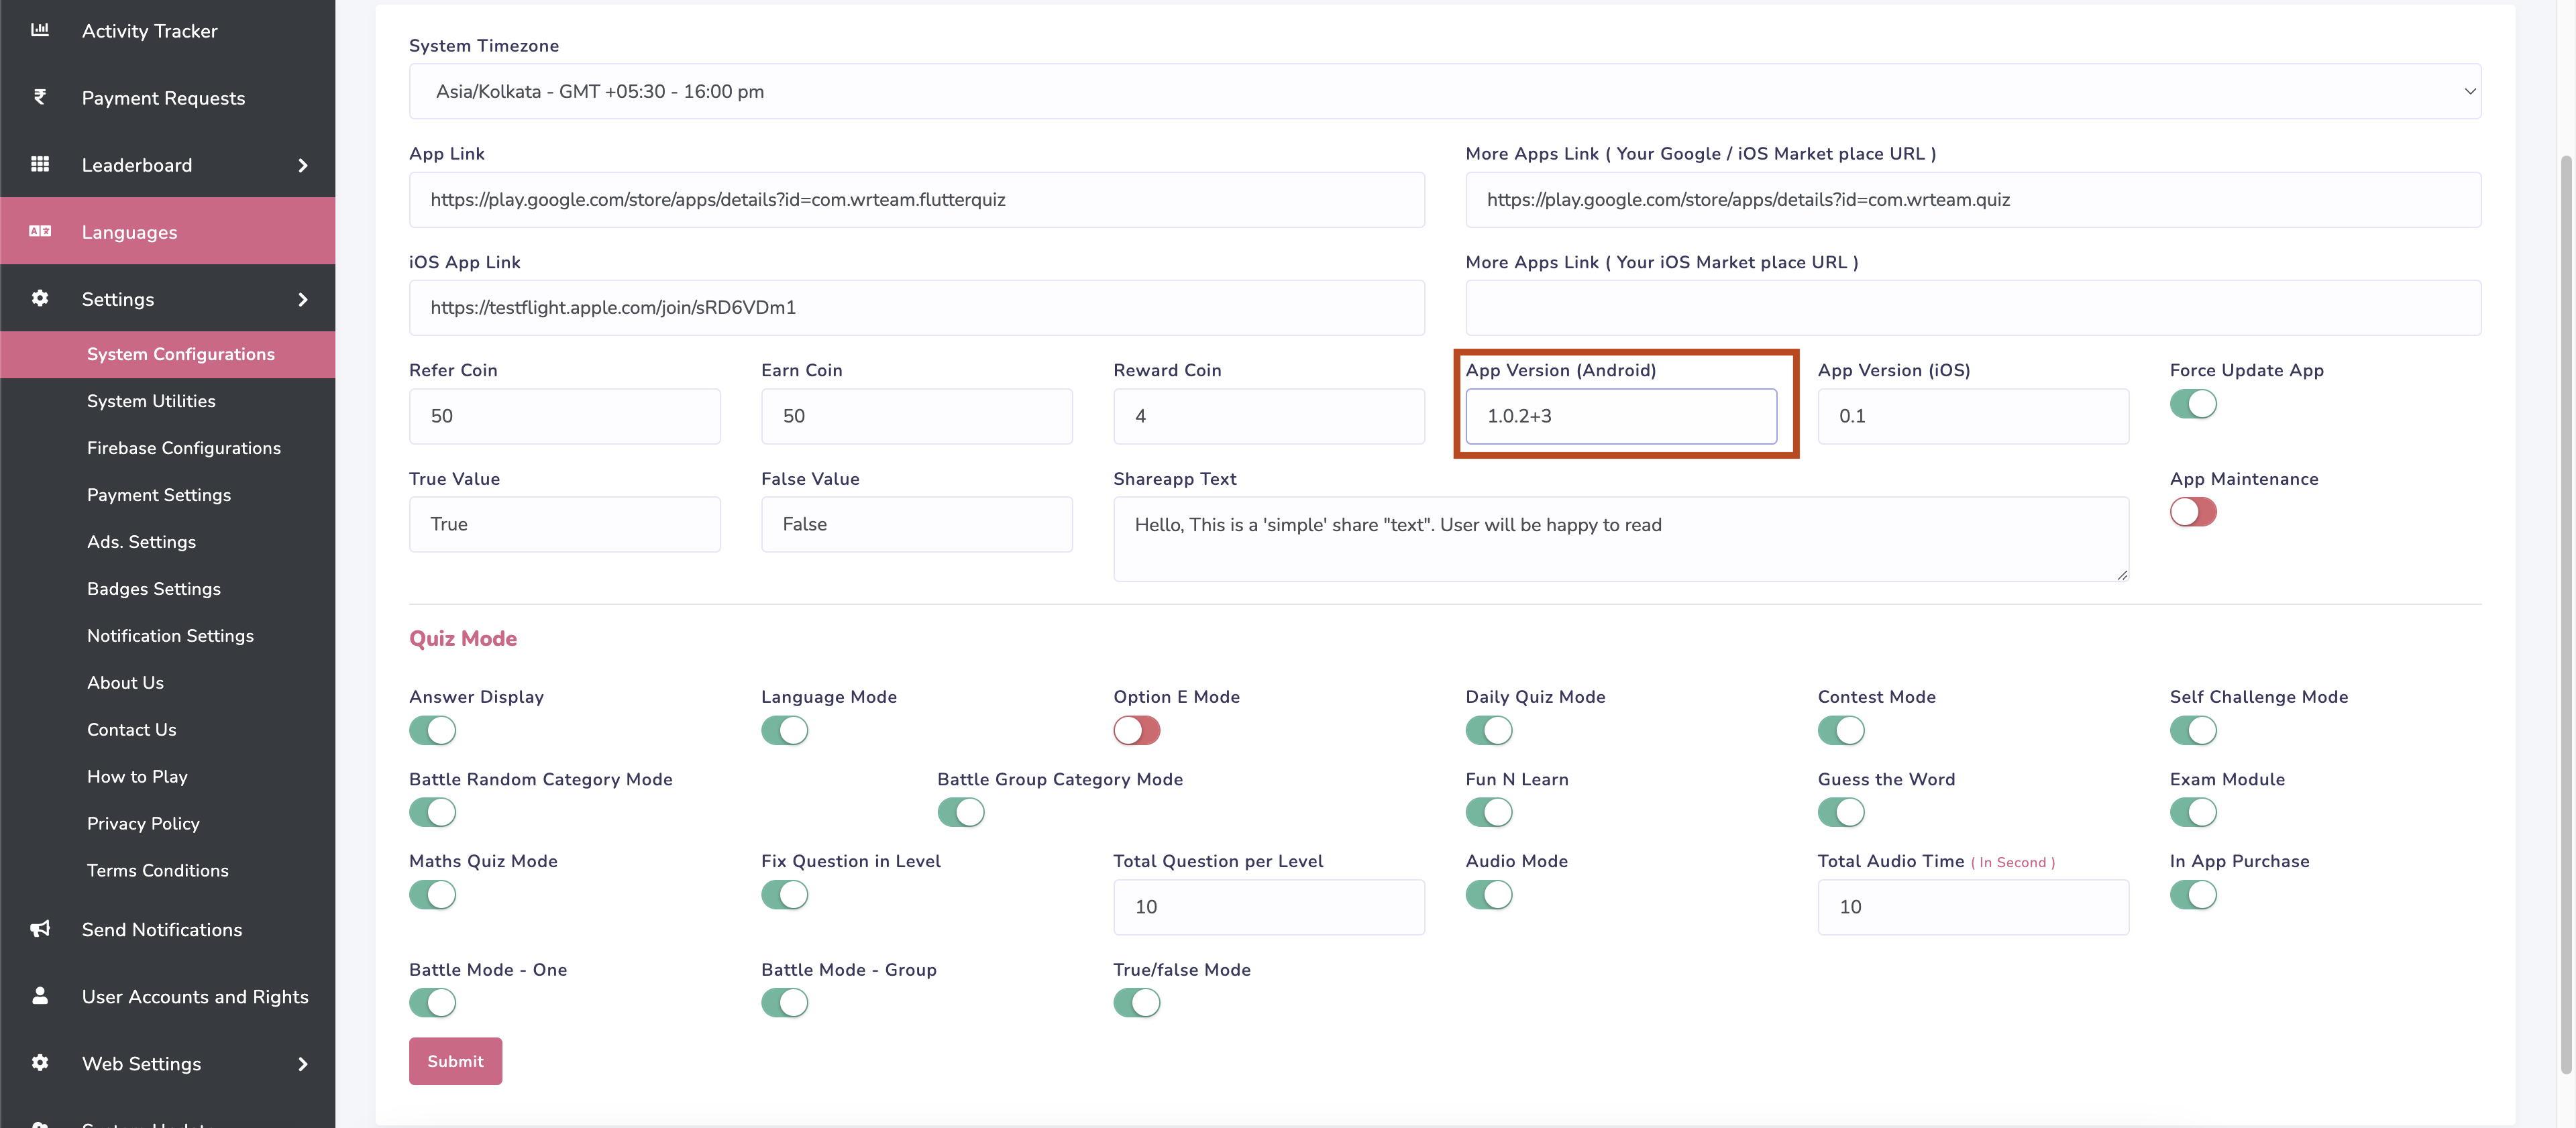
-
Go to admin panel in settings -> system configurations and enter the version number
we just copied.
-
Go to admin panel in settings -> system configurations and add application url(play
and app store link).
Make sure to add correct url otherwise force update will not work as expected.

Manage Badges
-
Manage badges from here

-
To unlock badges like Super Sonic, Flashback and Brainiac minimum question is set to
5.
You can change that as shown in below image.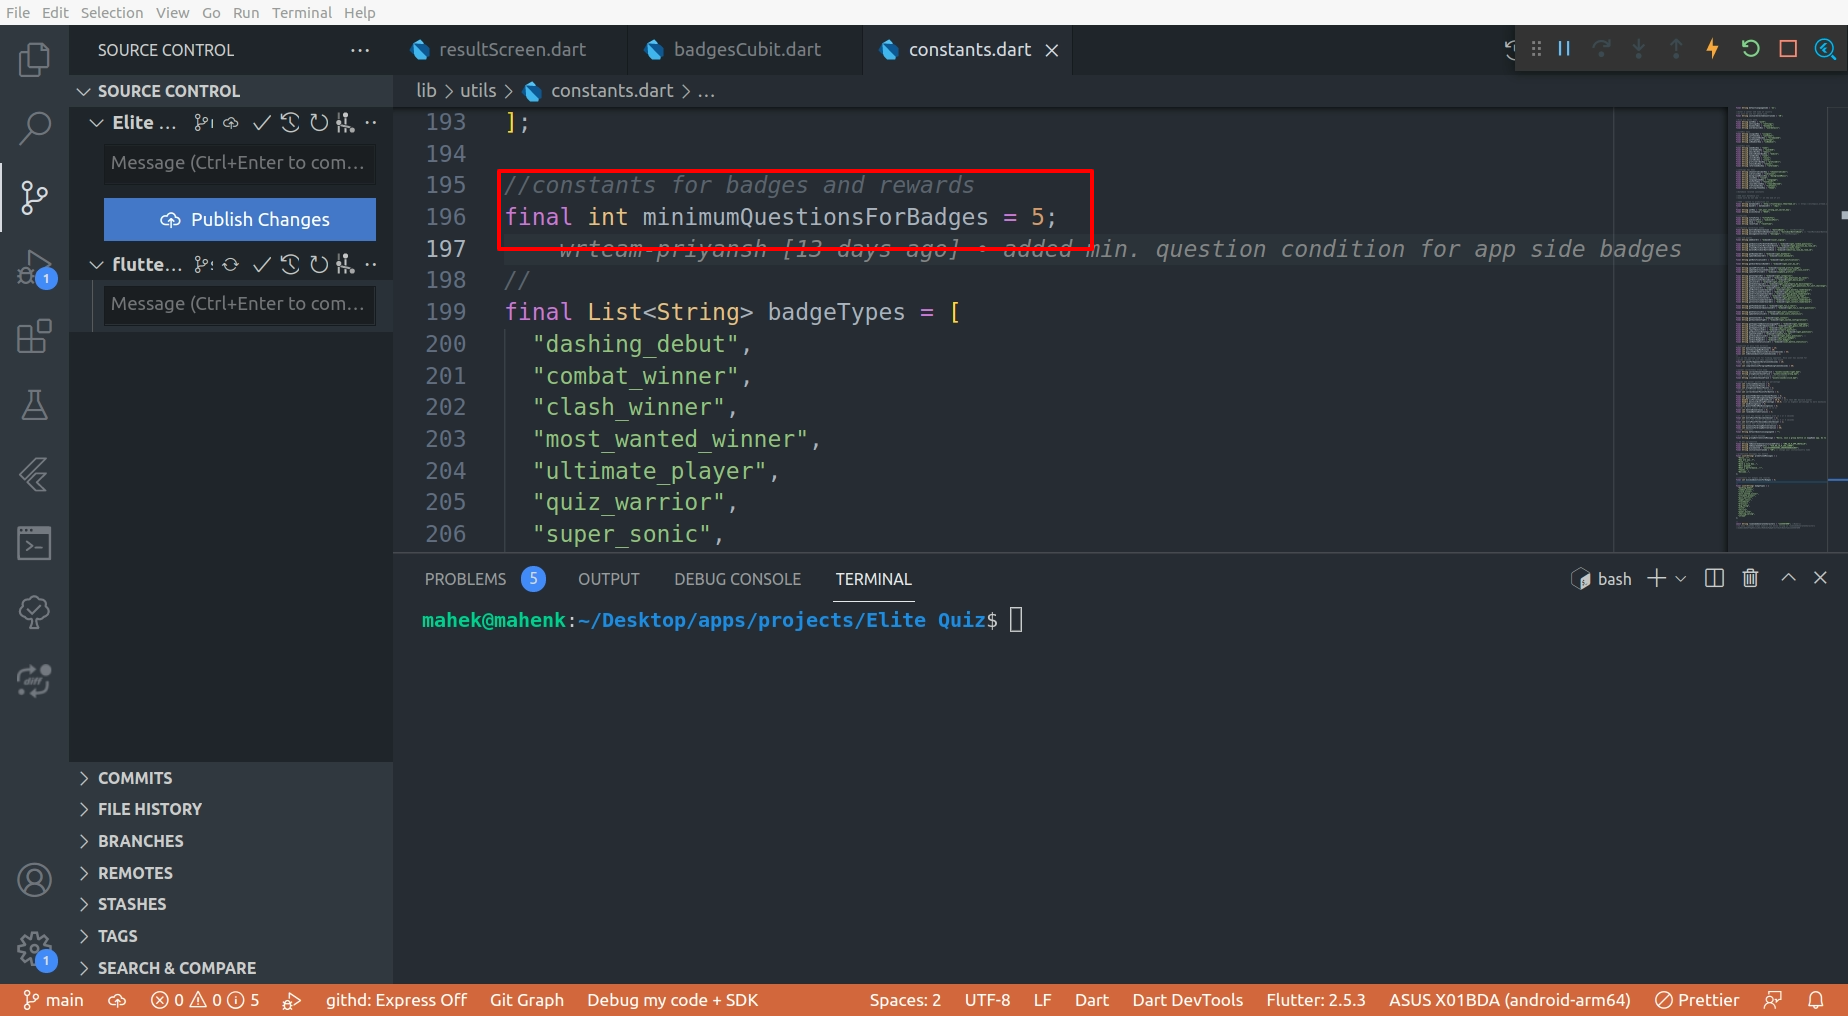
-
To unlock badges like Combat Winner, Clash Winner and Quiz Warrior winner must be
declared by completing battle.
-
To get more information about how badges works click here.
Badges Details
How to setup exam module
-
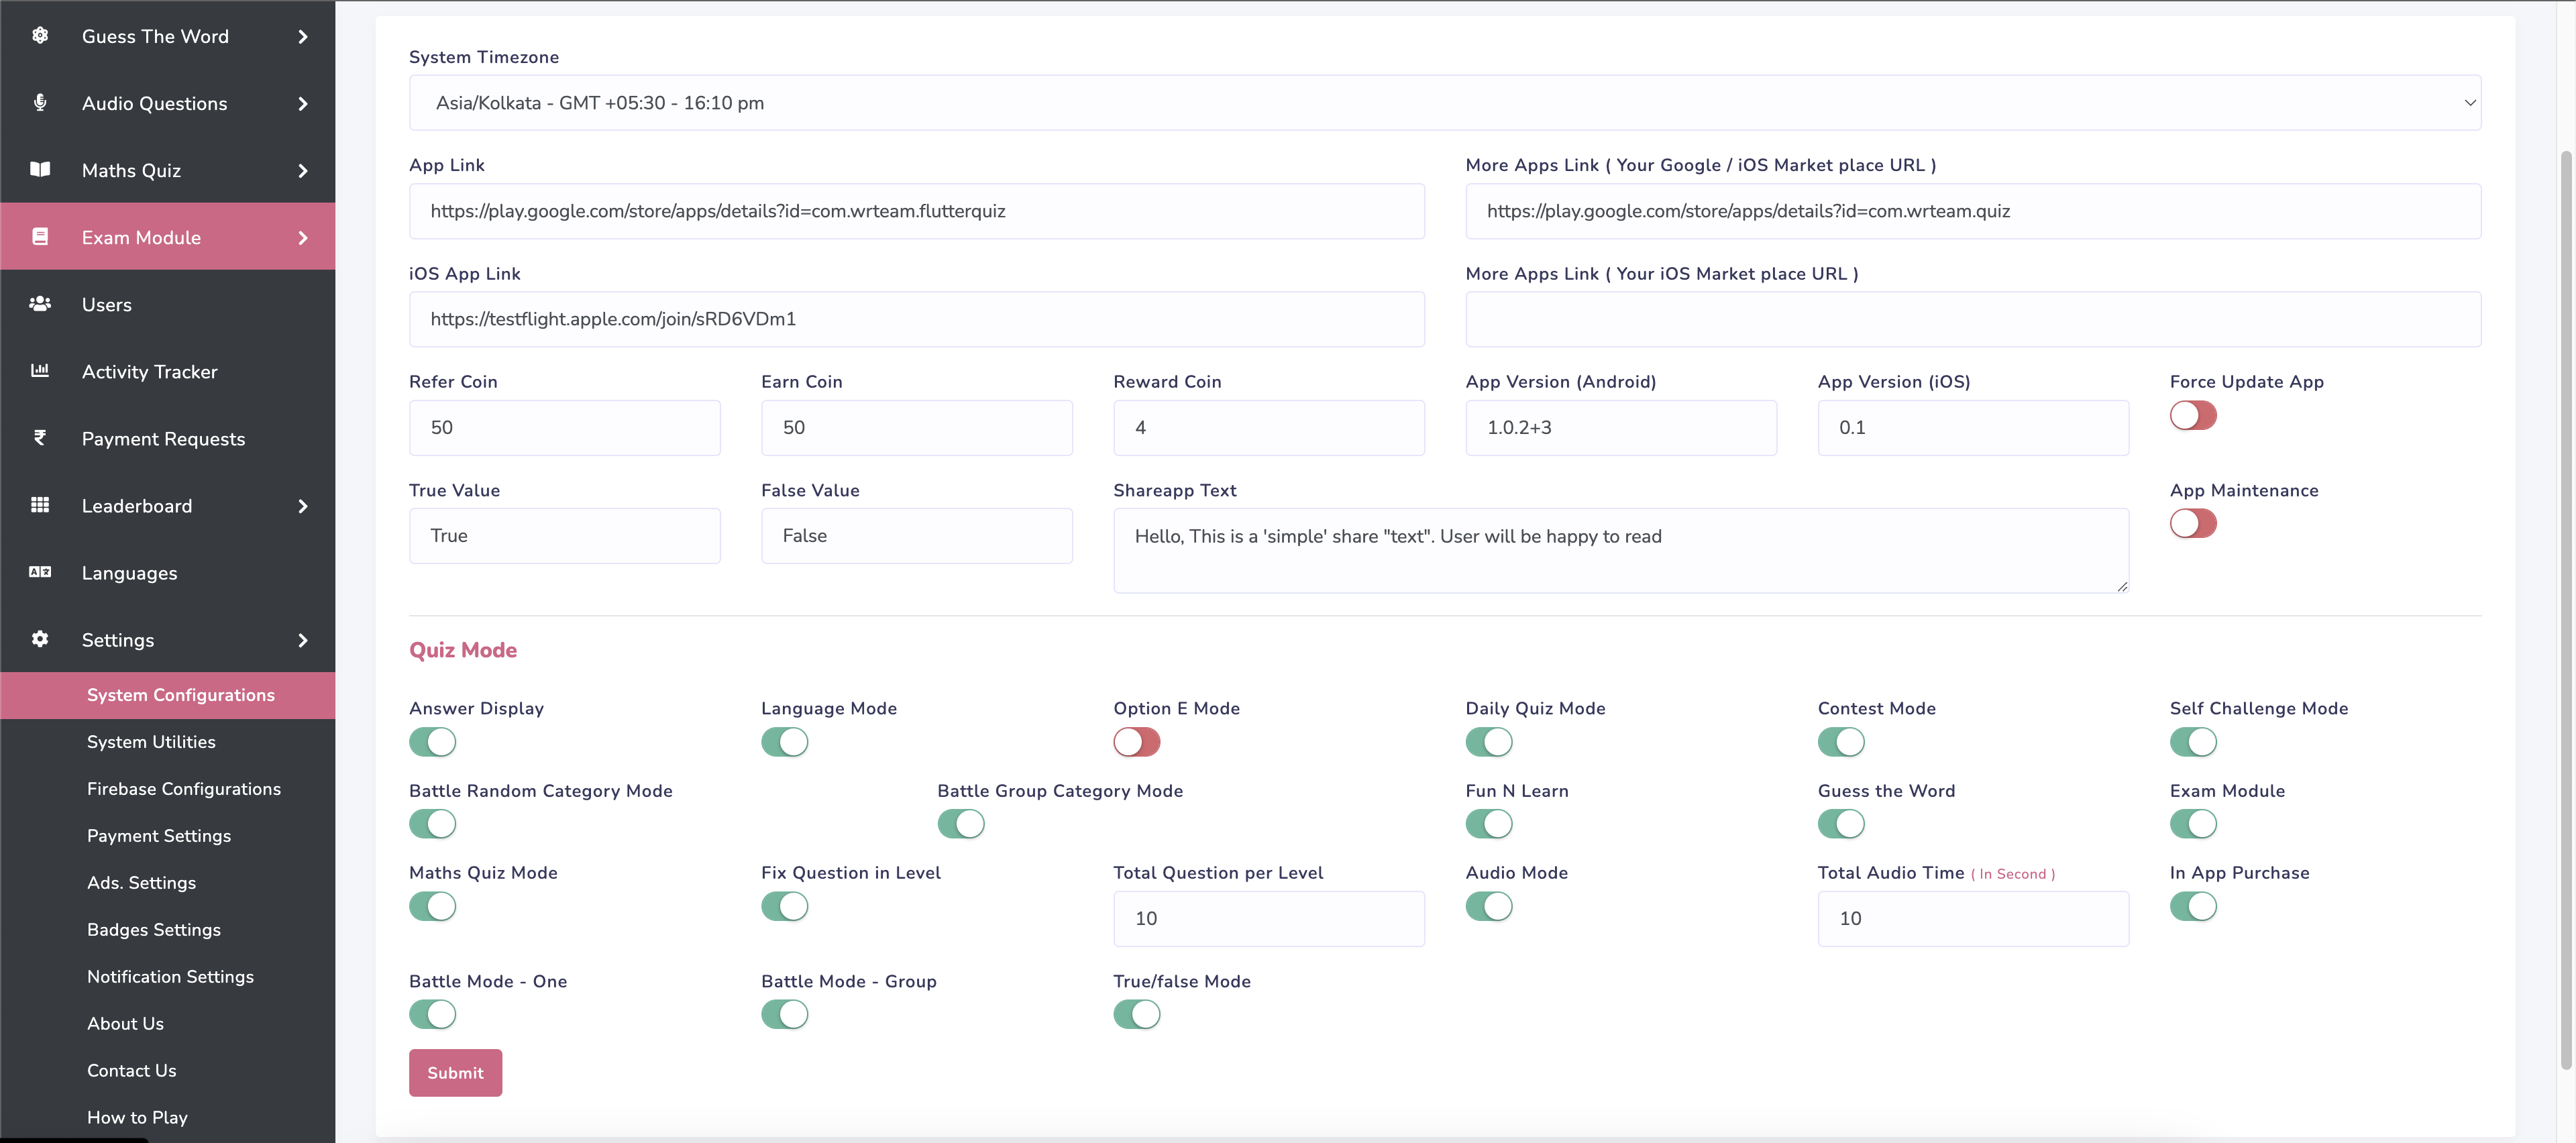
Go to admin panel in settings -> system configurations and enable exam module as
shown in image.
-
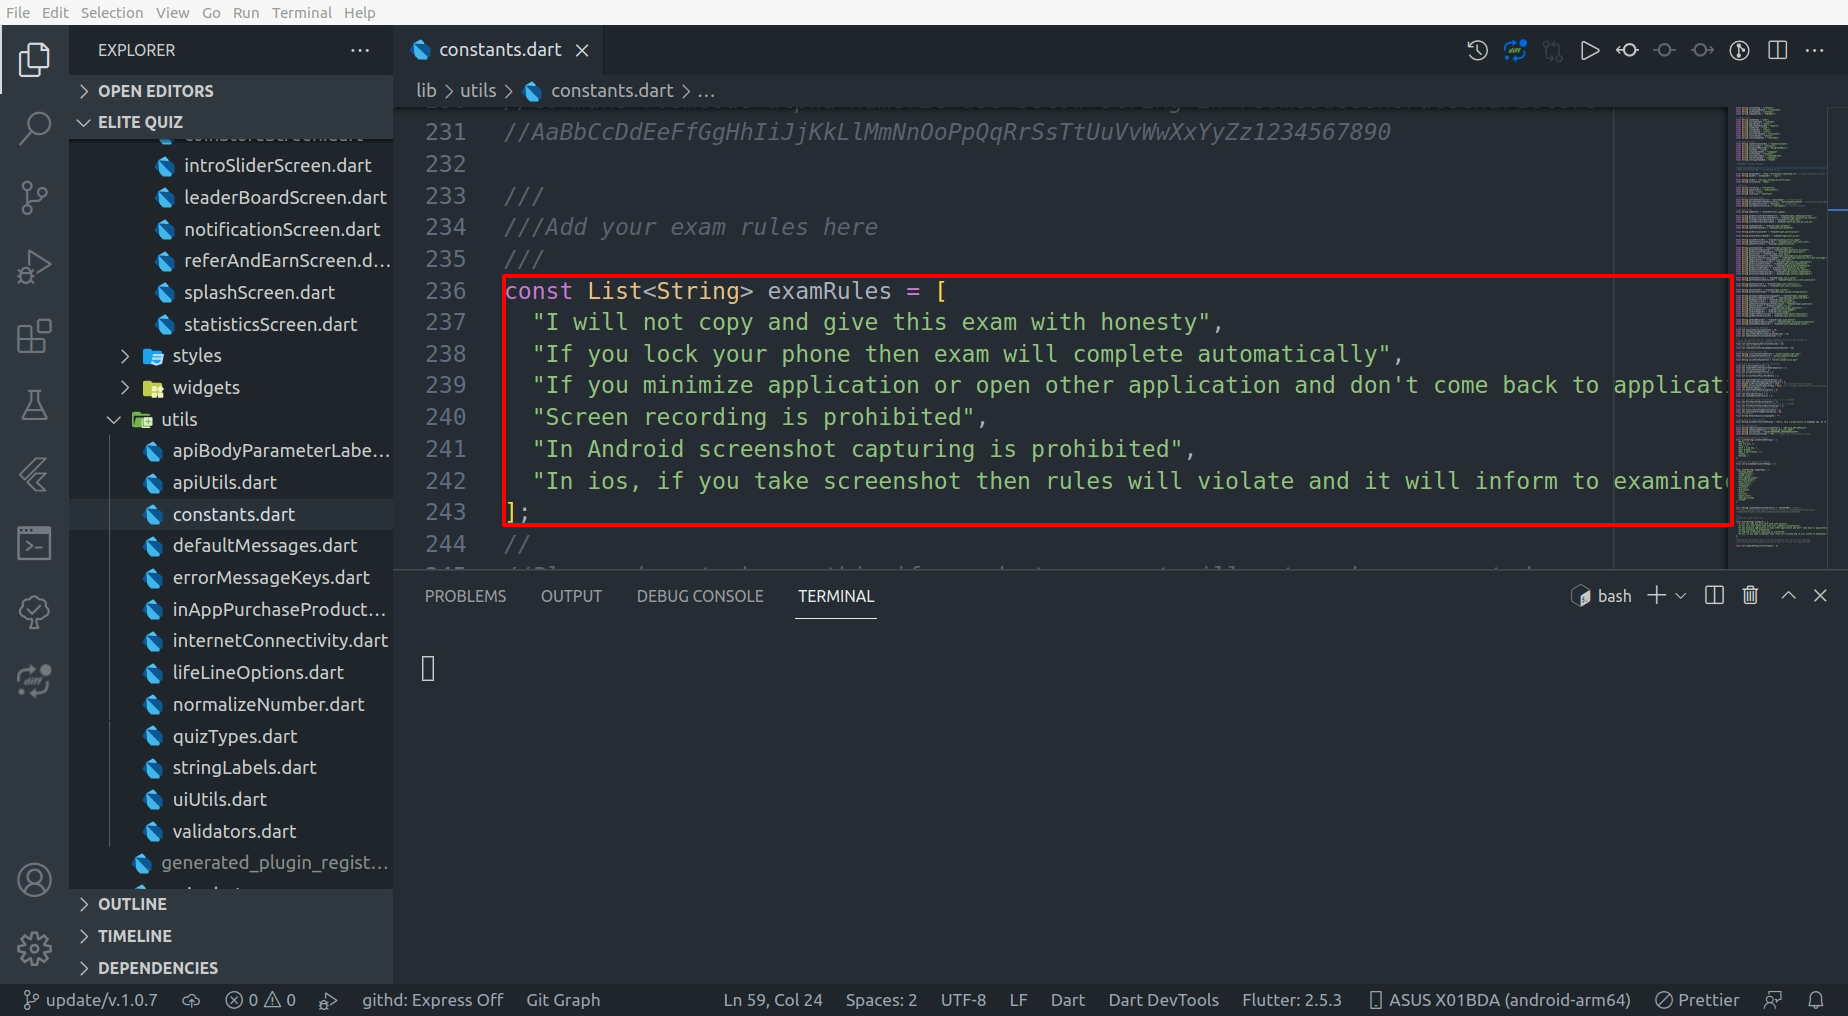
Go to lib/utils/constants.dart and update exam rules as per your need as shown in
image.
How to set up All Timers And Score
-
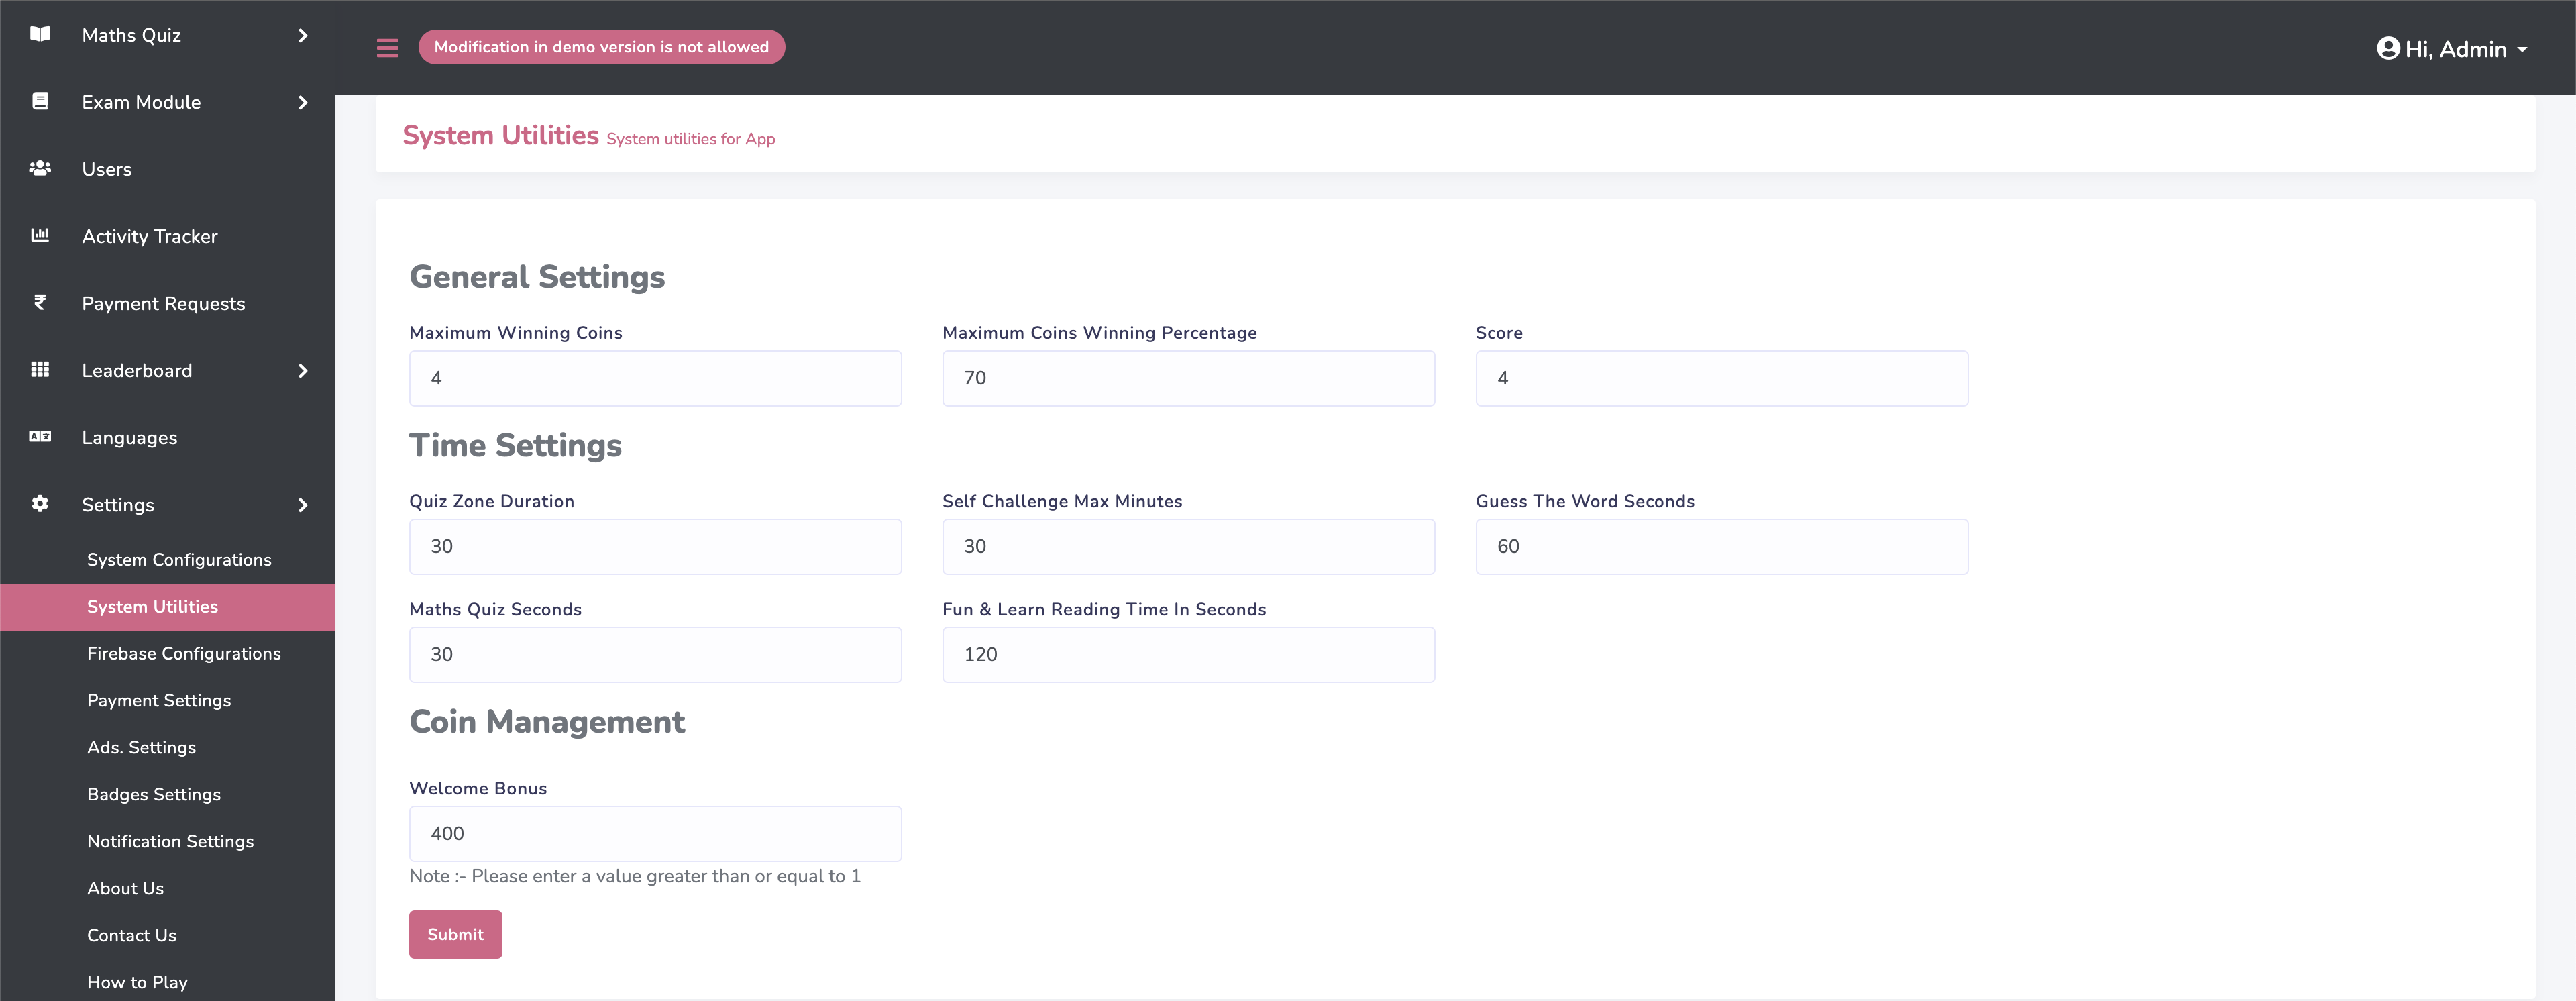
Go to admin panel in settings -> System Utilities and you can give All Quiz types
Timer per Question and score and Welcome Coin.
Note:- When a user logs in for the first time, they will receive a certain amount of welcome coins, which are determined by the administrator.
How to setup earning module
-
Go to admin panel in settings -> Payment settings and enable payment as shown in
image.
Per coin will decide amount of coins that will convert in amount. For Example. per 100 coins x amount will give to user.
Per amount will decide on x amount of coins user will get entered amount. For Example. per x coins 1 amount will give to user.
Note - Consider amount as dollar or any currency. It refer as real money.

-
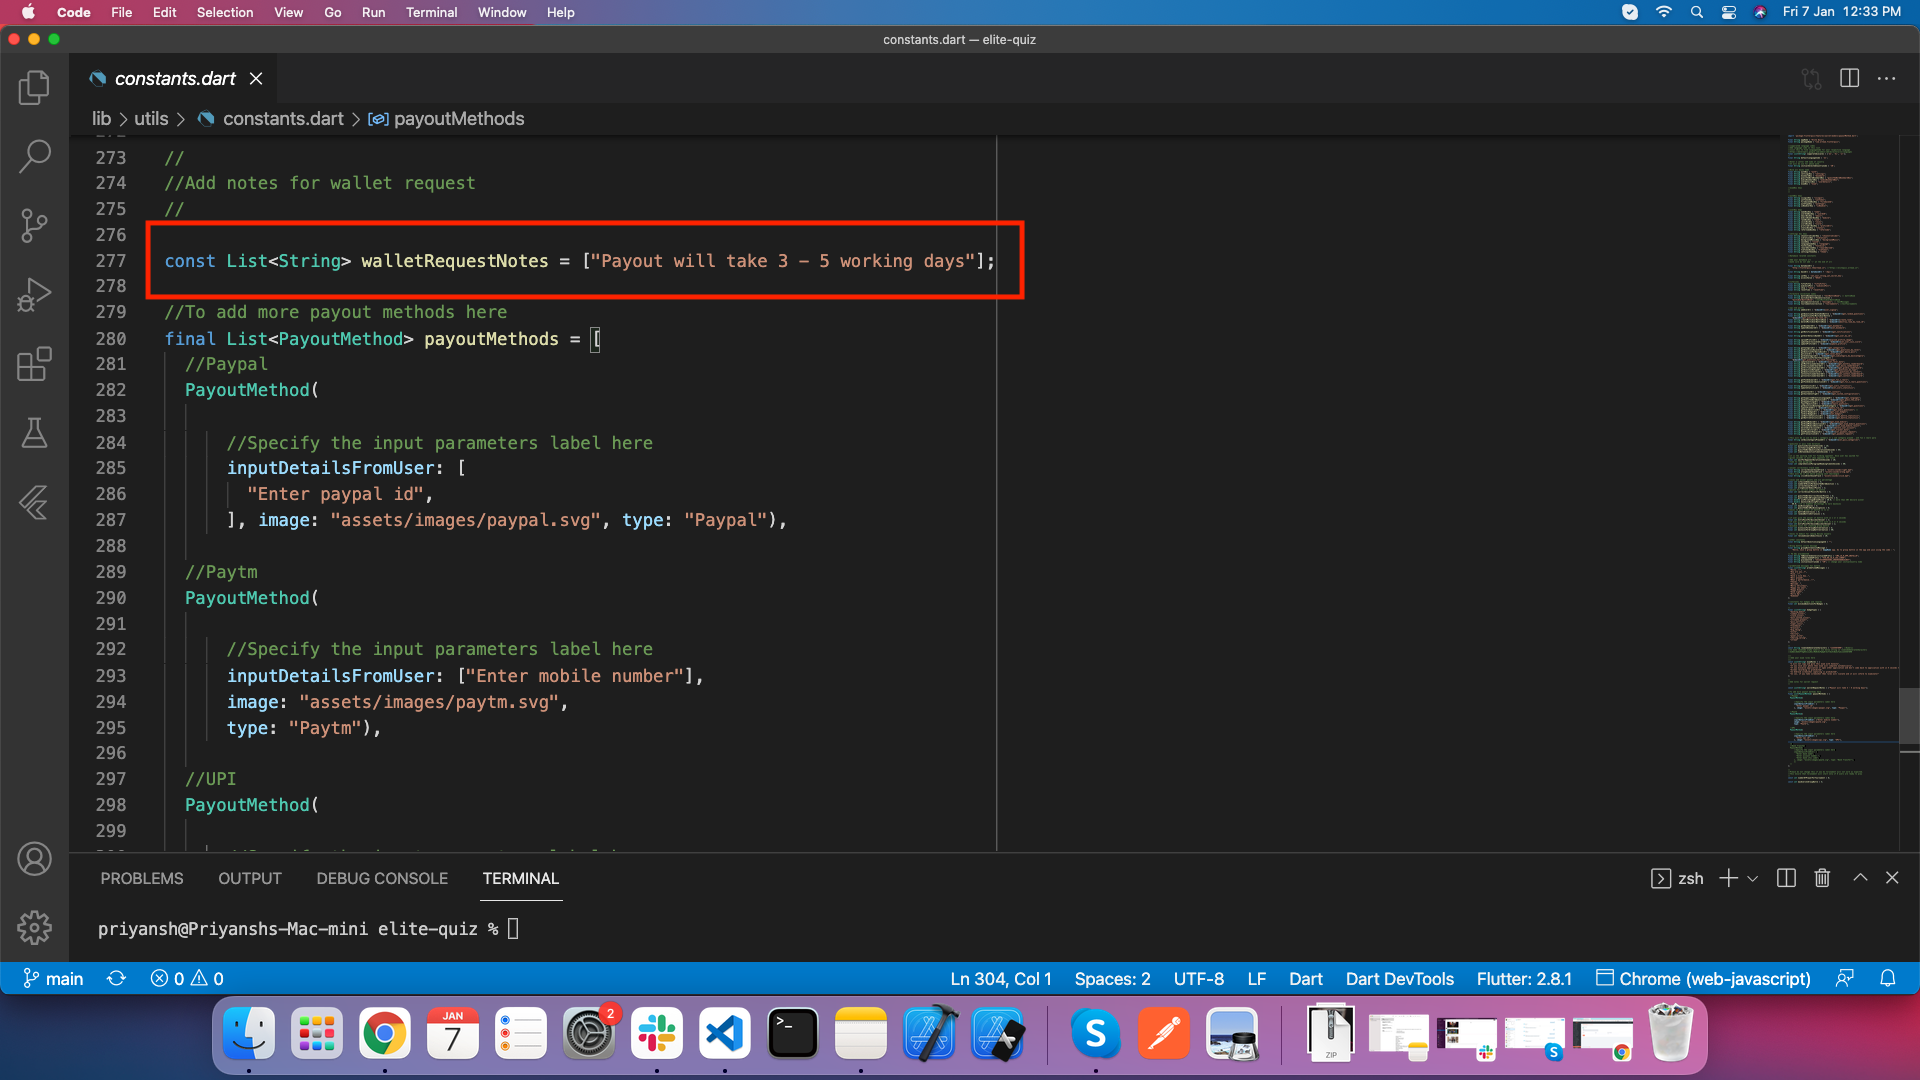
Go to lib/utils/constants.dart and update notes for payment request as per your need
as shown in image.
-
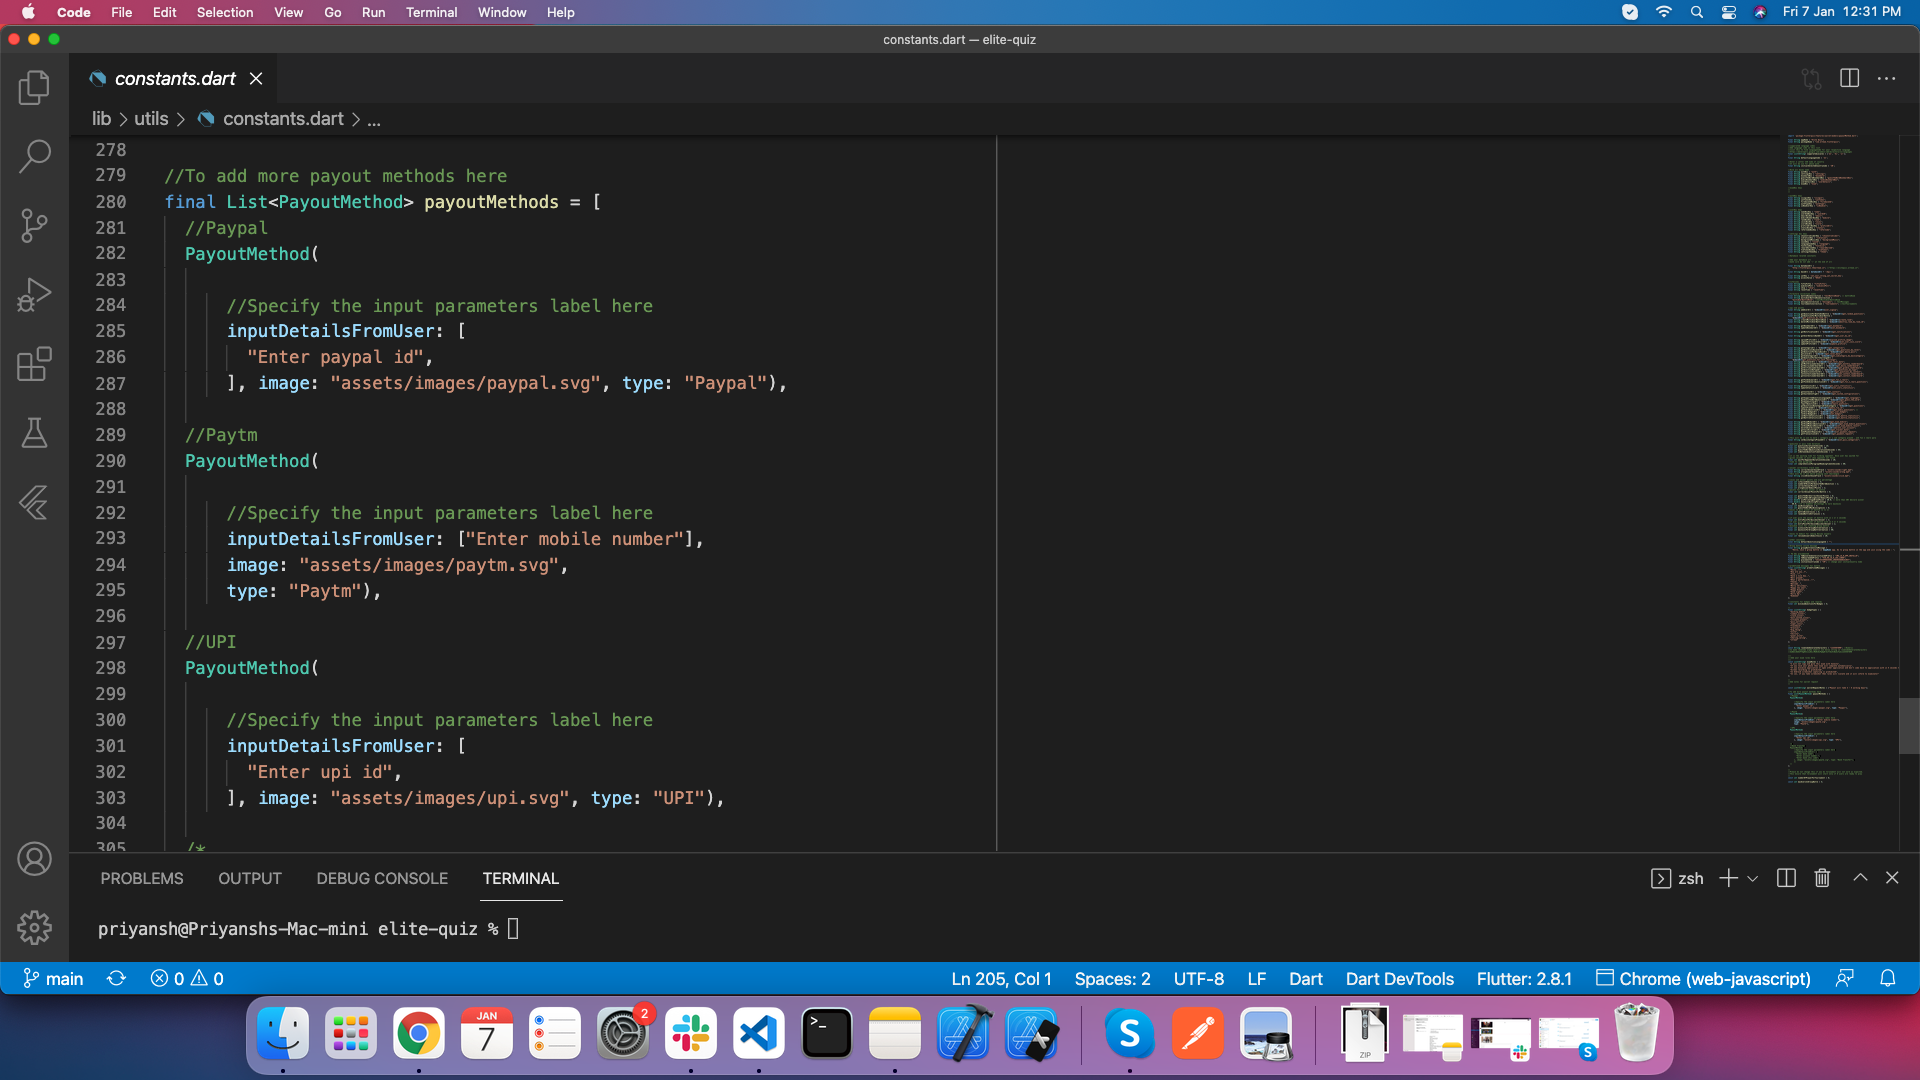
Go to lib/utils/constants.dart and add payment method as per your need.
-
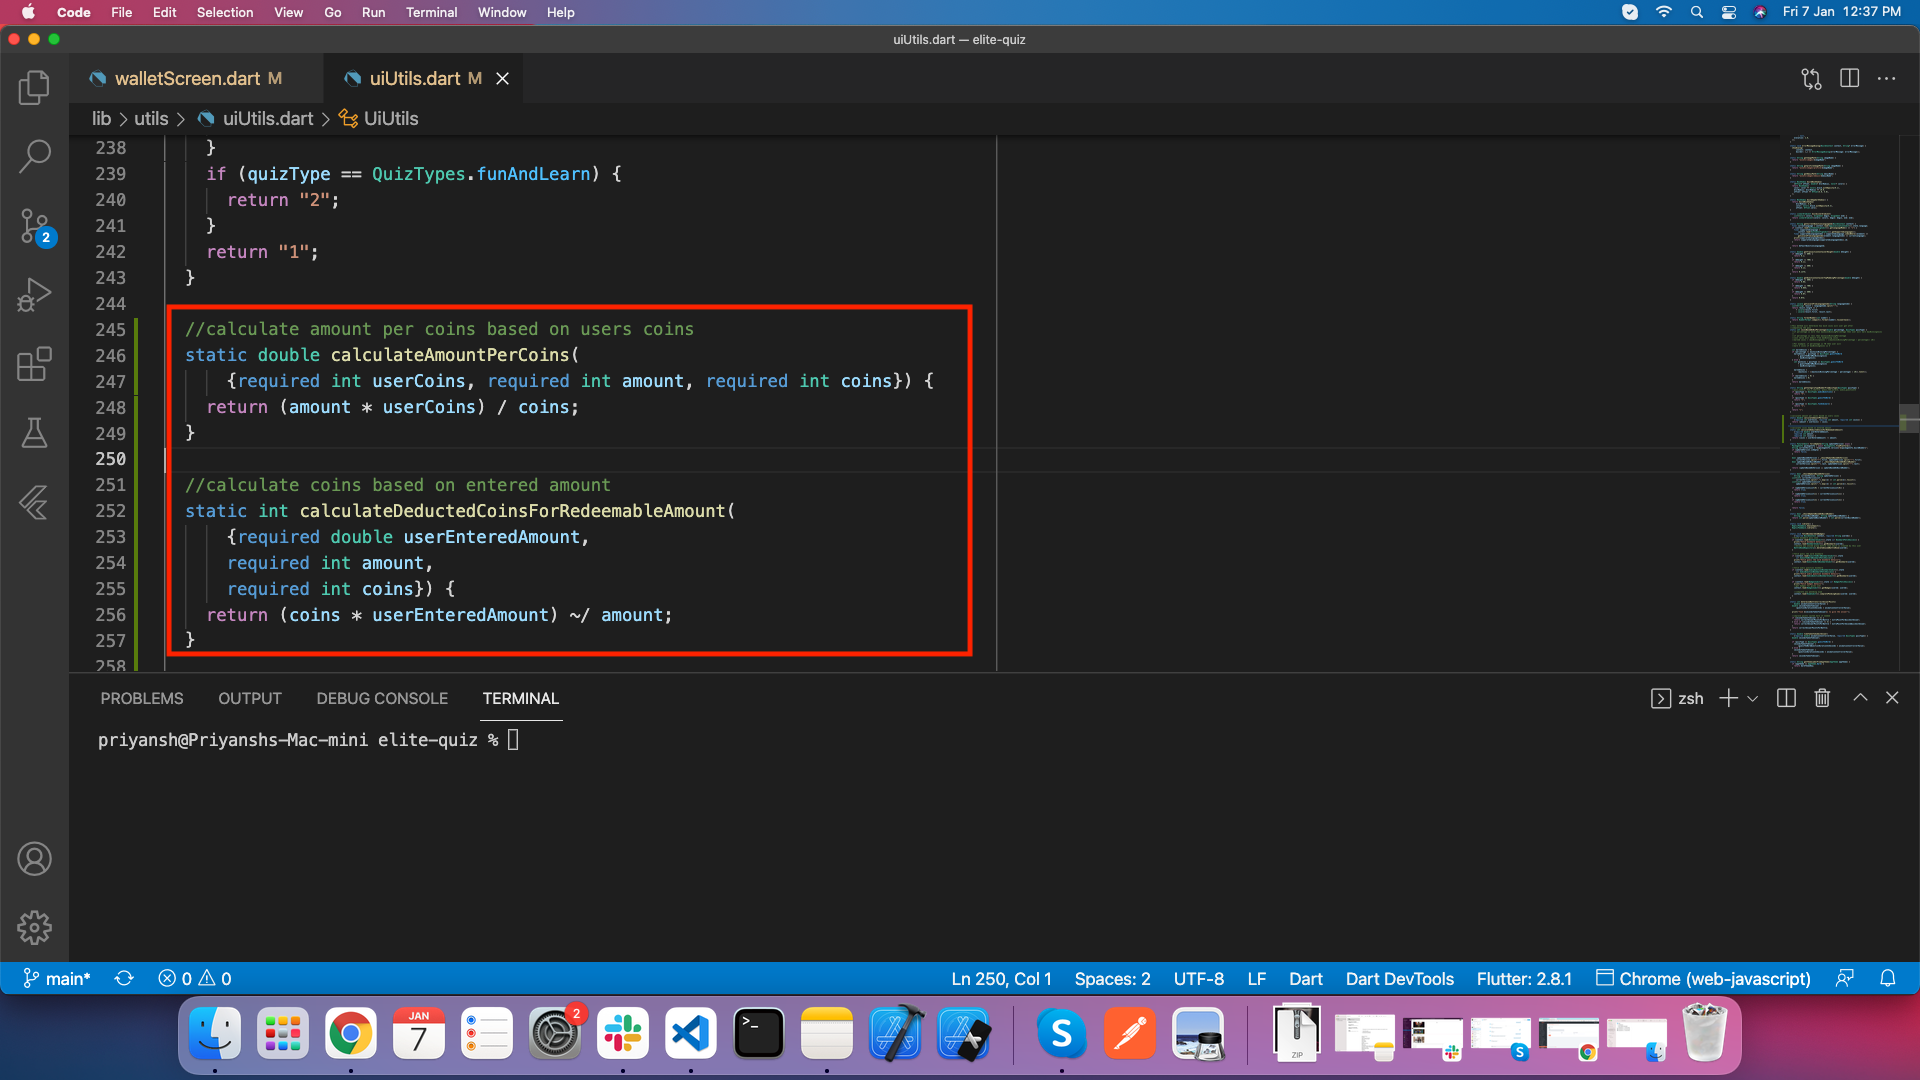
Go to lib/utils/uiUtils.dart and modify coins redeem related equaiton as per your
need.
How to change application constants
-
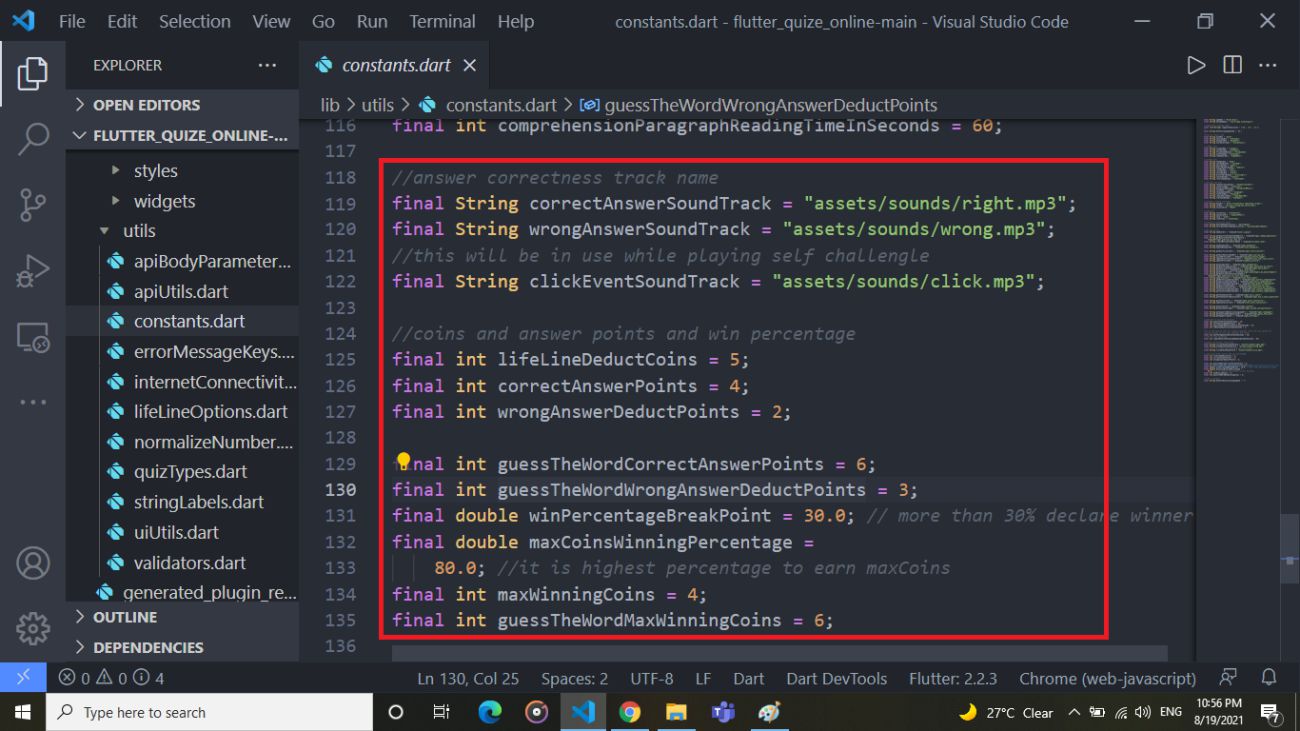
If you want to change question duration or other constants as shown in image
Go to lib/utils/constants.dart and update values

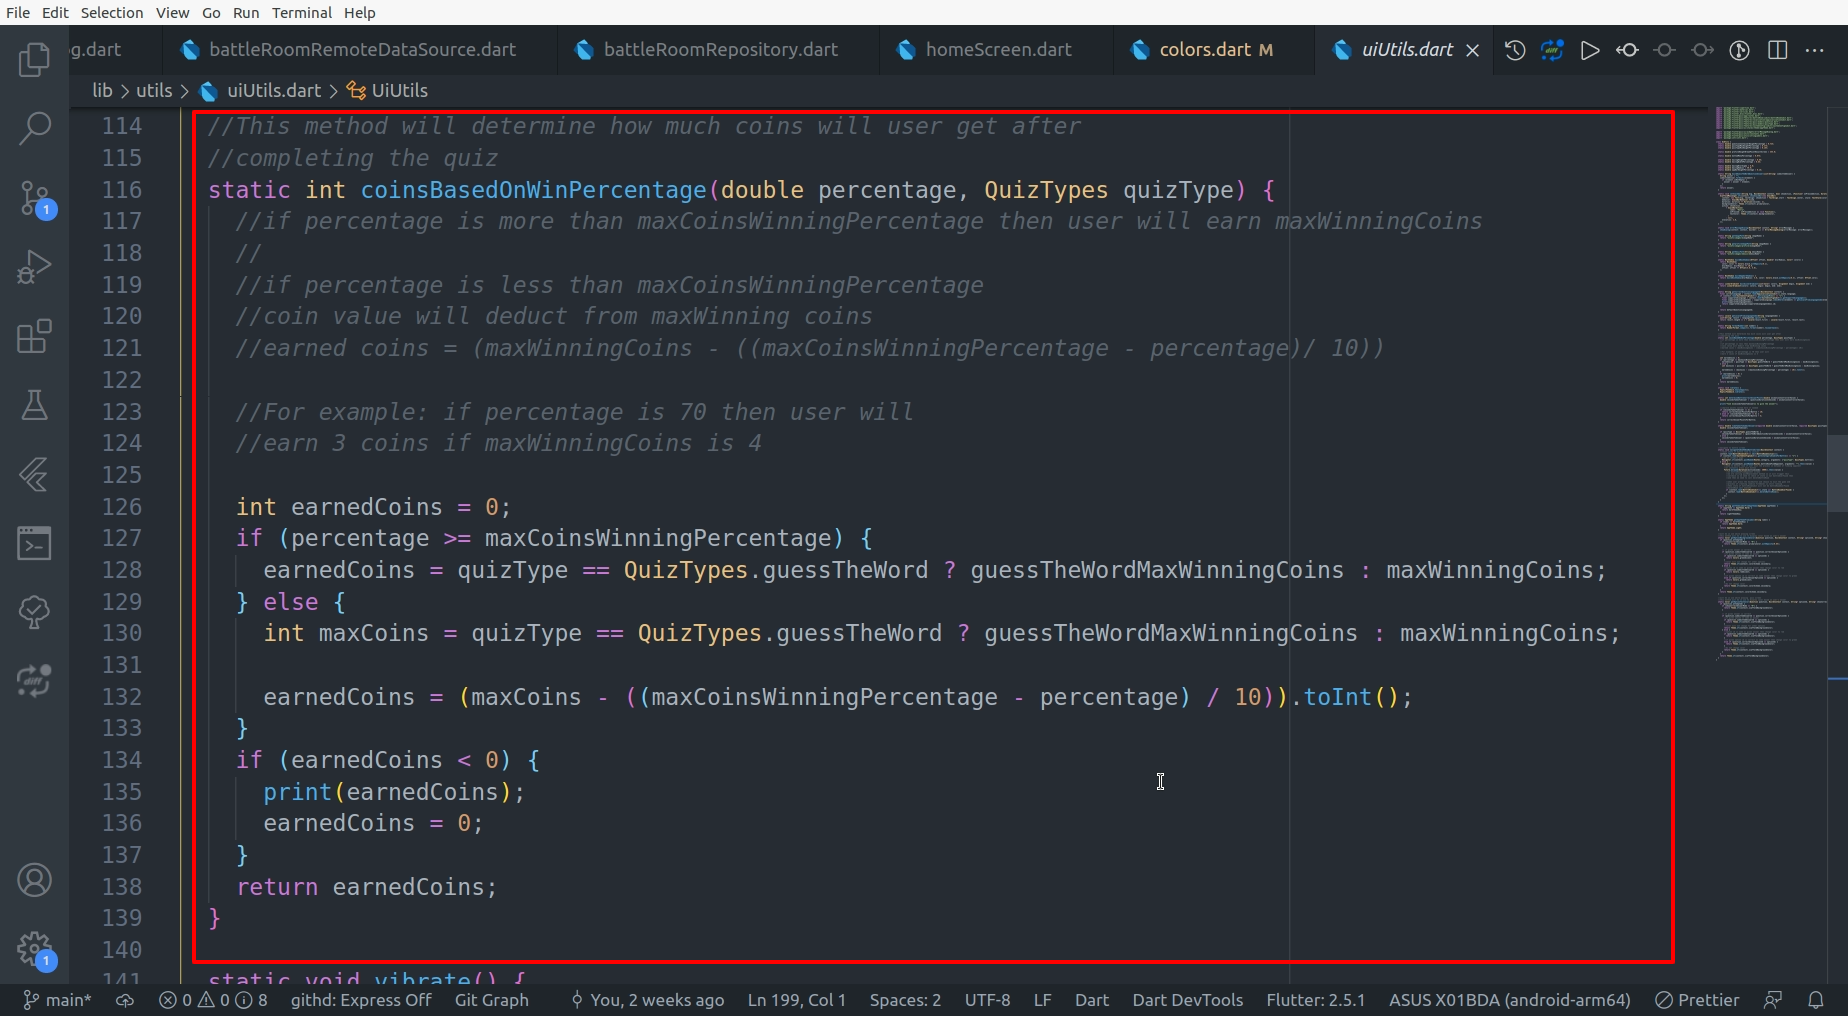
- If you want to modify coins distribution equation go to lib/utils/uiUtils.dart and
updated equaiton as show in below image
How to generate release version of this product
- To generate release android app-bundle and publish to playstore follow https://flutter.dev/docs/deployment/android
- To generate release ios apk and publish to appstore follow https://flutter.dev/docs/deployment/ios
- Before delpoying ios apk to app store make sure you configured below setting
Go To > General > Pricing and Availability > Availability > Edit All Countries or Regions Selected & unmark China Mainland there as highlighted in attached Screenshot.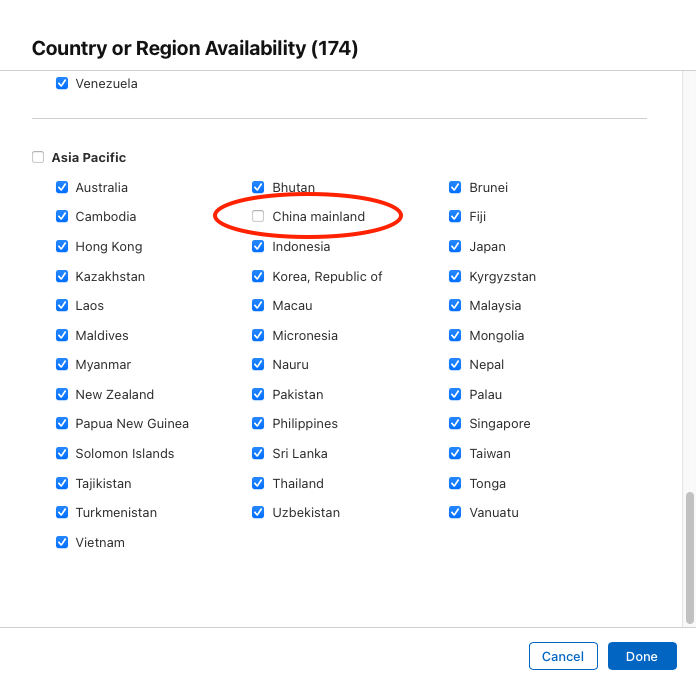
Support
Its our pleasure to serve our service and support. please contact our support team.
Head of Customer Support : Jay Parmar Skype Name : Jay Parmar
To help our customers, we constantly be in touch with every customer if they need any assistance regarding our product. We offer our customers a support from Mon – Fri 9.00am to 6.00pm IST (GMT +5.30) – We are a Team located in India – Asia.
Typically we reply our customers for all the questions and queries within 24 hours of time via comments, support forum or emails.
Your Feedback
Dear valuable customer, Thank you very much for choosing our product. It's our pleasure to serve top-notch service to you. Please give us your honest feedback that will help us to make a more strong and reliable product by click here Rate Us. Thank you very much.
Contact Us
WRTeam has creative and dedicated group of developers who are mastered in Apps Developments and Web Application Development with a niche in delivering quality solutions to customers across the globe. Contact us today to find out how we can help you or for freelance work.
Visit Us : https://wrteam.in
Mail Us : support@wrteam.in
Thank you very much.